Why is is recommended?
Let’s say that you have a security camera that sends recordings to an external service like angelcam.com and you want to open a port for it on your OPNSense firewall (this will be covered in the next step). You will need to provide the service with an external IP address that they will use to pull the live stream from in order to store it off-site. But what if your ISP changes that external IP address? The service would lose connection and if someone broke into your humble estate during that time, you would not have the recordings.
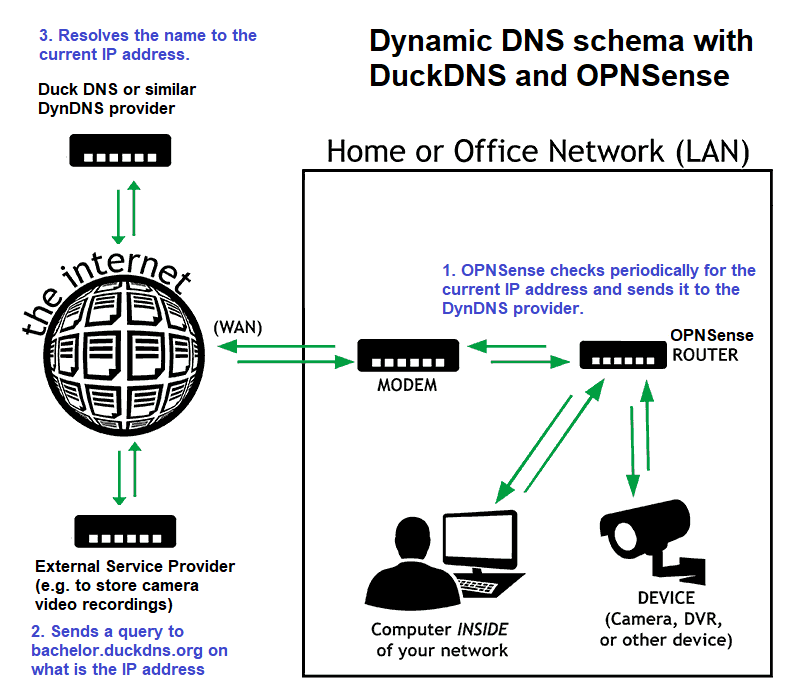
How does it work?
Instead of you providing an external IP address to third party, you will provide a host name that points to it – this is called Dynamic DNS. On your OPNSense, you would run a plugin that periodically checks for what external IP address is assigned on your WAN interface. If it changes it, it will modify where does the hostname lead to. This way, the outage would be short (e.g. a minute) instead of hours or days before you would manually modify the new IP with the existing service provider.
How to set up DynDNS?
OPNSense supports a wide variety of DynDNS providers. In this guide, we will cover Duck DNS, since it is a free and reliable service.
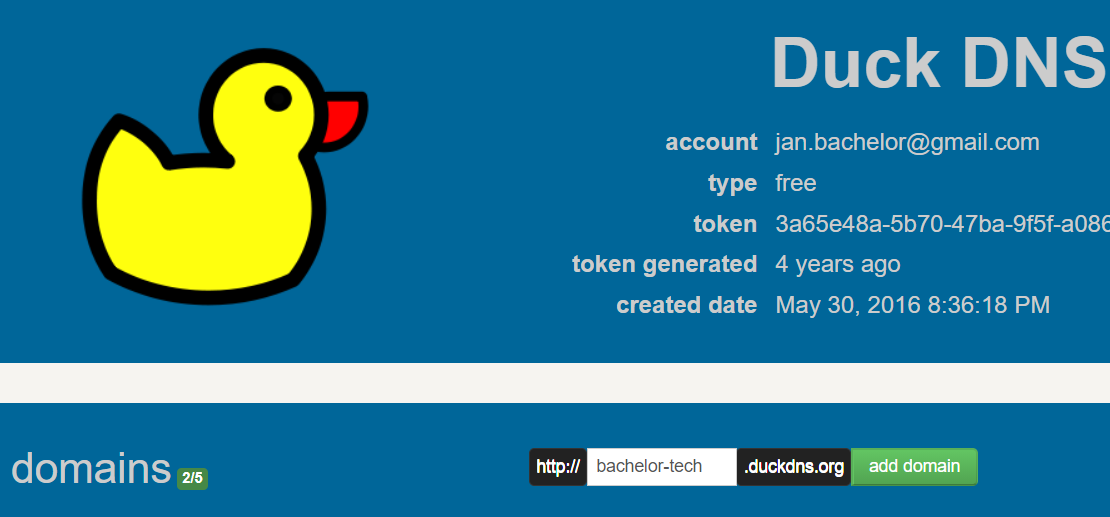
- Register an account with the DynDNS provider. In our case, DuckDNS account is free and can be registered here. The easiest way is to use your Gmail account to sign in.
- Create a subdomain – e.g. mydomain.duckdns.org, as illustrated below:
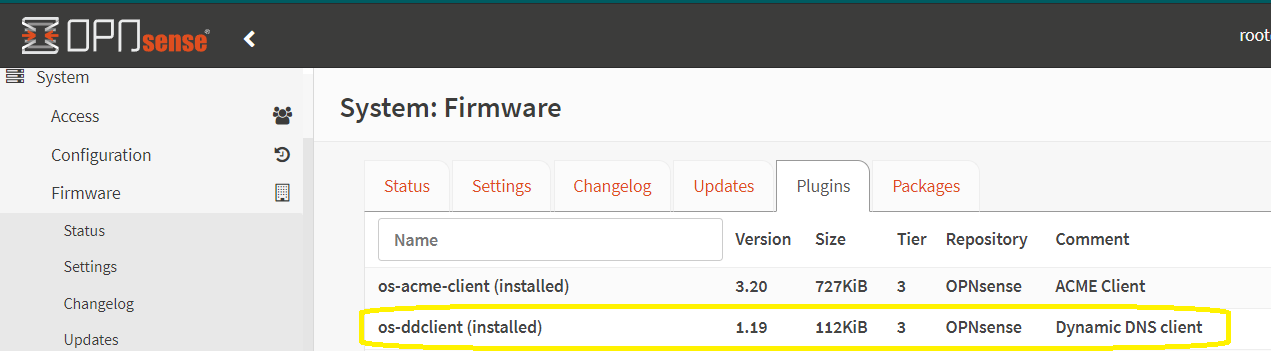
- Install the dynamic DNS plugin in OPNSense. ‘System’ -> ‘Firmware’ -> ‘Plugins’ and locate he ‘os-ddclient’ (previously before 23.7, the plugin was called ‘os-dynds’ but was deprecated despite being pretty good). When you find it in the list, click on the + sign to install it:
- On your OPNSense web GUI, go to ‘Services’ -> ‘Dynamic DNS’ -> ‘Settings’ and click on the ‘Add’ button.
- Service: ‘duckdns’
- Username: leave blank
- Password: token provided by DuckDNS.
- Hostname: your subdomain (e.g. bachelor-tech.duckdns.org).
- Check ip method: freedns
- Interface to monitor: none (this is best esp. if you have a multi-WAN set up).
- Check ip timeout – 10 (default)
- Force SSL: tick (you can disable it if you run into issues).
Final state is as follows:

- Note: In the past, it was also necessary to set up a cront job under ‘System’ -> ‘Settings’ -> ‘Cron’ to run regularly to check for changes. This is no longer required.
What happens once you create it?
With DuckDNS, the dynamic DNS agent will check every 1 minute to see what is the external IP and sends it to the AWS-hosted DuckDNS server. In case it changes, the IP address will be modified, accordingly. DuckDNS uses SSL certificates (256bit) and so all communication is encrypted. You can now forward your services to this subdomain instead of the IP address. This means that you could have up to 15 minutes of an outage, so only use DuckDNS for non-critical services.
Sources:
- OPNSense documentation on DynDNS
- Home Network guy’s OPNSense guide with CloudFlare DynDNS
8 comments
Your instructions worked like a charm. Thanks.
Could use an update for the newer DynDNS plugin in OPNsense. Biggest difference would be that it appears to schedule itself to run…300 second interval by default as shown in the General settings tab of the plugin settings.
Hi Aaron, I have updated the guide to reflect that newer set up with OPSense 23.x version. The 300 seconds no longer apply, I believe. When testing, the change in CloudFlare took < 30 seconds and about as much with DuckDNS.
solo me inscribi para agradecerte, gracias!
Hi Bruno, you are most welcome. Let me know if you need help with anything.
Thanks for the guide.
For some reason, after following the tutorial it was still not working on the latest release of OPNsense (24.7.6).
Changing the “Backend” from `native` to `ddclient` in the “General Settings” tab did the trick for me.
(Services: Dynamic DNS: Settings: General Settings)
followed guide above to the T and all is working. i didnt need to do what fastbrain mentioned. OPNsense 24.7.9_1-amd64
FreeBSD 14.1-RELEASE-p6
Hi Jake, that’s awesome, congratulations on getting it set up. Let me know if you have any further questions or requests for additional articles in the future. Recently, I published a guide on how to set up one’s own mail server, which can be of help and took quite a bit of time to research and set up – but it’s well worth the effort!