Bachelor Tech
  • Home
  • Tutorials
  • Portfolio
  • About Jan
  • Contact Jan

OPNSense Installation

by Jan Bachelor September 23, 2020

Last Updated on September 23, 2020 by Jan Bachelor

1. OS Installation

  • Once the booting sequence completes, notice that the VM will create a DHCP server with a default address of 192.168.1.1 (the VM’s web interface becomes available, but we do not need it at this point).
Initial post-boot screen in OPNSense
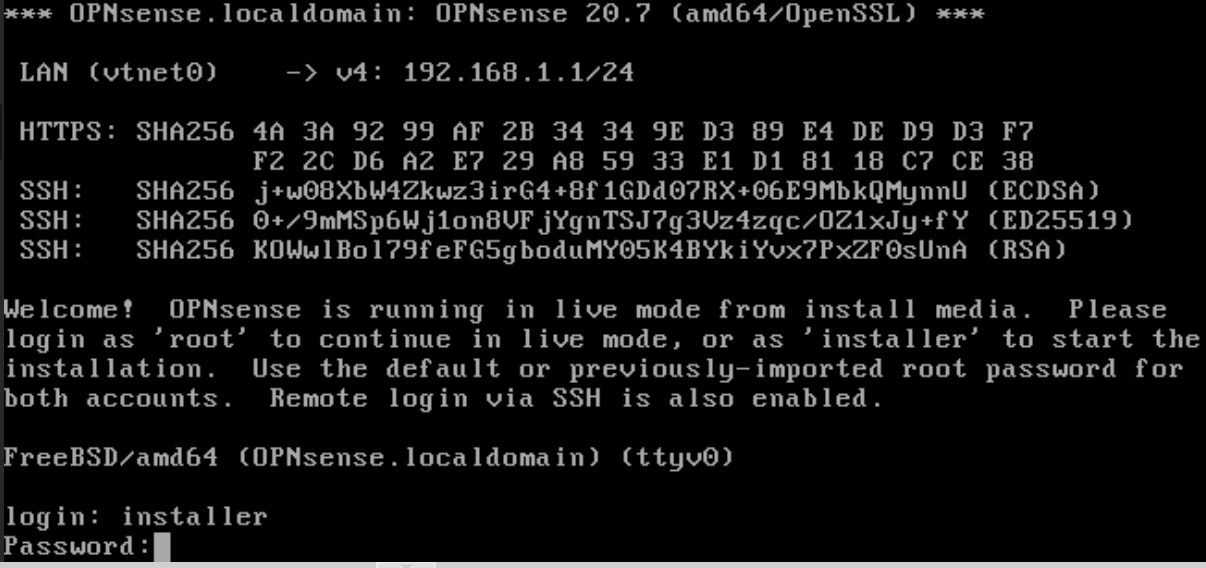
  • When prompted for login, enter ‘installer’ as username and ‘opnsense’ as password. Install it.
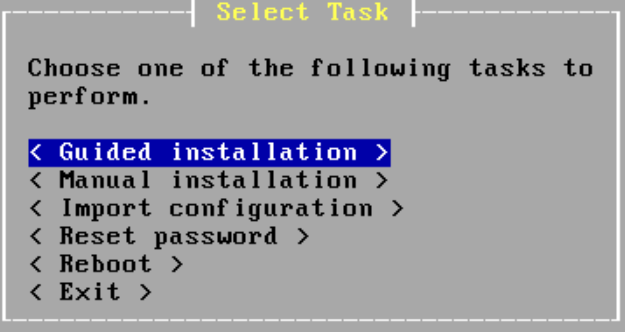
  • If you do not consider yourself experienced with OPNSense installation, while in the installer, select ‘Guided installation’.
OPSense’s GUI interface – installation mode
  • You will then get notified about all data on the local drive being deleted. This is fine – select ‘da0’ and then ‘GPT/UEFI’ mode as we do not need to be careful about older MBR compatibility settings.
  • You will then be prompted for a password and once done, a reboot prompt will pop up.
  • Once the reboot completes, you can log in as ‘root’ using the password you created earlier and you will see a screen like this:
FreeBSD console environment once logged in as root

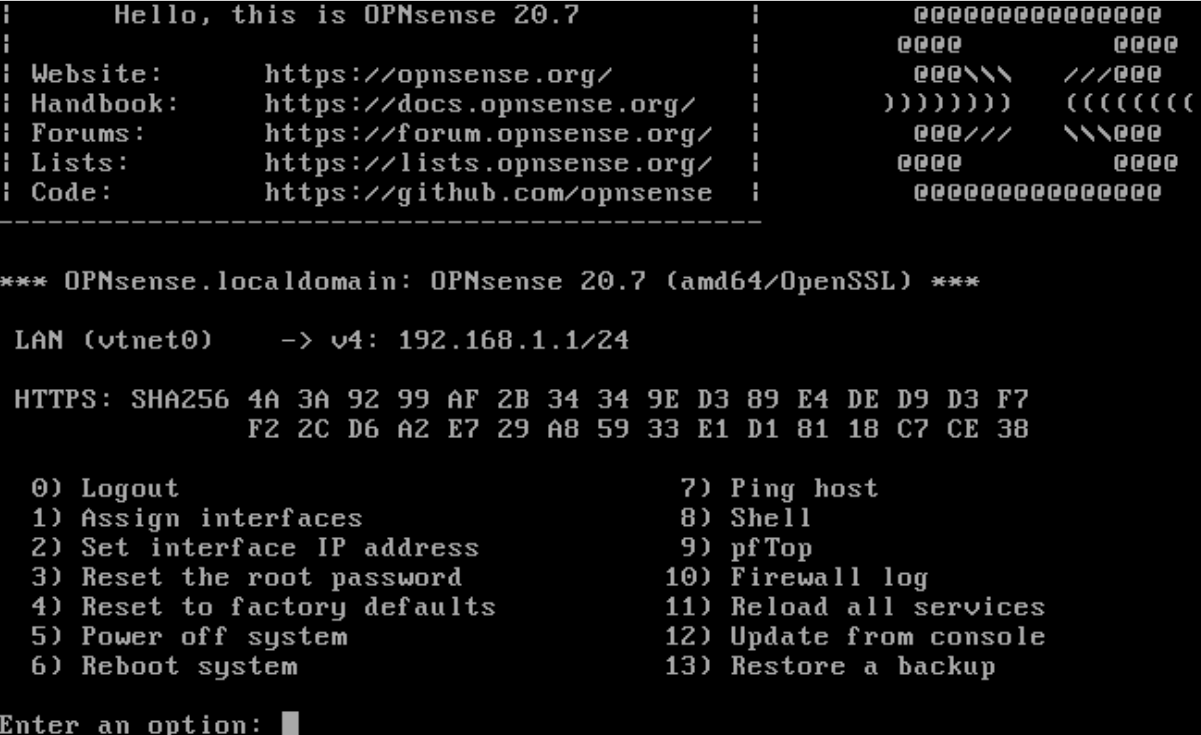
2. Verify that AES-NI is supported

  • While in the OPNSense console, choose option 8 and then type:

[shell]dmesg | grep AES[/shell]

Verify that AES-NI instructions are loaded
  • This way, you will verify that AES-NI instructions are supported and thus the VM will utilize your CPU’s features for faster encryption / decryption.
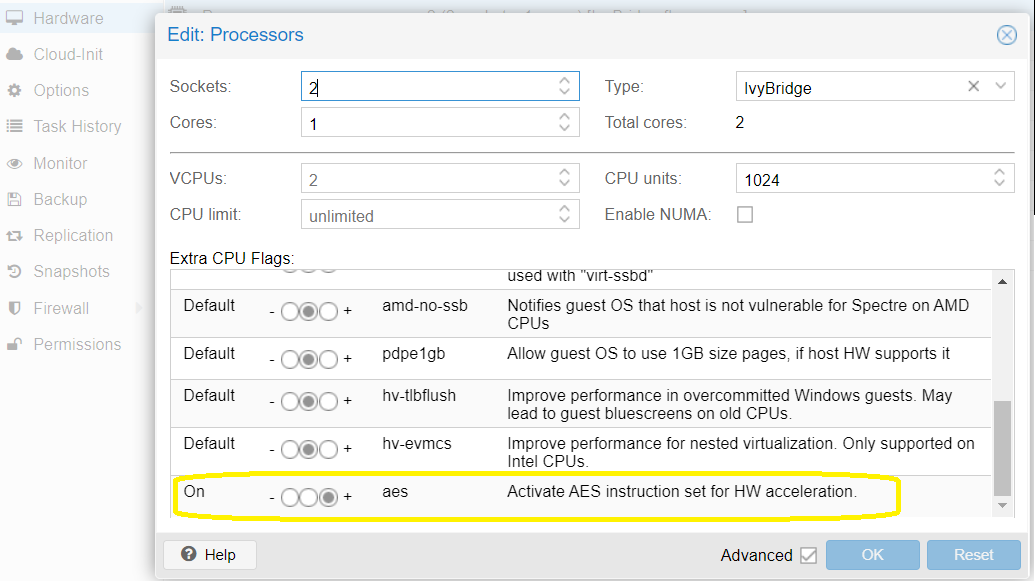
  • In case AES-NI is not loaded properly, there is chance that either your CPU does not support it (e.g. Celeron/Pentium/older AMD CPUs) or that you did not select it during the VM set up – double check it:
Verify that AES-NI support is selected

While some other parts of the installation (such as assigning IP configuration to an interface) can be done from the console, we will do the rest from the comfort of your browser providing that you can connect to the IP address that the console displayed to you (typically 192.168.1.1). Proceed to the next step for more OPNSense adventure!

OPNSense VM Set Up
PCI Passthrough Set Up (Optional)
Back to: Build Your Own Router – Proxmox, OPNSense, OpenVPN server and a VPN client all in one!

2 comments

SL September 23, 2020 - 5:32 pm

It seems that installing OPNSense with both “pcid” and “aes” flags enabled actually disables the AES-NI functionality. Reinstalled by activating only “aes” flag which activates AES-NI.

Reply
SL September 23, 2020 - 5:45 pm

Disregard my previous comment. The reason why AES-NI functionalities were not activated was because I have forgotten to select Ivy Bridge as chipset during initial VM configuration and only changed it after the OS was installed.

Reply

Leave a Comment Cancel Reply

Save my name, email, and website in this browser for the next time I comment.

This site uses Akismet to reduce spam. Learn how your comment data is processed.

0 comment 0 FacebookWhatsappEmail

Build Your Own Router – Proxmox, OPNSense, OpenVPN server and a VPN client all in one!

  • Previous
  • Next
Collapse
Expand
  • Hardware Considerations
  • Disabling default Proxmox firewall
  • OPNSense VM Set Up
  • OPNSense Installation
  • PCI Passthrough Set Up (Optional)
  • WAN / LAN Set Up (Before OPNSense Installation)
  • Initial OPNSense Set up in Web GUI
  • Dynamic DNS Set Up with DuckDNS on OPNSense
  • Choosing a VPN provider for your OPNSense
  • Is it worth getting VPN on OPNSense?
  • NordVPN installation on OPNSense
  • Multi-WAN Set Up in Proxmox & OPNSense

Search for articles

Other Tips

  • How to mount an NFS share (such as from FreeNAS) from an Android box
  • How to download a Windows 10 ISO on a Windows device – easy work-around

Other Tutorials

  • Build Your Own Router - Proxmox, OPNSense, OpenVPN server and a VPN client all in one!
    12 Steps
  • Dynamically Populate Gravity Forms from Google Sheets (GSheets APIv4)
    6 Steps

Recent Comments

  • Jan Bachelor on Use Integromat to get computer IDs from user email in JamF ProHi Robert, the static groups were created in the p…
  • Robert Petitto on Use Integromat to get computer IDs from user email in JamF ProCan you share how you'd use Make (integromat) to a…
  • Martin on Part 1 – What do we want to do + Required technology (bank feed)This tutorial deserves more credit, I've not seen…
  • Jan Bachelor on WAN / LAN Set Up (Before OPNSense Installation)Hi Ed, I have not tested it with PCI passthrough y…
  • Ed on OPNSense VM Set UpIn step 4 firewall you turned off firewall, should…

Tags

chrome iso windows

Categories

  • Android
  • FreeNAS
  • Linux
  • Windows

Recent Posts

  • How to mount an NFS share (such as from FreeNAS) from an Android box

  • How to download a Windows 10 ISO on a Windows device – easy work-around

Facebook Twitter Instagram Pinterest Linkedin Youtube

@2019 - All Right Reserved. Designed and Developed by PenciDesign

Bachelor Tech
  • Home
  • Tutorials
  • Portfolio
  • About Jan
  • Contact Jan