- Download the OPNSense ISO image (use amd64, DVD version) – it should be < 500 MB in size.
- Unpack the iso.bz2 file – note that the size of the image will be much greater – at least 1.5 GBs in size.
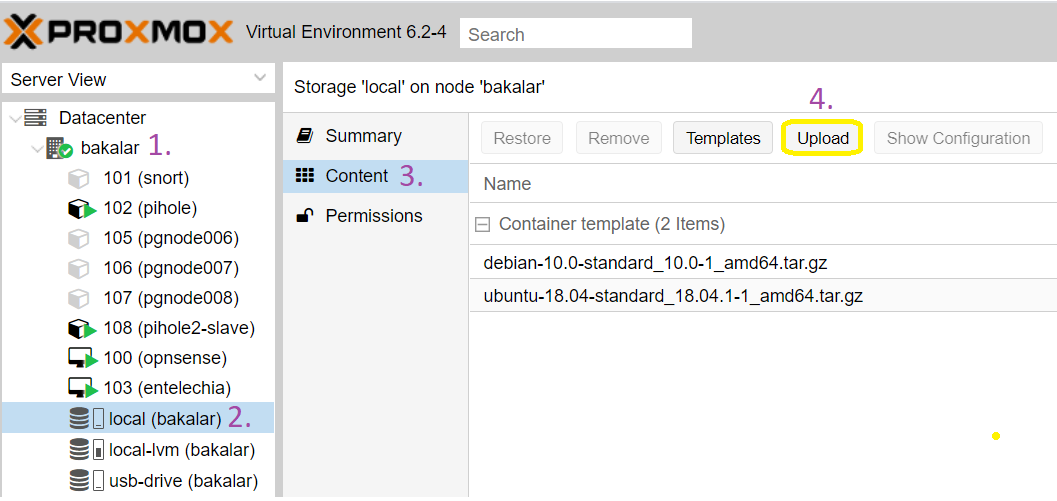
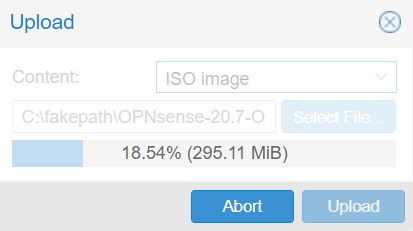
- Upload the image to your Proxmox instance – click on your node -> local disk -> Content -> Upload button:
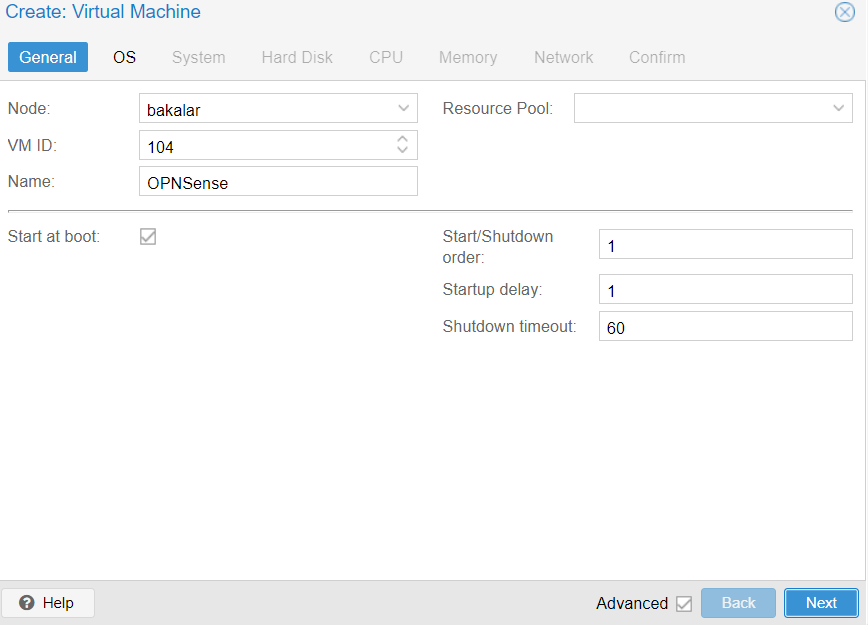
4. Create a new VM with the following parameters:
- General tab
- Fill the name VM’s name (e.g. OPNSense), tick the box to ‘Start at boot’.
- Fill in Start/Shutdown order as 1 (= 1 second), startup delay as 1 (you want this to be the first VM to be started when your server restarts), shutdown delay as 60 seconds or more (to be the last VM to shut down since it will be the gateway for all other devices).
- Tick the ‘Advanced’ button to view additional settings later.
- Fill the name VM’s name (e.g. OPNSense), tick the box to ‘Start at boot’.
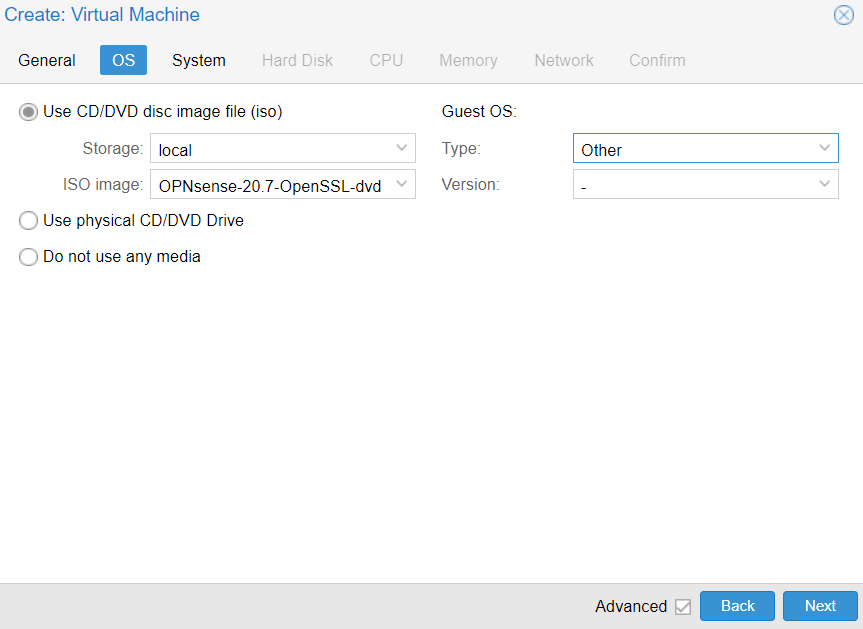
- OS tab
- Select the image that you previously uploaded.
- For Guest OS, select ‘Other’ since OPSense runs on FreeBSD (Unix).
- System tab -> SCSI controller – select VirtUI SCSI (all as defaults). See more details on performance tweaks in Proxmox.
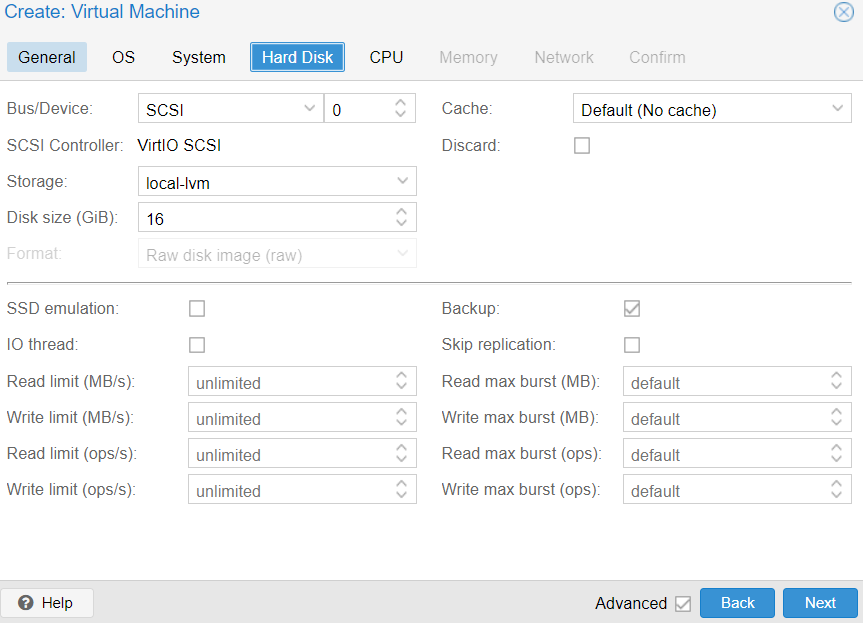
- HDD tab -> Use SCSI, 16 GB is enough, no cache. The tick box for ‘IO thread’ is useful if you use multiple drives, since with the IO thread, each disk would get a qemu thread.
- CPU tab
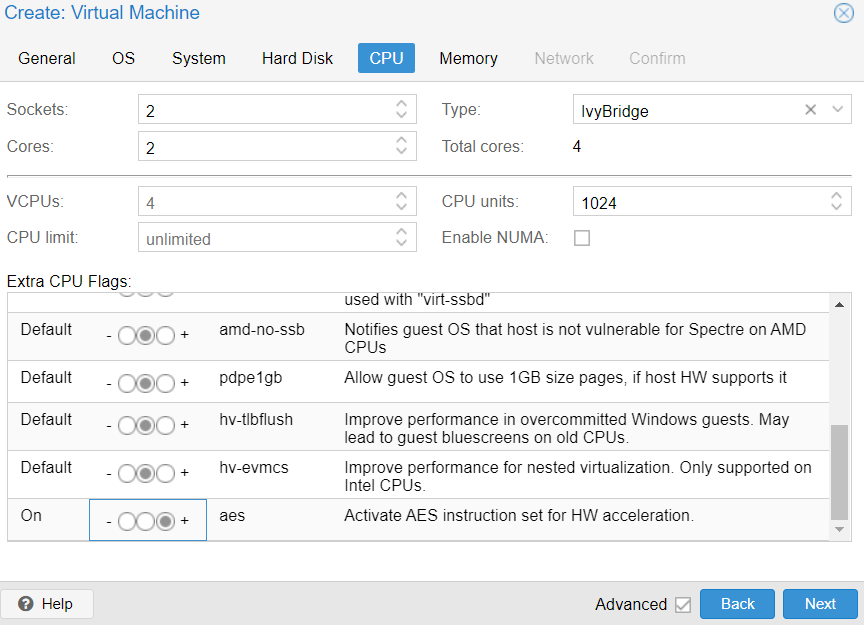
- On a Core i5/i7 CPU, it is recommended to be generous with the CPU resources, since any hiccups (CPU spikes) would cause your whole network to slow down – e.g. 2 cores and 2 sockets.
- The great function of the Core i3+ (and AMD-equivalent) processors is that they support AES-NI, which is good to minimize performance impact of encryption when using VPN services, for example.
- As for the ‘Type’, choose the appropriate architecture for your CPU. In case of QOTOM, the most compatible example is IvyBridge for a Core i3/i5/i7. If your VM fails to start, the best troubleshooting CPU Type is ‘Westmere’.
- For the extra CPU flags, enable ‘aes’ for AES-NI support.
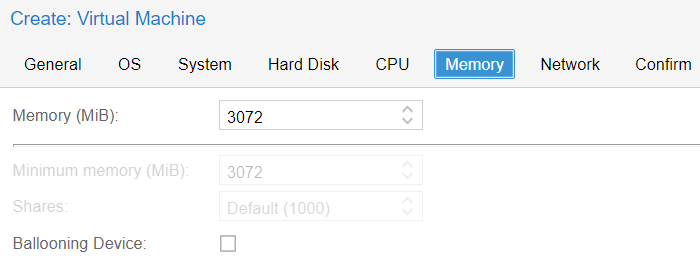
- Memory tab -> untick Ballooning Device (since FreeBSD VMs cannot use this functionality). By default for up to 20 devices on the network, 1 GB of RAM is enough. BUT think of what else you may be using OPNSense for (this guide will show you how to do all those):
- Connecting to an external VPN provider = + 1 GB RAM (ca for 10 active devices on the network).
- Intrusion Detection & Prevention (e.g. Sensei plugin) = + 1 GB RAM (ca for 10 active devices on the network).
- Running an OpenVPN server (to connect to your LAN from outside) = + 1 GB RAM (ca for up to 5 active connections).
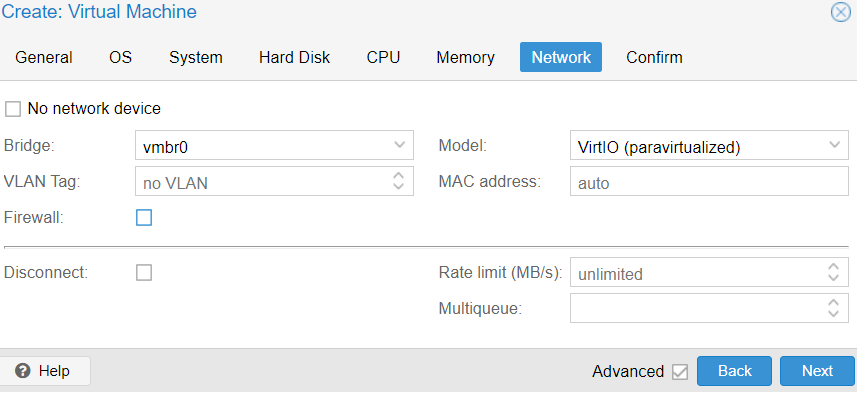
- Network – Select ‘vmbr0’ (LAN) since only one network card can be added at this point. Choose model VirtIO (paravirtualized), untick Firewall.
- Finish the set up afterwards – do not set the VM to start yet!
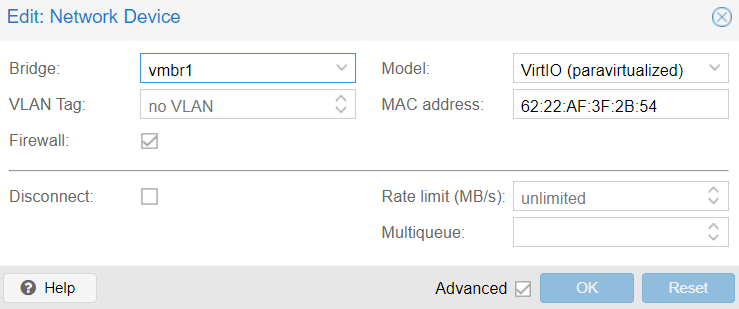
5. Add an extra network card for the WAN interface
Under Datacenter -> your Proxmox node -> OPNsense VM, go to Hardware and add a Network Device that is vmbr1 . For model, use virtio (paravirtualized) or whatever you prefer.
6. Final state before first launch
Once all done, check the overall hardware settings of the OPNSense VM. It could look like this:

Now you can finally start the VM up and proceed to the next step 🙂
2 comments
Very helpful article! I have created the VM as per suggestions in this article with some slight modifications:
– in the Hard disk tab, I chose “SATA” and enabled “SSD emulation” option. This enables some OSes to treat the SSD drives differently (for example, Windows disables defragmentation). Not sure if it does something in FreeBSD
– in addition to “aes” flag, enabled “pcid” (meldown fix cost reduction on westmere, sandy and ivy bridge intel CPUs)
I have also left SeaBIOS as per default settings, I’m assuming it doesn’t matter really much what BIOS is selected in this case.
In step 4 firewall you turned off firewall, should it be off in step 5 also?
(also firewall=1 in the screen capture for dev0, which, I think should be off and therefore no on the net0 line. I point that out for inexperienced people like myself so others don’t get hung up)