Length: 120 minutes|Difficulty: Hard
Pre-requisities for this step
- A bank-provided comma (or other-delimited) CSV file export of transactions.
- A Google Workspace business account (you could replace it with an O365 account, instead, to conver the comma delimited CSV file to a spreadsheet format).
- An Integromat account (a free subscription will work).
- A WordPress site with Gravity Forms installed.
- RESP API allowed in Gravity Forms’ settings with a generated customer key and secret to allow a submission of a Gravity form from Integromat. We will basically pre-fill the form on behalf of the user.
Define a Data Store & Process records from the spreadsheet
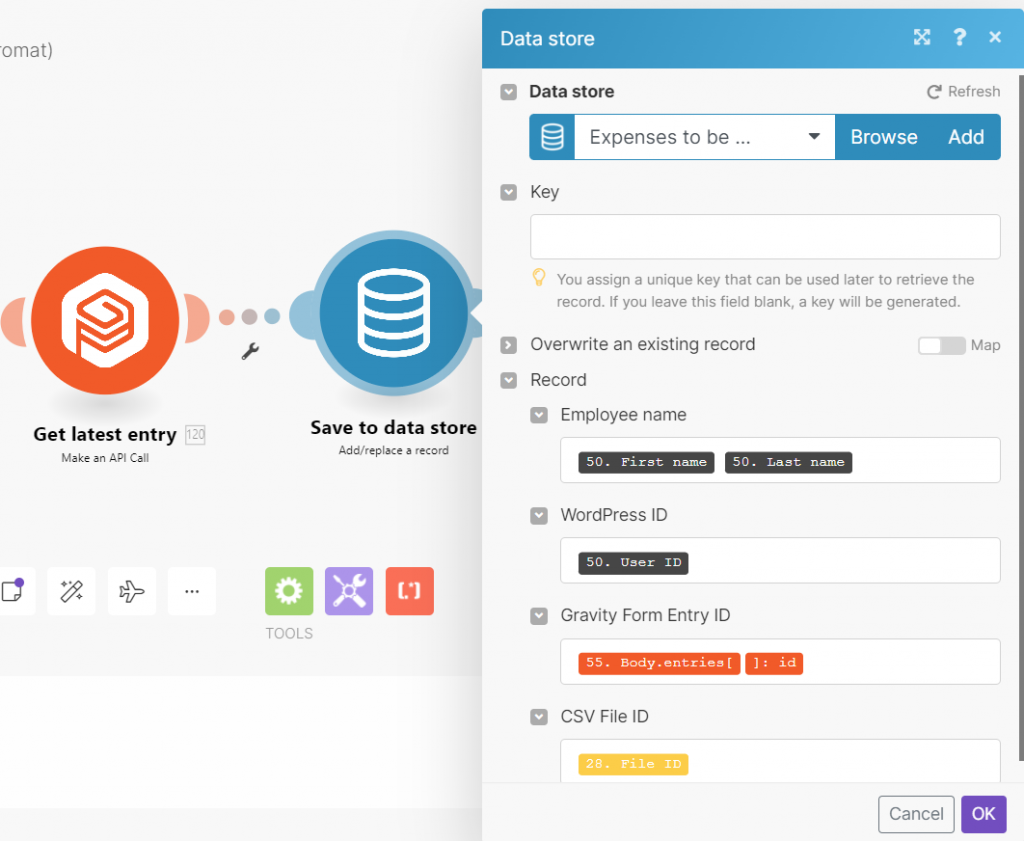
- Create a ‘Data Store’ tile called ‘Delete all records’. At the very beginning, we have nothing to clear out but we will once some data will start coming in. Create a new data store structure using the ‘Add’ button. We will need to store 4 items in there:
- Employee name
- WordPress ID (of the user)
- Gravity Form entry ID
- CSV file ID

Load items from the spreadsheet to find out for whom reports will be created.
- Provide the spreadsheet ID from the tile used for uploading and converting the CSV file.
- Provide the spreadsheet name from the tile used for uploading the CSV file.
- Choose the range that corresponds with individual transactions from all the people for whom a report will be created.

Aggregate fields from the spreadsheet & de-duplicate the names
- Tick only the box where the names are shown (in our case, it is column P in the spreadsheet).
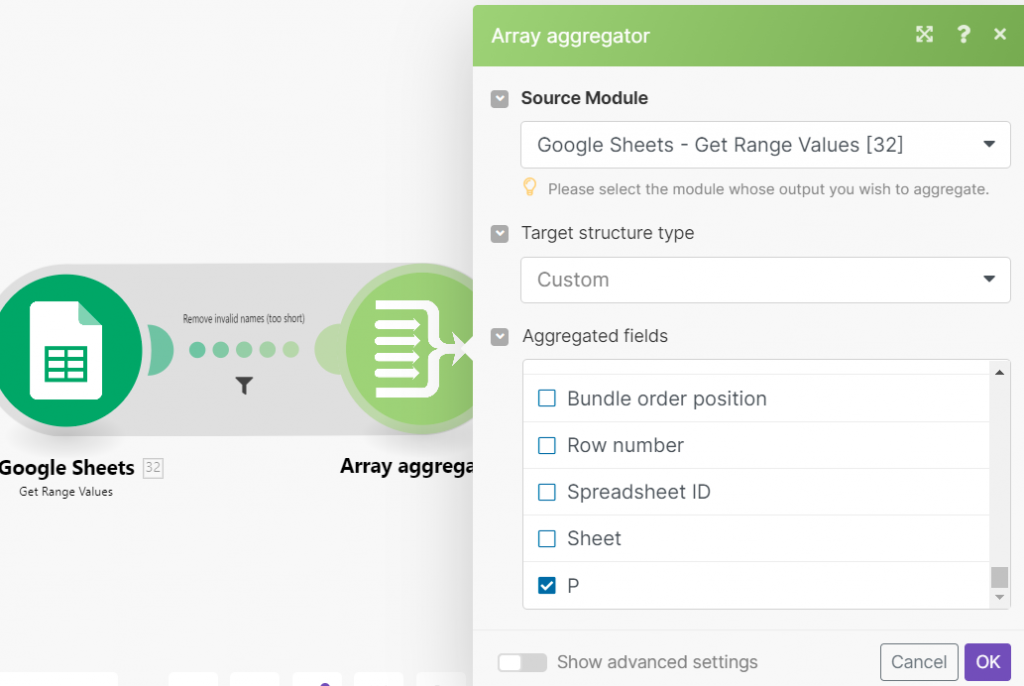
- Then create a filter between the Google Sheets and the Array Aggregator to filter out names that are too short (this is to catch out empty records or other non-names).
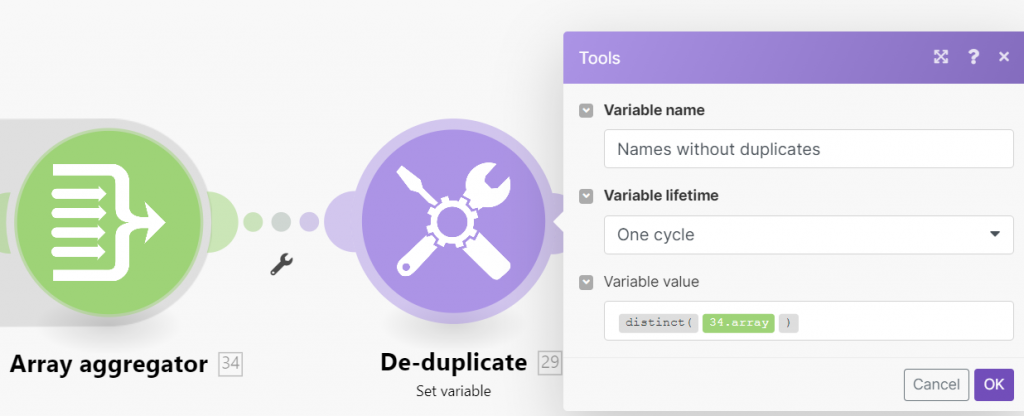
- De-duplicate the aggregated records – use the distinct() function
Find whether a parent Gravity Form has already been created for each employee.
- Overall view for this mini-section:
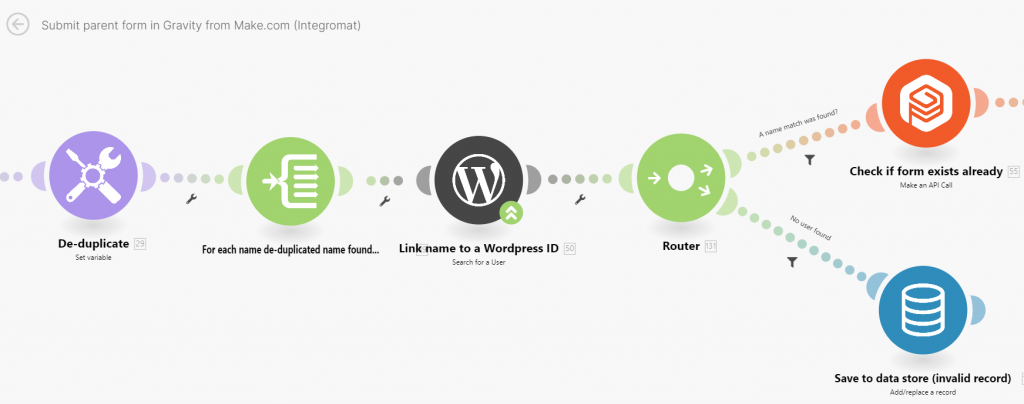
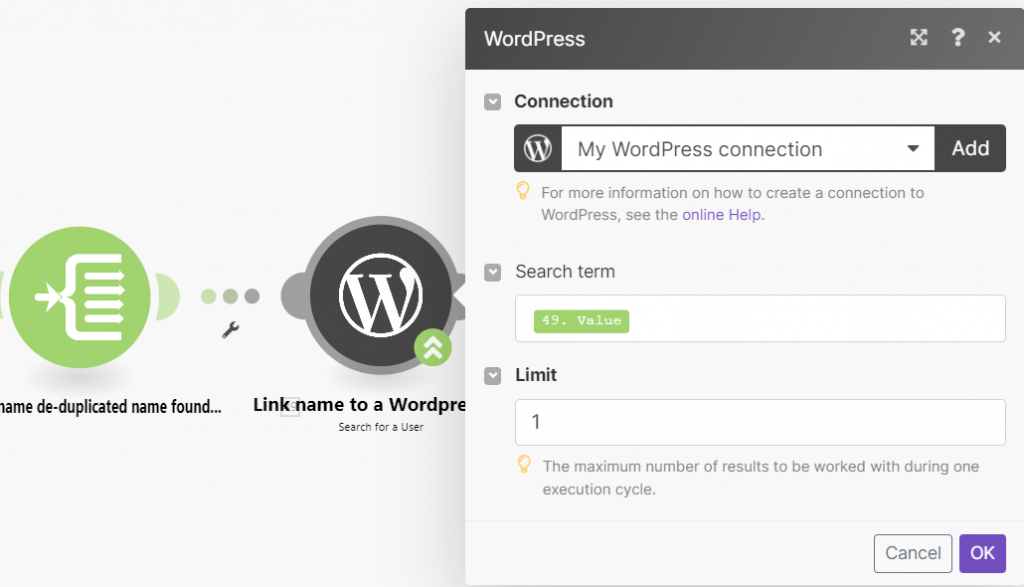
- The idea here is to iterate through every previously de-duplicated (i.e. unique) name that can be found in the report provided by the bank & to link the name to a WordPress user on our site.

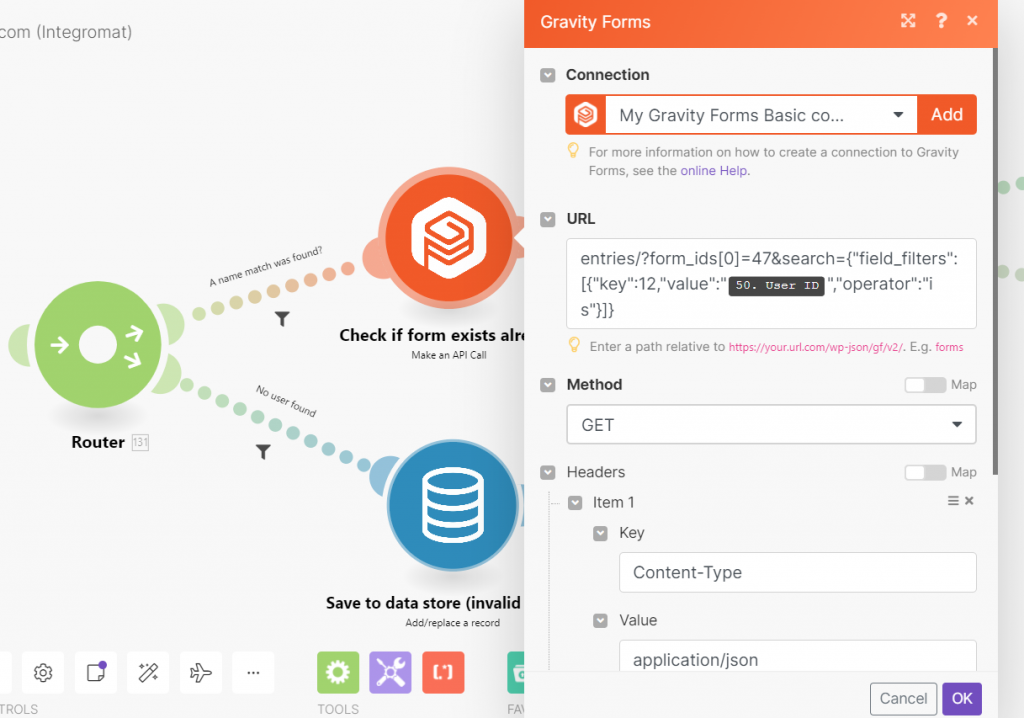
- Then add a Router tile and add a ‘Gravity Forms – Make API call’ tile. Configure it to search through a form ID that you can find when you open the Gravity Form in WordPress. Use the following syntax to send an HTTP GET query to fetch the latest forms where field ID no.12 contains the user ID, as we created in step 3 (the form ID and field ID will differ in your case!). The output is always up to 10 latest forms and we will then later search only through the latest one.
- The syntax of the URL field is as follows:
entries/?form_ids[0]=47&search={"field_filters": [{"key":12,"value":"{{50.id}}","operator":"is"}]}
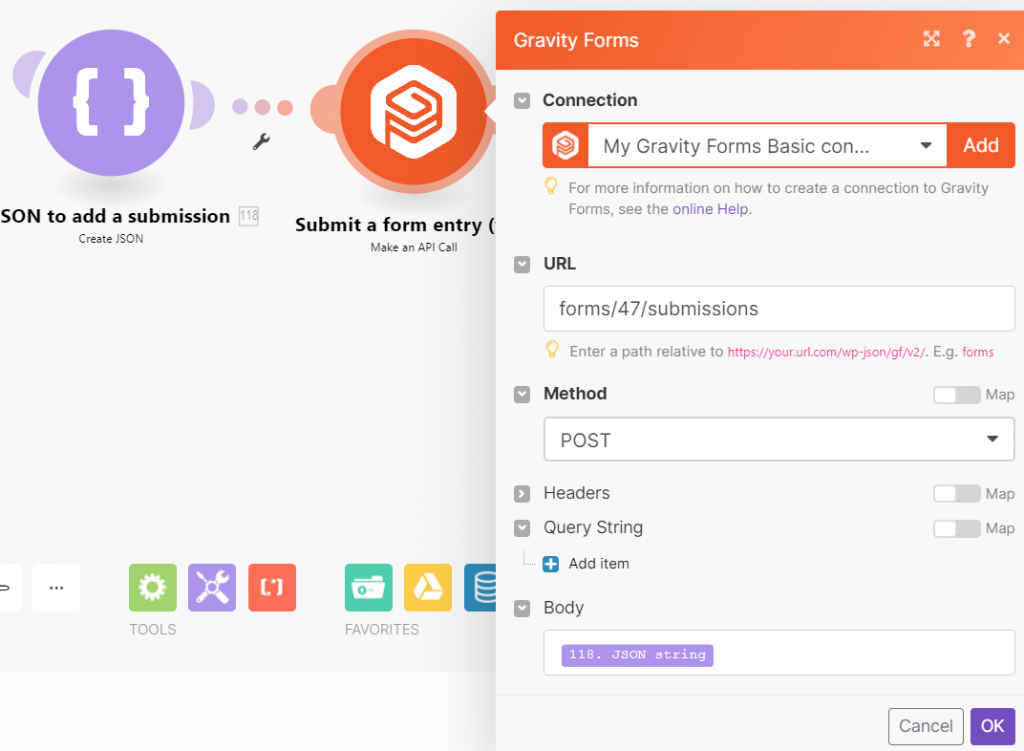
- See the tile configuration below:
- Add a filter to filter out requests where no WordPress user was found (zero bundles):
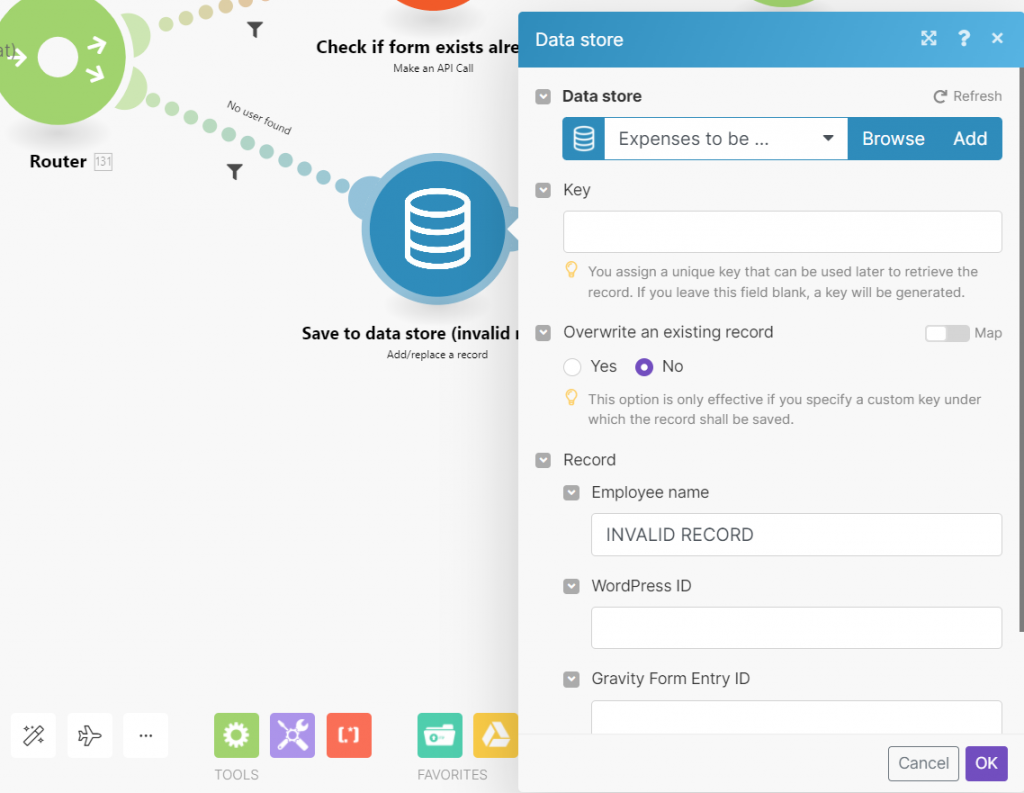
- If no record was found in WordPress, then add into the Data Store tile that this was an invalid record. We need to record even the invalid ones for Part 4c when we add the creation of child forms into the same Make.com (Integromat) workflow.
- And here is the related filter rule to go this way if no bundles were found:
Submit a parent Gravity form if there is no existing pending one

- If a previous Gravity form was found, save its details to the Data Store tile. We will need it later in the next step where we create the child form (individual expenses per parent form).
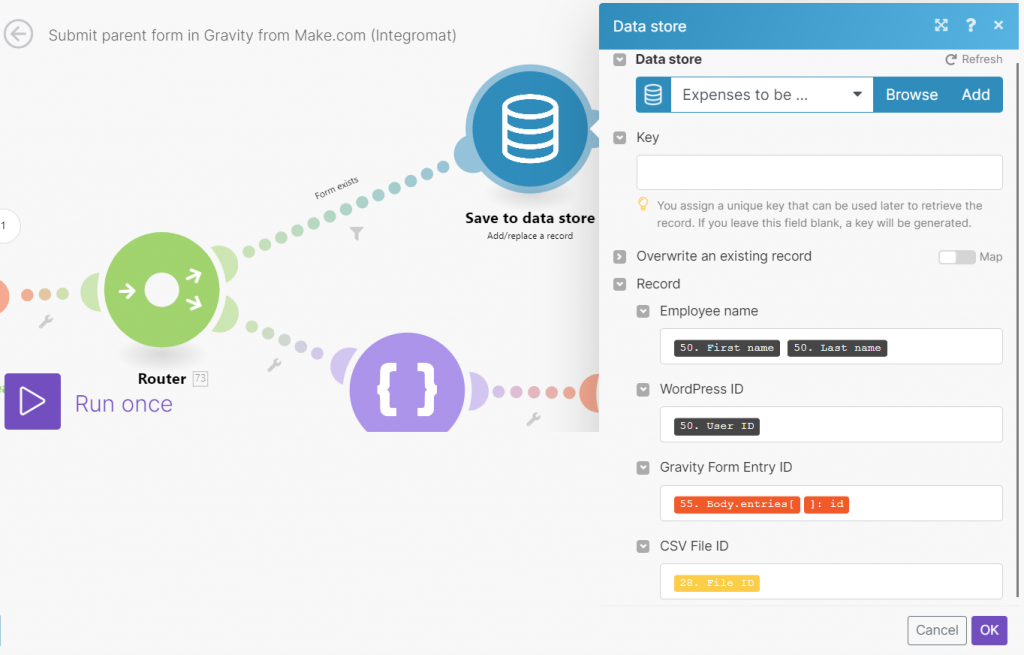
- And here is the filter to use to filter out only forms that are pending. Gravity Flow is needed – check the Gravity flow step ID as shown below:


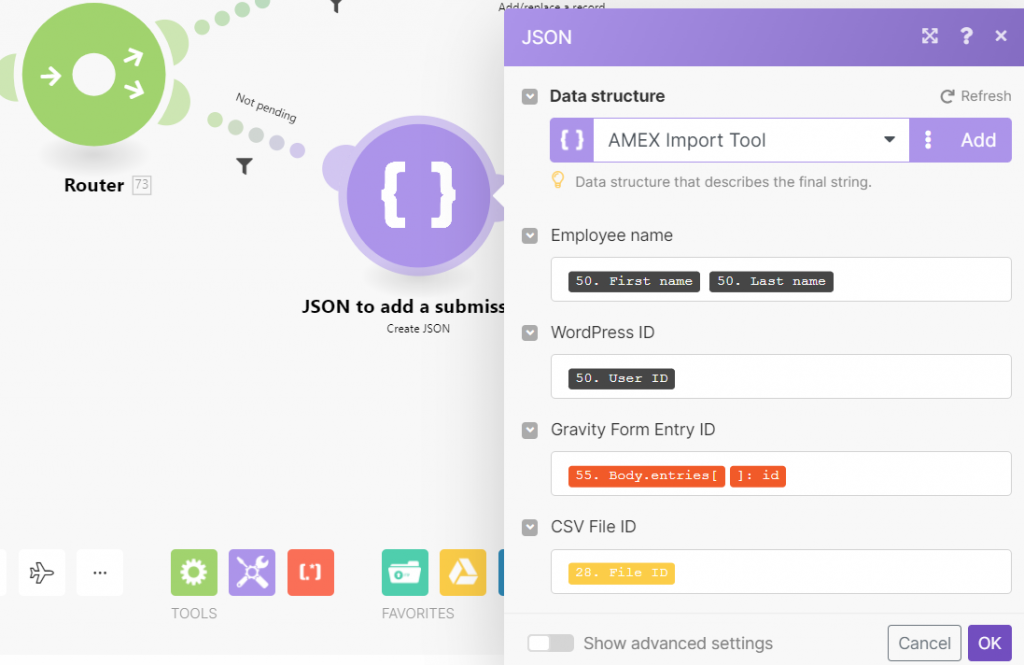
- In case a pending form is NOT found, then create the following JSON request:
- Do not forget to set a filter to make sure that pending forms do not go this way:
- Create another custom Gravity API call that will submit the form using the JSON file we just created. Make sure that the form ID matches yours.
- One might think that this is all we need to do for this part but the truth is that we need to record the entry ID of the newly created Gravity Form. The output of the API request through which we just created it, unfortunatelly, does not include the entry ID. So we will now need to recall the latest entries in the form ID to get the detail.
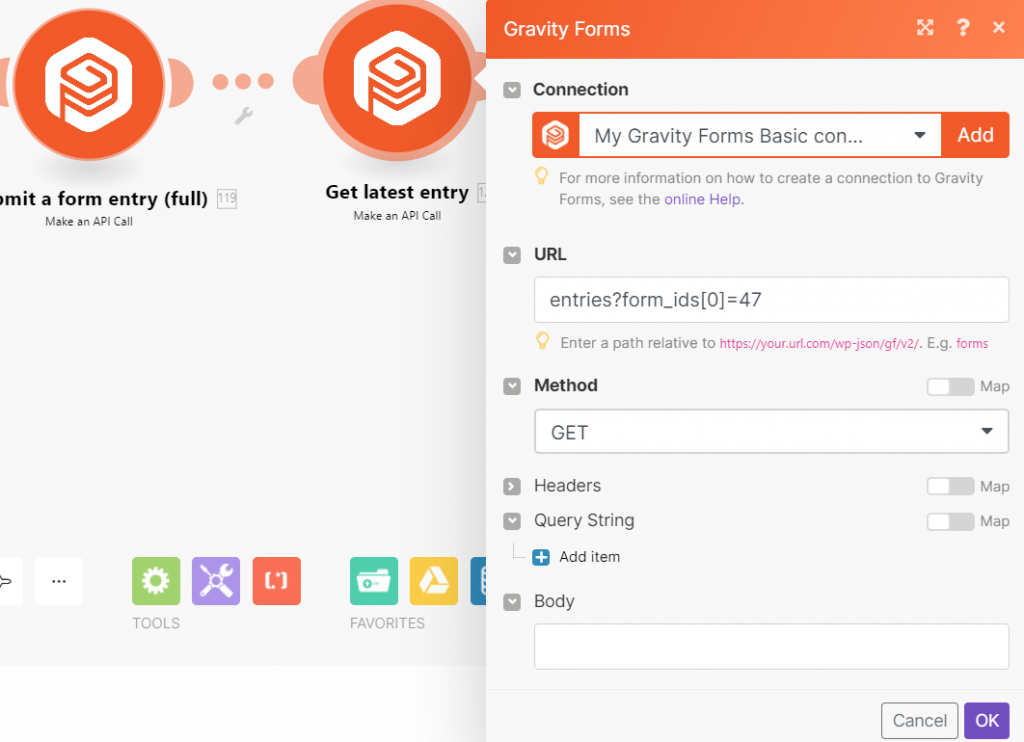
- Now we have all the info we need – we just simply need to save it in the Data Store.
Make.com blueprint .JSON file
The Integromat scenario can be downloaded below – rename the file to .JSON to import it to Make.com:


