Bachelor Tech
  • Home
  • Tutorials
  • Portfolio
  • About Jan
  • Contact Jan

Part 2 – Design the child form for expenses (Gravity Forms)

by Jan Bachelor April 16, 2022

Last Updated on April 16, 2022 by Jan Bachelor

Length: 45 minutes

You can download the form and import it as per Gravity’s instructions (rename the file to .json) or create it as per steps 1 and 2:

Download

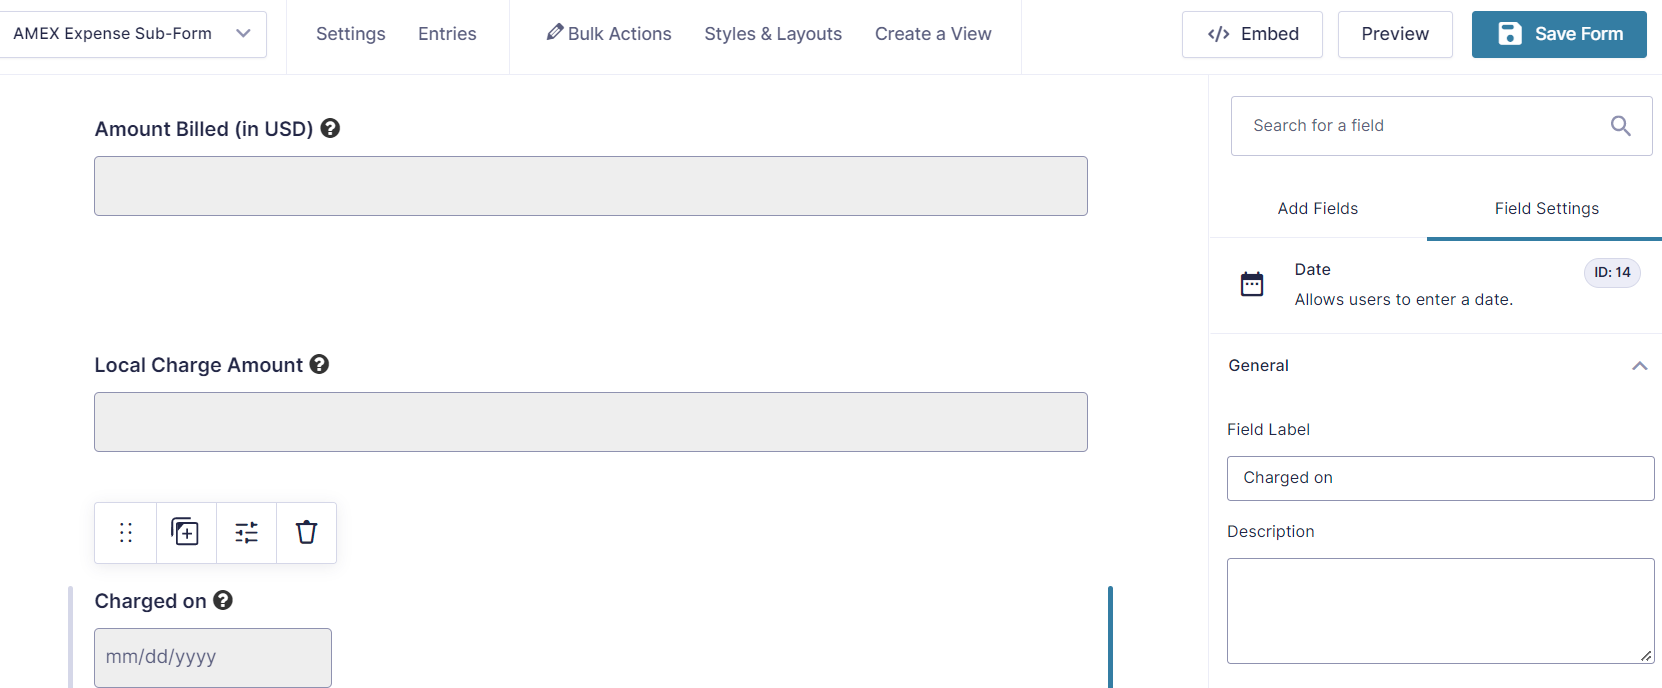
1. Create a new form in Gravity and use fields that you will want to import from the exported bank transactions as specified your Finance team, such as:

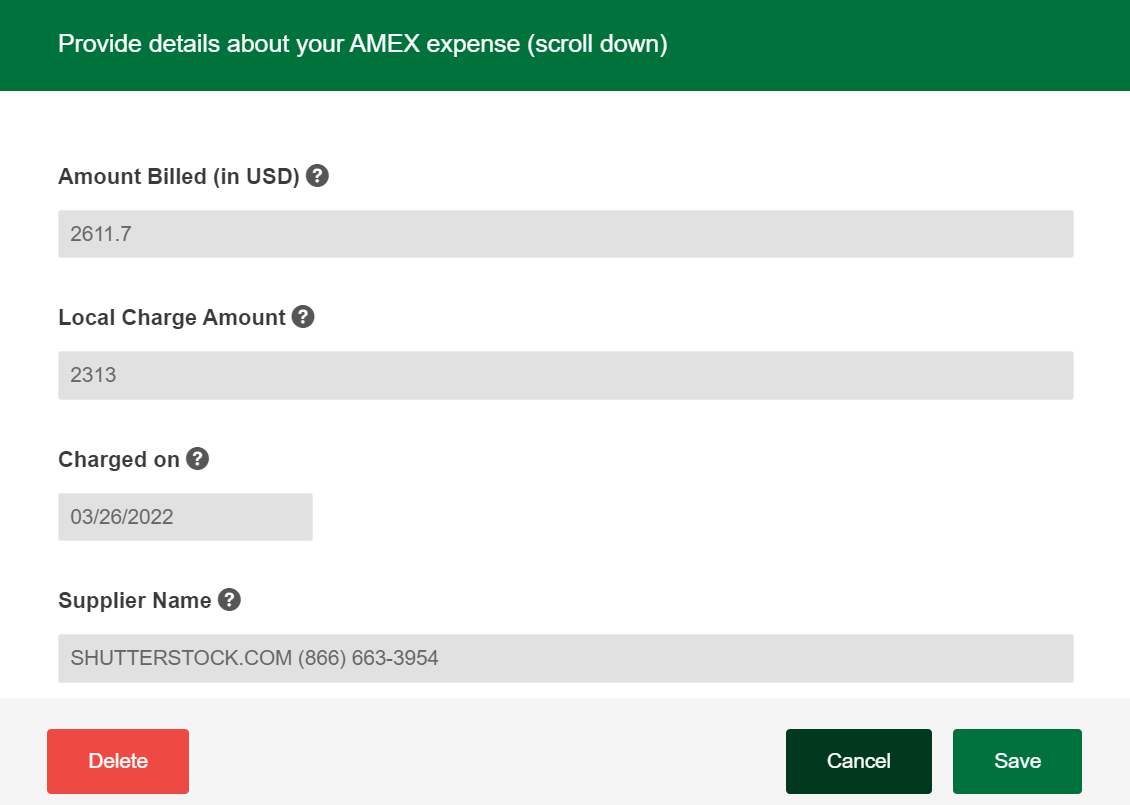
  • Amount billed (number field)
  • Local charger amount (number field)
  • Charged on (date field)
  • Supplier Name (single text line field)
  • Transaction Description (single text line field)
Expense import nested form in the making

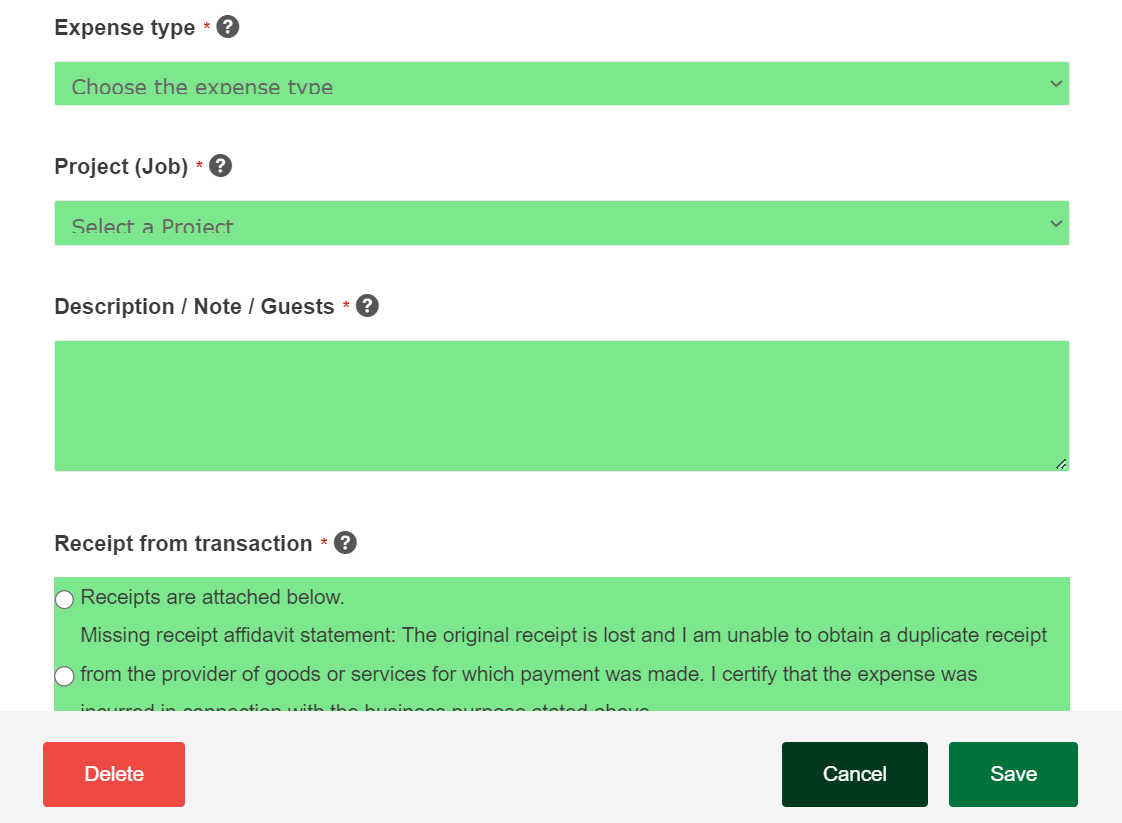
2. Add fields that your Finance team wants to collect from the users, such as:

  • Project name (single text line field)
  • Description / Justification (single text line field)
  • Receipt from transaction (yes / no radio buttons)
  • Attach your receipts (file upload field)

3. Mark fields that you want the users to enter as required.

  • Add tooltips as per the Gravity Tooltips add-on if you like.

4. Set fields that are NOT to be edited as read-only. Use the Gravity Forms Read Only add-on for this purpose.

Using the read-only perk to lock the desired fields

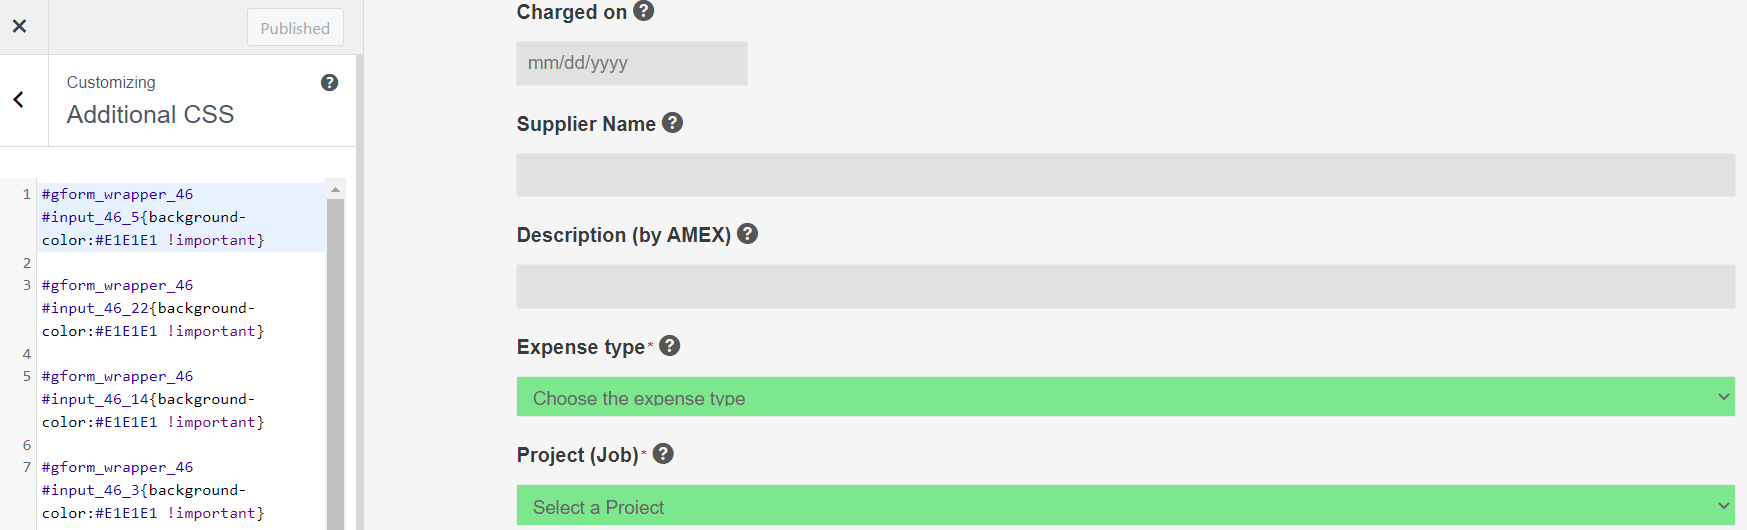
5. To modify the coloring (if desired), edit your theme’s CSS (under the ‘Customize tab’) and add the following code for each field that you want to edit.

  • The first number (46) is the ID of the Gravity Form (you can tell from your URL) and the second number (i.e. 5) is the ID of the field, which you can see when editing the field.
  • The color is in HTML coding – check websites such as this one to determine the right color for you.
#gform_wrapper_46 #input_46_5{background-color:#E1E1E1 !important}
Example CSS code to color code each field.

6. Sneak peak into the final state of the child form when viewed from the parent form.

  • Note: Data (entries) in the forms are yet to be created and data is to be yet imported). Quite nice, isn’t it?
A final state of the nested (child) form’s first part (greyed areas are locked from editing)
A final state of the nested (child) form’s second part – editable fields are highlighted in green (how to do it is explained later)

Part 1 - What do we want to do + Required technology (bank feed)
Part 3 - Design the parent form for individual expenses (Gravity Forms)
Back to: Concur Alternative: Import Employees’ Credit Card Expenses to WordPress via an automated bank feed – Gravity Form/Flow & Make.com (Integromat)

Leave a Comment Cancel Reply

Save my name, email, and website in this browser for the next time I comment.

This site uses Akismet to reduce spam. Learn how your comment data is processed.

0 comment 0 FacebookWhatsappEmail

Concur Alternative: Import Employees’ Credit Card Expenses to WordPress via an automated bank feed – Gravity Form/Flow & Make.com (Integromat)

  • Previous
  • Next
Collapse
Expand
  • Part 1 - What do we want to do + Required technology (bank feed)
  • Part 2 - Design the child form for expenses (Gravity Forms)
  • Part 3 - Design the parent form for individual expenses (Gravity Forms)
  • Part 4a - Integromat Workflow - Fetch data from FTPS and filter it out
  • Part 4b - Integromat Workflow - Submit the parent gravity form from Integromat
  • Part 4c - Integromat Workflow - Create child forms in Gravity from Integromat

Search for articles

Other Tips

  • How to mount an NFS share (such as from FreeNAS) from an Android box
  • How to download a Windows 10 ISO on a Windows device – easy work-around

Other Tutorials

  • Build Your Own Router - Proxmox, OPNSense, OpenVPN server and a VPN client all in one!
    12 Steps
  • Dynamically Populate Gravity Forms from Google Sheets (GSheets APIv4)
    6 Steps

Recent Comments

  • Jan Bachelor on Use Integromat to get computer IDs from user email in JamF ProHi Robert, the static groups were created in the p…
  • Robert Petitto on Use Integromat to get computer IDs from user email in JamF ProCan you share how you'd use Make (integromat) to a…
  • Martin on Part 1 – What do we want to do + Required technology (bank feed)This tutorial deserves more credit, I've not seen…
  • Jan Bachelor on WAN / LAN Set Up (Before OPNSense Installation)Hi Ed, I have not tested it with PCI passthrough y…
  • Ed on OPNSense VM Set UpIn step 4 firewall you turned off firewall, should…

Tags

chrome iso windows

Categories

  • Android
  • FreeNAS
  • Linux
  • Windows

Recent Posts

  • How to mount an NFS share (such as from FreeNAS) from an Android box

  • How to download a Windows 10 ISO on a Windows device – easy work-around

Facebook Twitter Instagram Pinterest Linkedin Youtube

@2019 - All Right Reserved. Designed and Developed by PenciDesign

Bachelor Tech
  • Home
  • Tutorials
  • Portfolio
  • About Jan
  • Contact Jan