Create an LXC container in Proxmox outside of pre-packaged templates
March 25, 2025
Table of Contents
- Let's say you want to run Debian 13 (Trixie), but there is no standard template for it in Proxmox. What do you do?

LinuxContainers.org for the rescue!
- Such cases may happen but do not worry, there is a way around it! Simply go to LinuxContainers.org and find your desired one. You will find that the actual image name is called 'rootfs.tar.xz'.

- Head to your Proxmox node and connect to it via shell or via SSH.
- Go to the following folder and download + rename the CT image:
cd /var/lib/vz/template/cache/
# Replace the URL of the one you are after
wget https://images.linuxcontainers.org/images/debian/trixie/amd64/cloud/20250628_05:24/rootfs.tar.xz
# Rename it to something that makes sense to you:
mv rootfs.tar.xz debian-13-trixie-lxc-2025-06-28.tar.xz- Now you could head to Proxmox's GUI and create the container from there. However, if you are on Proxmox 8 (which is powered by Debian 12) and try creating a CT with Debian 13, you will inevitably hit an issue with the new networking service that is used in Trixie:

- The way around it is to create the container from the Proxmox shell and skip the networking part initially.
pct create <CT_ID> \
/var/lib/vz/template/cache/debian-13-trixie-lxc-2025-06-28.tar.xz \
--storage <YOUR_STORAGE> \
--rootfs <YOUR_STORAGE>:10 \
--hostname <HOSTNAME> \
--memory 1024 \
--cores 1 \
--password <YOUR_PASSWORD>- Replace the values as follows:
-
: Choose an available one. -
: local storage name such as 'local-lvm'. -
: Name of the CT, such as deb13 -
: Root password to log in with. Do not use special characters.
-
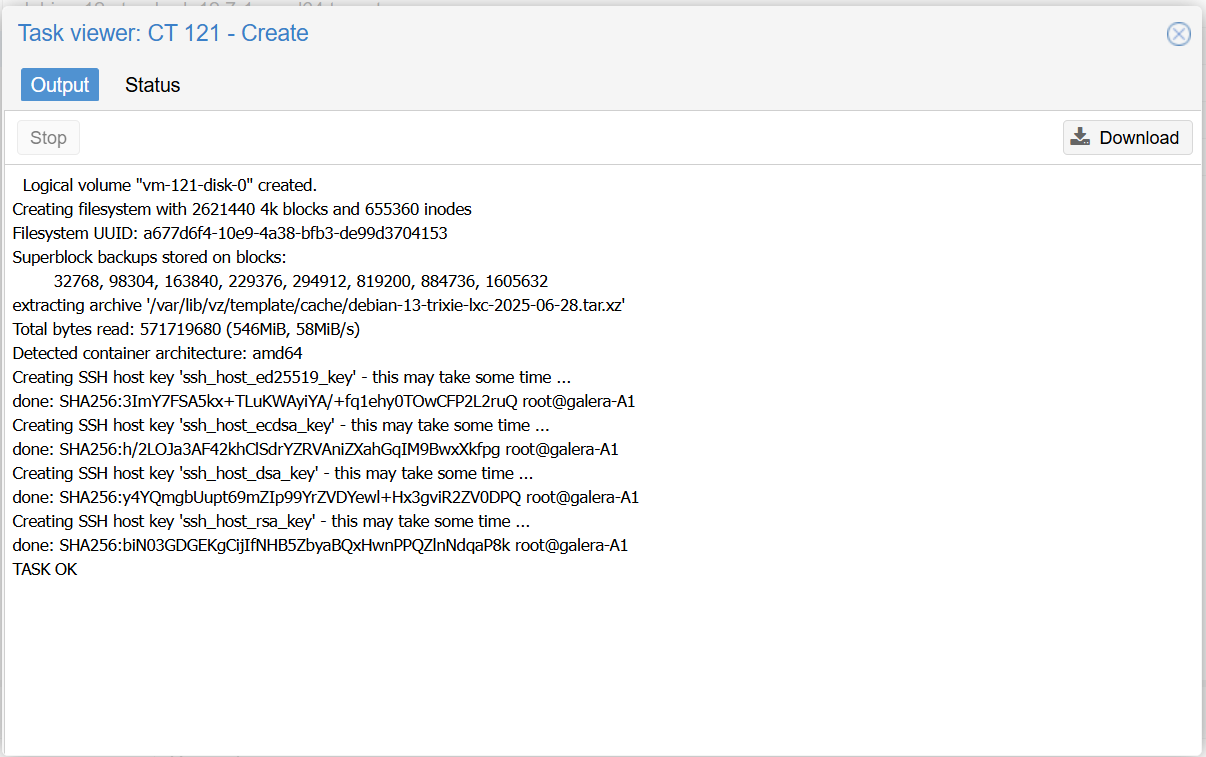
- And voila, straight after passing the command, I can see the result in Proxmox's GUI tab:
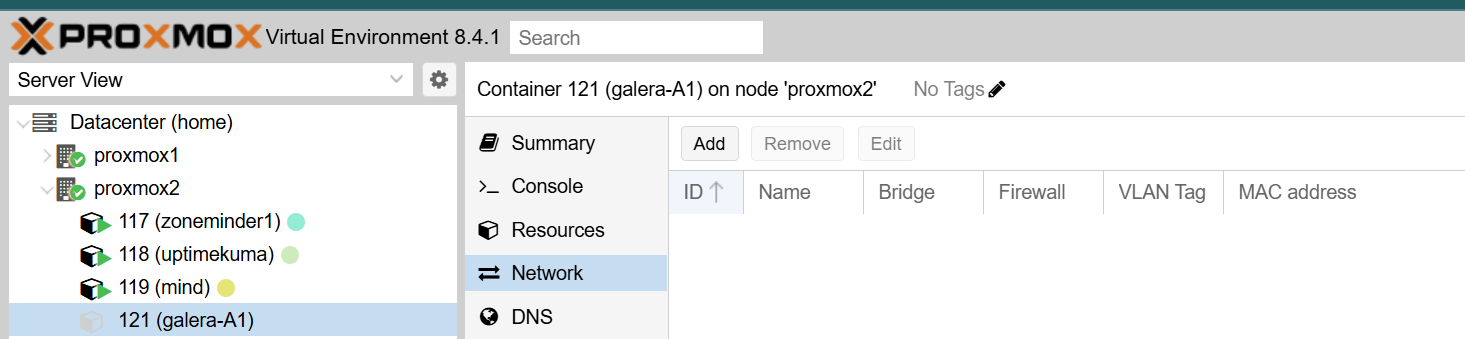
- When viewing from Proxmox's web GUI, you will notice that there is no network tab in there:
- Now we can continue using the Proxmox shell to start the container (or you can do so from the GUI), log into it and create a folder in which the network adapter will be created later.
# Start the container
pct start <CT_ID>

# Enter the container's command line
pct enter <CT_ID>

# Inside the container, create the directory
mkdir /etc/network

# Exit the container's shell
exit

# Shut the container down so we can add the network device
pct shutdown <CT_ID>

# Add a network interface to the container (assuming you use vmbr0 for LAN and are okay with DHCP)
pct set <CT_ID> --net0 name=eth0,bridge=vmbr0,ip=dhcp

# Start the container again
pct start <CT_ID>

# Switch the network interface on + add DHCP
ip link set eth0 up
dhclient eth0

# Verify connectivity
ip addr | grep eth0

# To make it pernament, run the following:
apt update
apt install ifupdown2
reboot- What we did there by creating the folder and assigning the port was to make the generic Debian 13 image compatible with the way Proxmox manages a container's network configuration, until Proxmox itself gets updated to work with it smoothly.
- This means that this article may not age well, but the idea behind it remains.
Takeaways
In summary, you can:
- Download the newest versions of LXC images from trusted sources like LinuxContainers.org
- Use the Proxmox shell to circumvent what the GUI cannot do and even create scripted solutions to start/configure/stop containers.
- Create containers with certain settings missing (like for networking) in case the current version of Proxmox struggles to work with it.
And that is all there is to it!
Enjoying this tutorial?
This site is a non-profit project. If it saved you some time, you can support it by getting Jan some coffee.
☕ Buy me a coffee
Comments