Backup your Proxmox hosts with ProxSave
May 11, 2026
Table of Contents
Previously known as proxmox-backup, ProxSave is an invaluable tool that helps you to restore Proxmox hosts (PVE) or Proxmox Backup servers (PBS) without having to manually configure them after a disaster scenario or when you want to replicate a good working config on a new host. Written in Go, it is lightweight, fast and does not take almost any resources during run (apart from the few seconds it handles compression of the backed up files). It also supports encryption of the backups using AGE (an 'actually good encryption' tool created by Filippo Valsorda, backed up by Google engineers).
The idea is to have at least two locations for the backups, one locally on your LAN (such as a NAS), the other in a cloud environment (in this case, I'm using a GCP bucket). Let's dive in into how to set it up, starting from mounting NAS storage and setting up the GCP bucket before an actual installation and set up of the tool.
Step 1 - Configure NFS/SMB share to save your backups
- For NFS storage to work on a proxmox host, we need to ensure that it has the required packages:
apt install nfs-common cifs-utils -y- Mount your storage:
mkdir -p /mnt/nas-backup

# Option 1: As NFS - Linux to Linux (recommended)
mount -t nfs 192.168.8.14:/home/jan/Backups/Proxmox /mnt/nas-backup

# Option 2: As SMB
mount -t cifs -o username=jan,password=YOUR_PASSWORD //192.168.8.14/home/jan/Backups/Proxmox /mnt/nas-backup

# Unmount it
umount /mnt/nas-backup- Make it permanent:
nano /etc/fstab

# NFS option (do not hang if it not reachable on boot):
192.168.8.14:/home/jan/Backups/Proxmox /mnt/nas-backup nfs hard,intr,timeo=50,retrans=3,_netdev,nofail,x-systemd.automount,x-systemd.mount-timeout=15 0 0

# NFS option (auto-mount of first touch, not on first boot - useful for VPN tunnel
# connections that get established later during uptime
192.168.8.14:/home/jan/Backups/Proxmox /mnt/nas-backup nfs noauto,hard,intr,timeo=50,retrans=3,_netdev,nofail,x-systemd.automount,x-systemd.mount-timeout=15 0 0

# SMB option
//192.168.8.14/home/jan/Backups/Proxmox /mnt/nas-backup cifs username=jan,password=YOUR_PASS,_netdev,nofail,iocharset=utf8 0 0- In case you used the soft auto-load on access option:
# Confirm that nothing is mounting on access at this point:
ls /mnt/nas-backup

# Reload systemd
systemctl daemon-reload

# Restart the Remote-FS target service (to activate the automount listener):
systemctl restart remote-fs.target

# Verify that the mounting works
ls /mnt/nas-backup- For statically mapped shares:
# Verify that the mounting works
mount -a
ls /mnt/nas-backup
So now we have our local NFS/SMB location ready and can move on to the remote one.
How to install and set up NFS
If the NAS or backup server itself doesn't already run an NFS server, here's how to set that side up:
# Install it on the NAS or backup server
sudo apt install nfs-kernel-server -y

# Take into account which user you want the ownership of the files to go to.
# You can use your current non-root user, just check out the ID - let's say it is a 1000
id jan

sudo nano /etc/exports

# Provide access to all the 192.168.x.x subnets and force user 1000 (jan)
/home/jan/Backups/Proxmox 192.168.0.0/16(rw,sync,no_subtree_check,all_squash,anonuid=1000,anongid=1000)

# Apply the changes
sudo exportfs -ar

# Restart the NFS service:
sudo systemctl restart nfs-kernel-server
- If you use this NFS share also as a Samba (SMB) share, it may be worth installing an ACL tool that will override the settings of either service:
# Install the tool while still on the NFS server (NAS, backup server..)
sudo apt update && sudo apt install acl -y

# Change the user as you need
sudo setfacl -R -m "default:user:jan:rwx" /home/jan/Backups/Proxmox
sudo setfacl -R -m "default:group:jan:rwx" /home/jan/Backups/Proxmox

# You can always verify the permissions for the given folder
getfacl /home/jan/Backups/Proxmox- From another server on the LAN, check that the mount is available:
showmount -e 192.168.8.14
# Mount it (NFS)
mount -t nfs 192.168.8.14:/home/jan/Backups/Proxmox /mnt/nas-backup
# Try a write operation and remove the file:
touch /mnt/nas-backup/testfile
rm /mnt/nas-backup/testfile
💡 Note
If you try to move a file to the NAS, you will receive an error after copying, as the destination server will not allow permissions changing from the source due to the 'setfacl' that we did earlier.
- Save it in fstab without hanging on startup if not available:
sudo nano /etc/fstab
192.168.8.14:/home/jan/Backups/Proxmox /mnt/nas-backup nfs hard,intr,timeo=50,retrans=3,_netdev,nofail,x-systemd.automount,x-systemd.mount-timeout=15 0 0- The mounting command in
fstabexplained:
| Option | Why |
|---|---|
nofail |
Systemd won't block boot if this mount fails |
x-systemd.automount |
Mount is lazy, nothing happens at boot at all, it only mounts on first access. This is your real boot-hang fix |
x-systemd.mount-timeout=15 |
If it is accessed and the NAS is unreachable, give up after 15s instead of hanging |
_netdev |
Tells systemd this needs network, orders it correctly |
hard,intr,timeo=50 |
Deliberate choice - keep trying to connect during outage (when already connected) |
- Remember to restart the daemon after
fstabchanges:
systemctl daemon-reloadStep 2 - Configure remote storage for Proxmox backups (GCP bucket)
- In my case, I went for a GCP bucket on archived tier. If you have not got it set up yet, please follow this guide first to get the the bucket set up with
rclone. - Note: Modify your
rclone.configfor bucket level policies:
nano /root/.config/rclone/rclone.conf

# Ensure this line is in there:
bucket_policy_only = true- Verify that you have created a folder on your cloud storage and is accessible via rClone:
rclone lsd your_storage:folder

# An example from my environment:
rclone lsd gcp:proxmox-backup-bachelor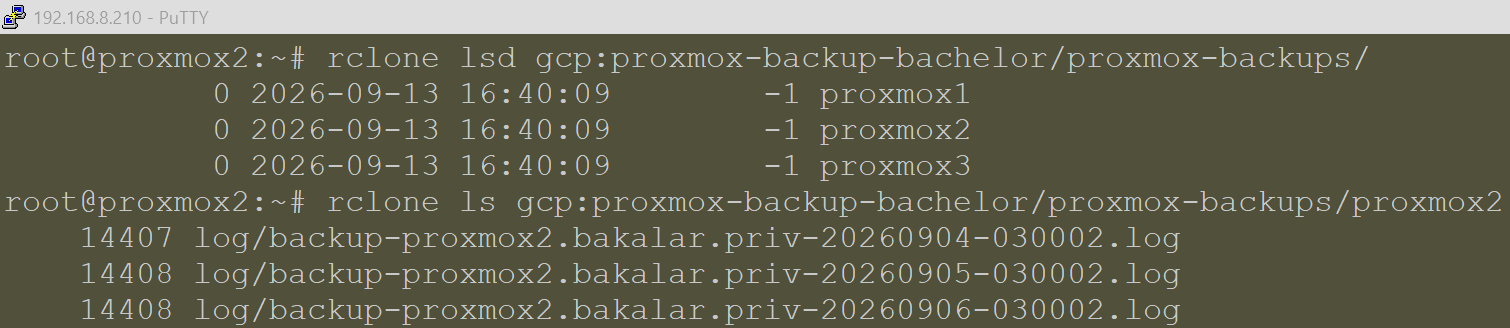
Step 3 - Configure emails in Proxmox (pmf)
- ProxSave can send emails via the author's relay SMTP server. You can use it for staging. For production, it is best to set up your own. However, the Go binary does not support MUA (like
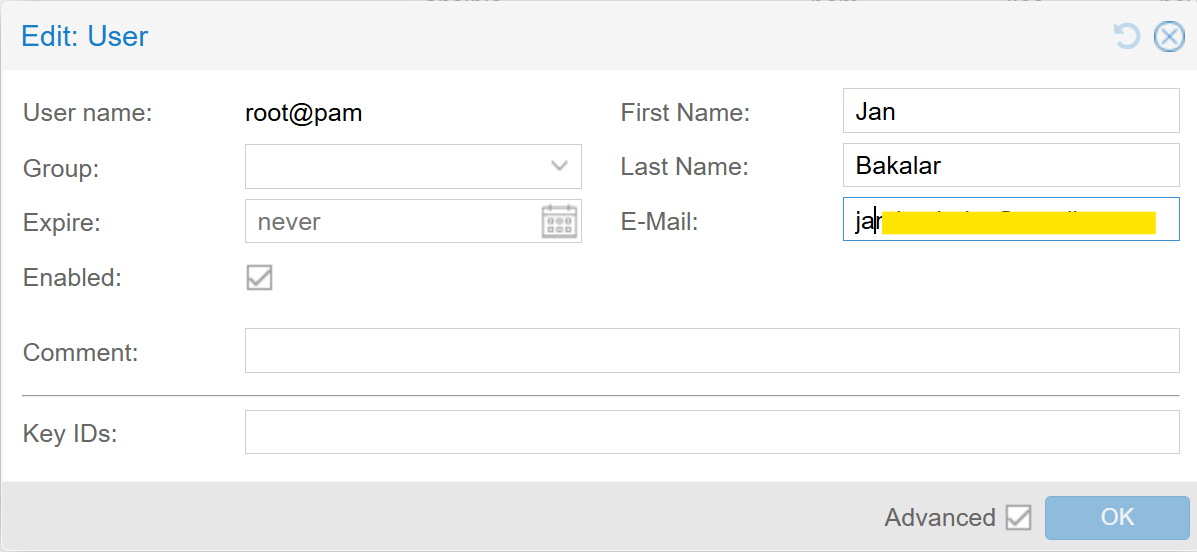
mutt), so it is best to switch it to Proxmox's ownpmfmethod. - Ensure you have an email address recipient in Proxmox:
- Go to Datacenter → Permissions → Users
- Find your user and ensure that there is an email address defined.
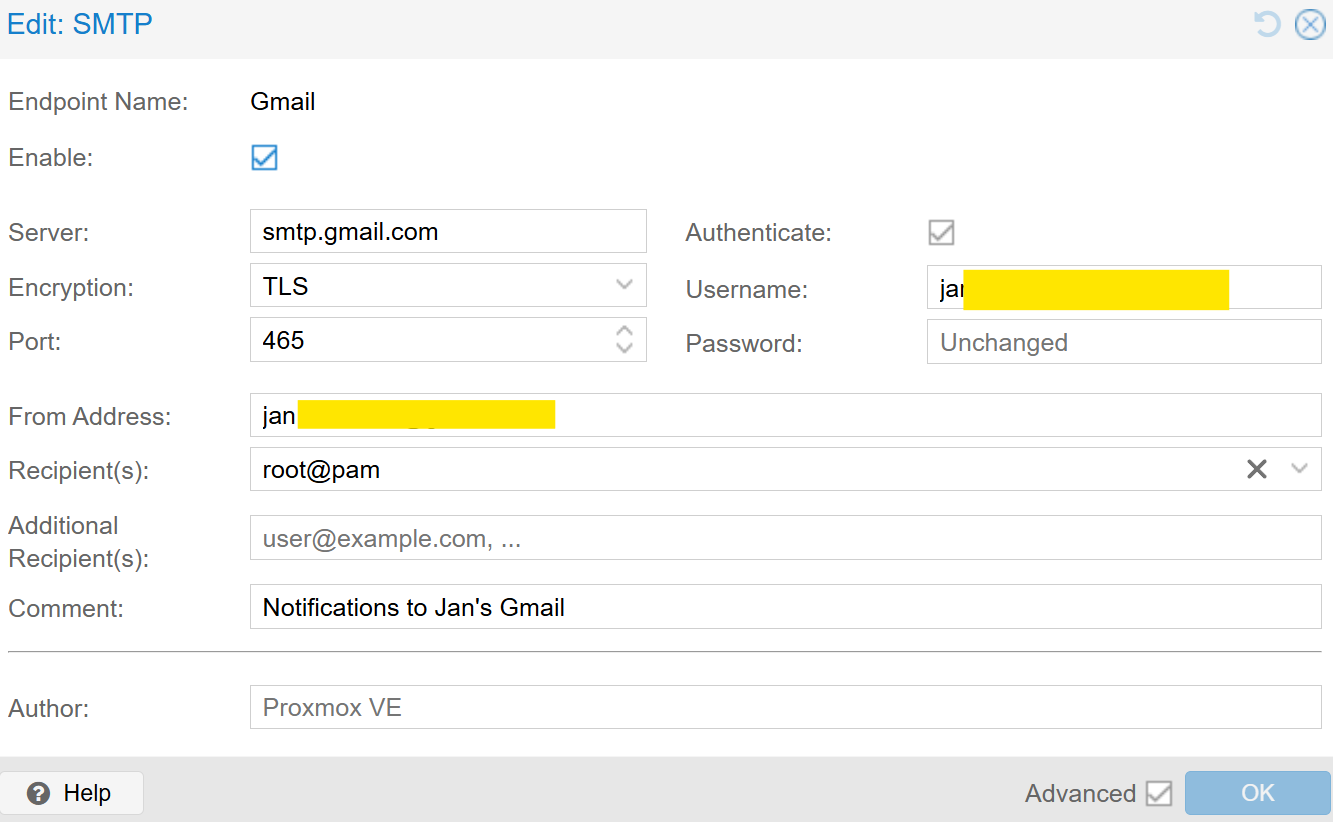
- Here is how to set up SMTP in Proxmox UI:
- Go to Datacenter → Notifications → Notifications
- Add → SMTP
- Endpoint name: Gmail (use short names, no spaces and special chars)
- Enable: Tick
- Server: smtp.gmail.com
- Authenticate: Tick
- Encryption: TLS
- Recipient: root@pam (or whatever user in Proxmox you use)
- While in the same section under Notification Matchers, make sure that the default matcher is on.
- Open it, select the 'Targets to notify' option and tick the new notification created above.

Step 4 - Install ProxSave
- SSH into your Proxmox host and read the recommendations on the project's GitHub page before proceeding:
bash -c "$(curl -fsSL https://raw.githubusercontent.com/tis24dev/proxsave/main/install.sh)"- Tweaking the config post-installation:
nano /opt/proxsave/configs/backup.env

# Disk space - set min. on secondary storage to be lower than the default 90:
MIN_DISK_SPACE_SECONDARY_GB=5

# Find suspicious ports and if you use port 2222 for SSH, then remove it:
SUSPICIOUS_PORTS="6666 6665 1337 31337 4444 5555 4242 6324 8888 3389 5900"

# Replace the original with these to lower CPU usage:
COMPRESSION_TYPE=zstd
COMPRESSION_LEVEL=12
COMPRESSION_THREADS=0
COMPRESSION_MODE=standard

# For your secondary storage, if you have mounted an NFS share (such as a NAS):
SECONDARY_ENABLED=true
SECONDARY_PATH=/mnt/nas-backup/proxmox1
SECONDARY_LOG_PATH=/mnt/nas-backup/proxmox1/log

# Email Notifications
EMAIL_ENABLED=true
EMAIL_DELIVERY_METHOD=pmf
EMAIL_FALLBACK_SENDMAIL=true
[email protected]
[email protected]

# To disable ZFS warnings if you do not use ZFS:
BACKUP_ZFS_CONFIG=false
- Utilize the dry-run function:
proxsave --dry-run
Troubleshooting Options
- If you get an error related to the lack of existence of corosync.config while your host is not running in a cluster, then just create an empty file to prevent the script from errorring out:
touch /etc/pve/corosync.conf- If all is good, simply run
proxsaveand then check that the backups got saved on your local and remote storage. If you have configured it earlier, you should see an email in your mailbox as well.
💡 Note
Add other Proxmox hosts to your SSH config to account for custom ports. The
proxsavetool will want to connect to at least the other hosts in the cluster.sudo nano /root/.ssh/config Host proxmox1 192.168.8.3 Port 2222 Host proxmox2 192.168.8.4 Port 2222 Host proxmox3 192.168.6.3 Port 2222 chmod 600 /root/.ssh/config
Set up a cron
- To run the backups regularly, set up a cron job (send the output to null to avoid receiving two emails):
crontab -e
# Append this line at the end (run it every Sunday at 3am):
0 3 * * 0 /usr/local/bin/proxsave >/dev/null 2>&1
Rinse and repeat on your other PVE/PBS hosts to backup its configs. If possible, do not rely on the author's SMTP relay, as that could stop working at any time without notice.
Updating ProxSave
In case a new version is available and you want to update the tool, simply run the following:
proxsave --upgrade
Then run a dry run or the full run to verify that no dependencies were broken by the upgrade or that there are no new requirements. It's also always good to briefly check the release notes.
Other considerations
- In case you are updating from the original
proxmox-backuptool, follow these steps described by the author on the Proxsave website. - Fancy exploring the encryption options with AGE? Take a look at the author's manual. Keep in mind that:
- Archives are written as ".tar..age" . The intermediate .tar file is not encrypted, neither is the working copy during compression/encryption.
- ProxSave does not support AGE plugins or the native
age --passphrase. - For decryption in the Terminal, use the CLI option preferably with debug options, i.e
proxsave --decrypt --cli --log-level debug.
Enjoying this tutorial?
This site is a non-profit project. If it saved you some time, you can support it by getting Jan some coffee.
☕ Buy me a coffee
Comments