1. Choose a container, download it and put it to work.
- You will need to make a decision on what will be the base OS for your container running Maria DB. In our case, we will go for Ubuntu (the latest at the time of writing this article).
- See Proxmox’s Wiki with all the flavors that you can use.
- To see and download your chosen container, log into your Proxmox mode and go to the console (either directly via WebGUI or via SSH):
pveam available | grep ubuntu
pveam download local ubuntu-23.04-standard_23.04-1_amd64.tar.zst
2. Initialize your first container
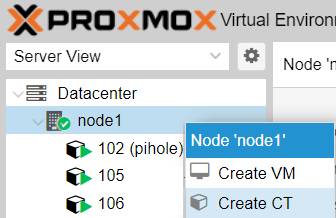
- In Proxmox WebGUI, use the ‘Server View’ and under the ‘Datacenter’, right click on the Proxmox node where you want to install the container -> select ‘Create CT’.
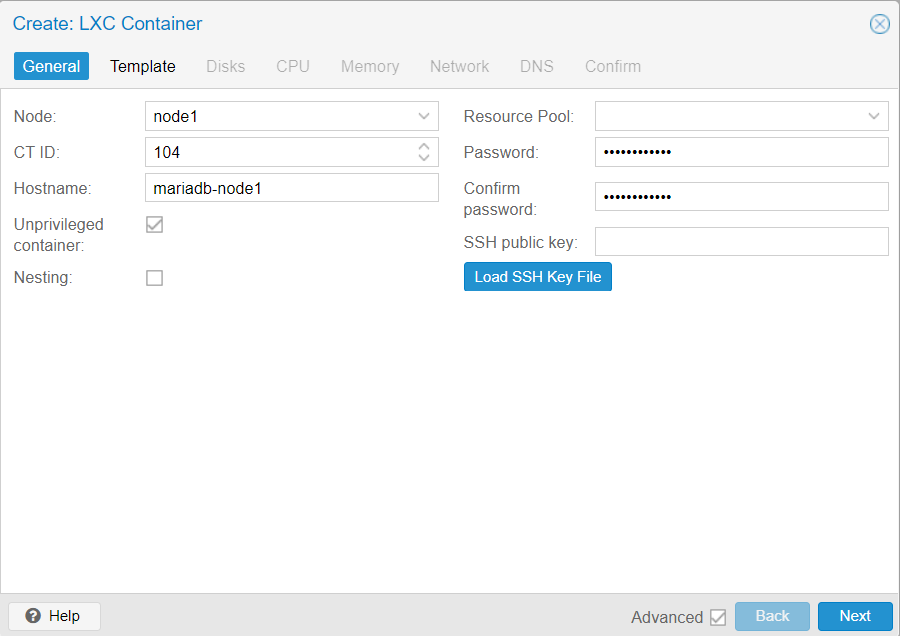
- Select a fitting hostname, such as mariadb-node1 . Leave it as an unprivileged container but disable nesting (in this context, nesting means that the user/group id inside the container can be mapped outside the container, such as to get access to a NFS share, which, in our case, we are not interested in).
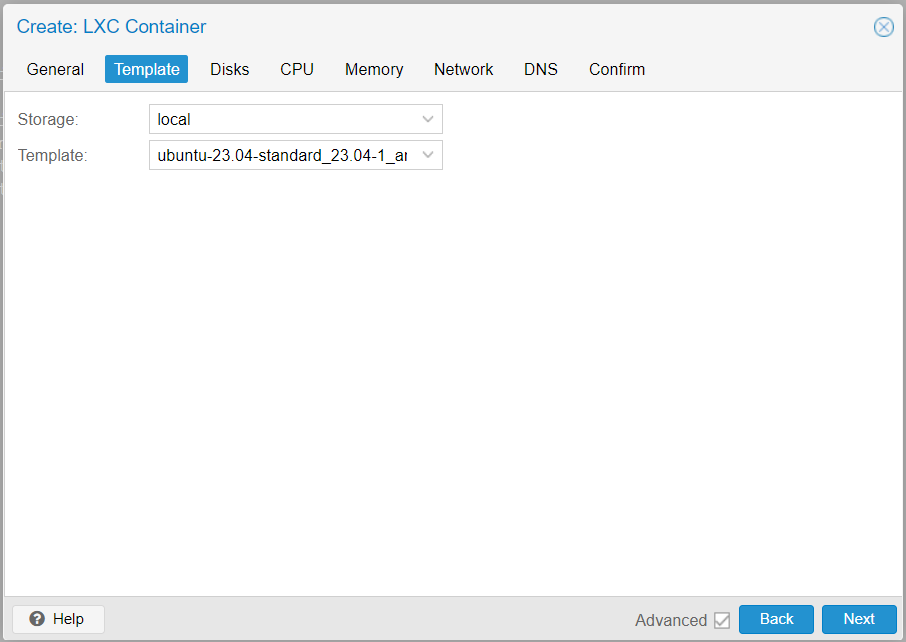
- Template section – you will likely find the the template under the ‘local’ storage. Select your chosen OS and proceed.
- CPU/Memory sections – up to your best judgement. Remember that you do not need to allocate space for the OS when using containers. As for CPU/RAM, while we will implement load balancing, it is still important that a single container can handle all the databases that you want to run in one given time.
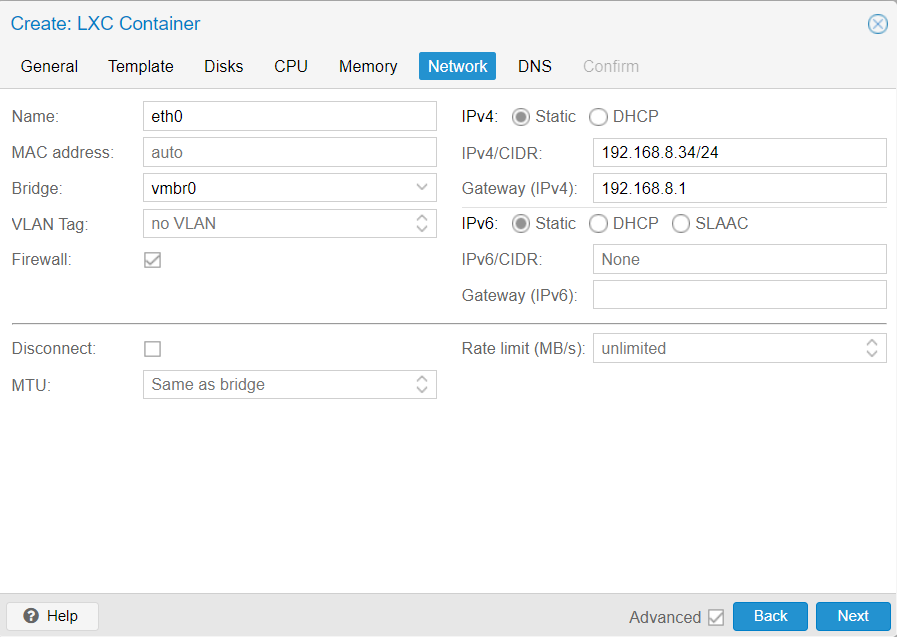
- Network – For IPv4/CIDR and gateway, provide a static mapping that is relevant for your network.
- DNS – keep the same as for the host, unless you have specific requirements.
3. Configure the Proxmox container (LXC) and install MariaDB
- Start your new container and reach its terminal either via SSH or the WebGUI’s console.
- Run the following commands that will update the OS, install MariaDB server + client and then go through the initial MariaDB setup.
apt-get update && apt-get upgrade
apt-get -y install mariadb-server mariadb-client
mysql_secure_installation
- During the MariaDB initialization, you will be asked a few questions:
- ‘Enter current password for root (enter for none):’ –> Provide the root password.
- ‘Switch to unix_socket authentication [Y/n]’ –> No need for it, choose ‘n’.
- ‘Change the root password? [Y/n]’ –> This is for the root user of the MariaDB database. It is good practice to change it for production environment. When testing, you can leave it.
- ‘Remove anonymous users? [Y/n]’ –> Choose ‘y’.
- Disallow root login remotely? [Y/n] –> Choose ‘y’, we will not need to log in as root remotely and it is a best security practice.
- Remove test database and access to it? [Y/n] –> Choose ‘y’, as we will create our own testing database on the cluster later.
- Reload privilege tables now? [Y/n] –> Choose ‘y’, although it does not matter at this point.
4. The LXC ignore /etc/hosts trick + Prep for nodes
- In Proxmox, when a container is restarted, the /etc/hosts file is re-created together with other things. For more details, check the Proxmox Guest OS System Configuration manual.
- In order to prevent the /etc/hosts file to be overwritten, run the following simple touch command to create an empty file:
touch /etc/.pve-ignore.hosts
- Now let’s set up the current and future node list by editing the /etc/hosts file . While at this point, only one node is set up, you will already now the IPs and hostnames of the future containers.
- Change the IP and host name information as it fits in your environment.
nano /etc/hosts

# --- BEGIN PVE ---
192.168.8.31 mariadb-node1.bachelor.priv mariadb-node1
192.168.8.32 mariadb-node2.bachelor.priv mariadb-node2
192.168.8.33 mariadb-node3.bachelor.priv mariadb-node3
# --- END PVE ---


