Bachelor Tech
  • Home
  • Tutorials
  • Portfolio
  • About Jan
  • Contact Jan

Fiirewall- Set Up NAT Rules (OPNSense)

by Jan Bachelor October 31, 2024
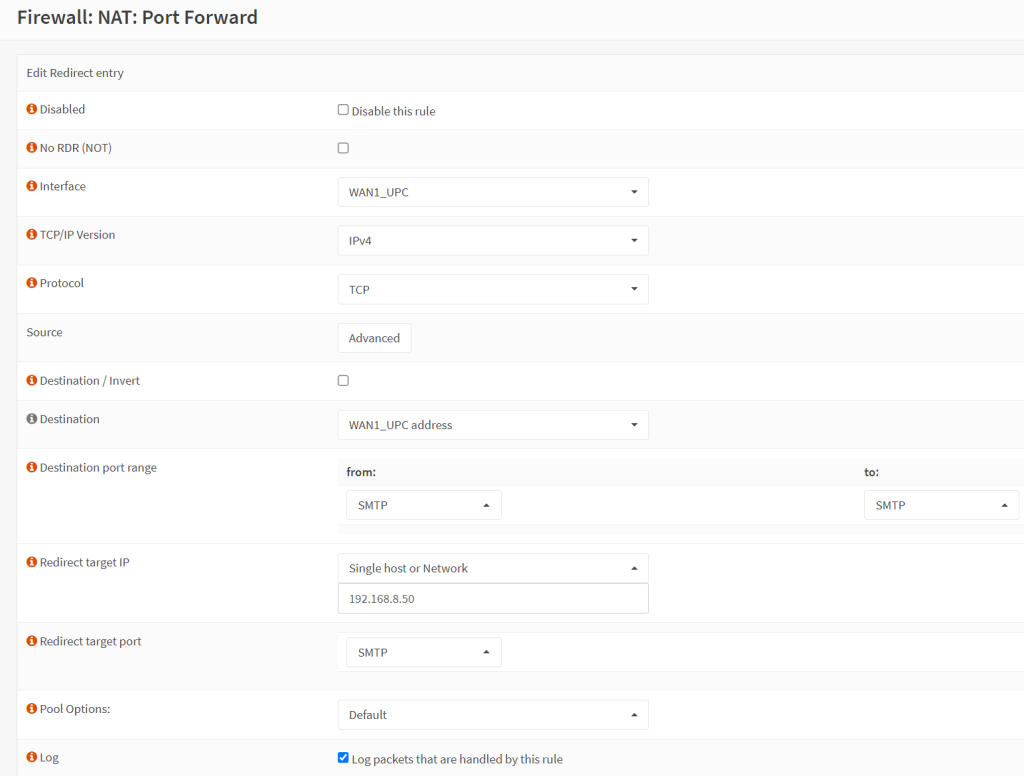
  • NAT rule for port 25
    • On OPNSense, go to Firewall → NAT → Port Forward and create a new rule.
    • Interface: your WAN
    • TCP/IP: IPv4
    • Protocol: TCP
    • Destination: WAN address
    • Destination port range: SMTP to SMTP (or select other and manually type in 25 to 25)
    • Redirect target IP: the IP of your mail server
    • Redirect target port: SMTP
    • Log it in for debugging purposes
    • Everything else leave as default or tweak as per your needs.
OPNSense Port Forward for Port 25 – SMTP in
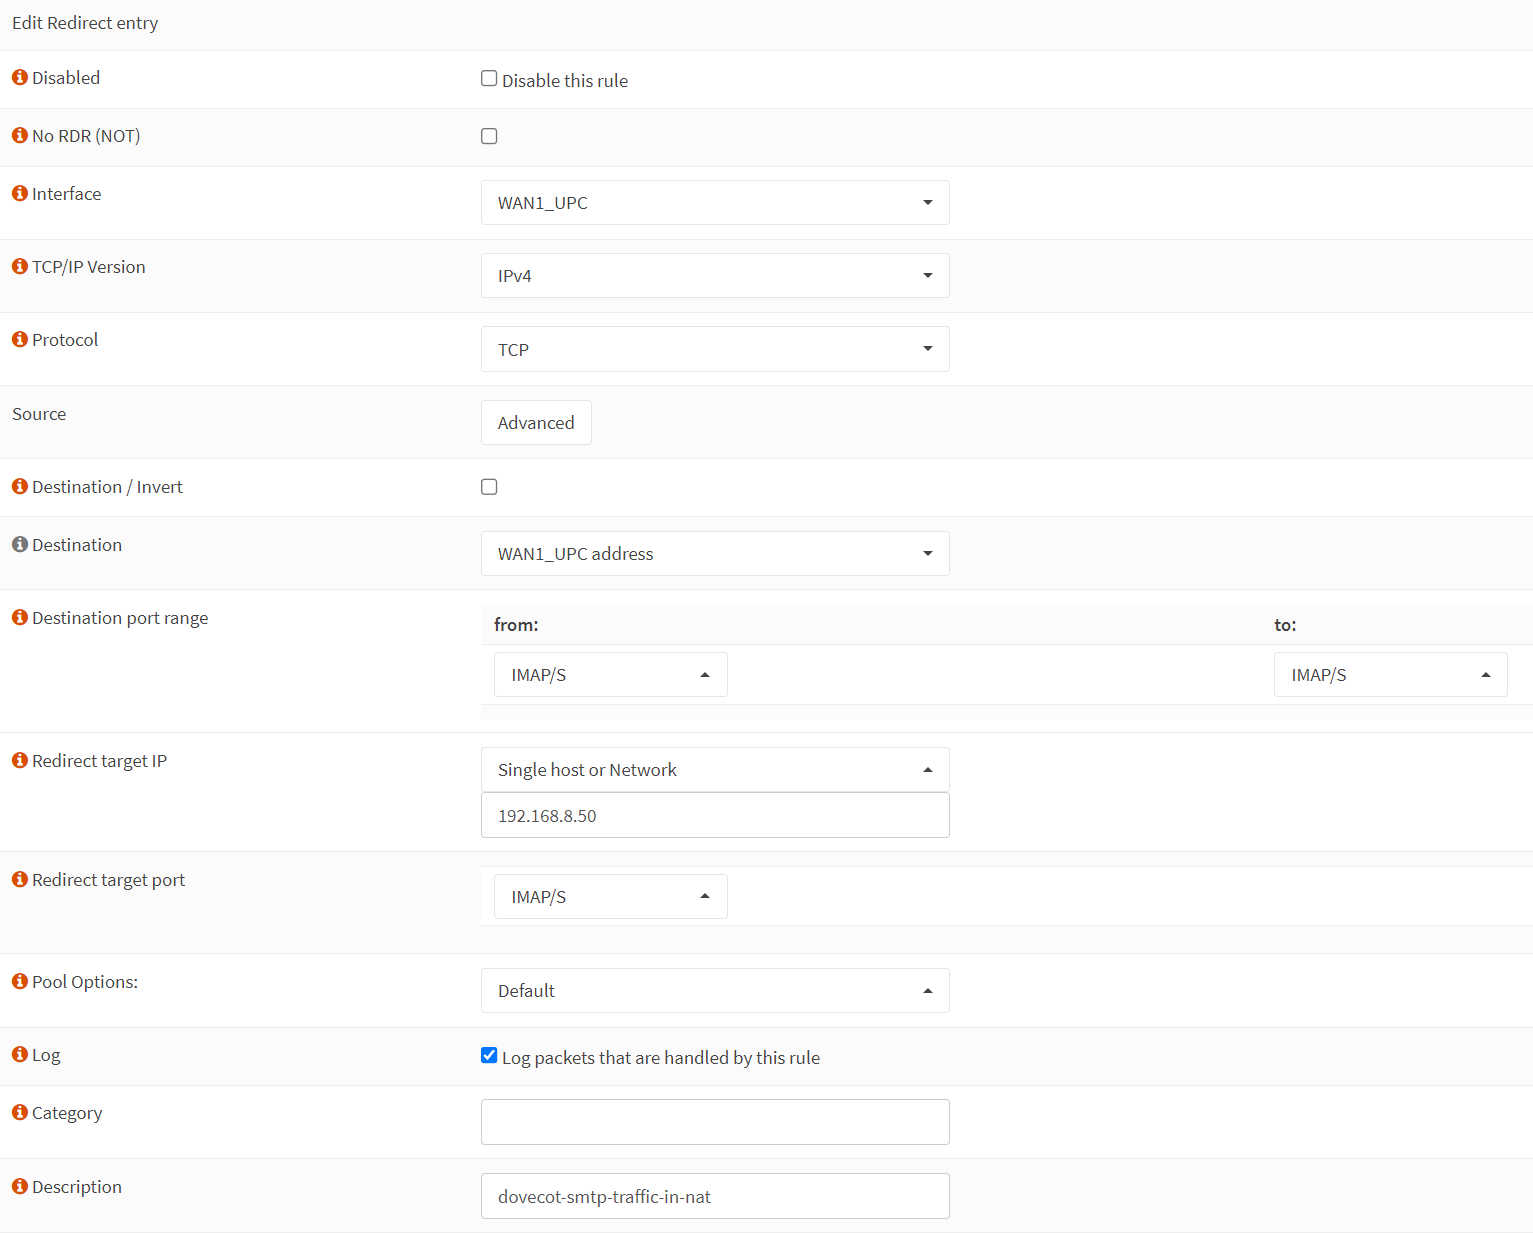
  • NAT rule for port 993 (IMAPS)
    • On OPNSense, go to Firewall → NAT → Port Forward and create a new rule.
    • Interface: your WAN
    • TCP/IP: IPv4
    • Protocol: TCP
    • Destination: WAN address
    • Destination port range: IMAPS to IMAPS (or select other and manually type in 993 to 993)
    • Redirect target IP: the IP of your mail server
    • Redirect target port: IMAPS
    • Log it in for debugging purposes
    • Everything else leave as default or tweak as per your needs.
OPNSense Port Forward for Port 993 -IMAPS
  • NAT Rule for port 465 (SMPTS)
    • As above, use port 465 or SMTPS
OPNSense Port Forward for Port 465 – SMTPS out
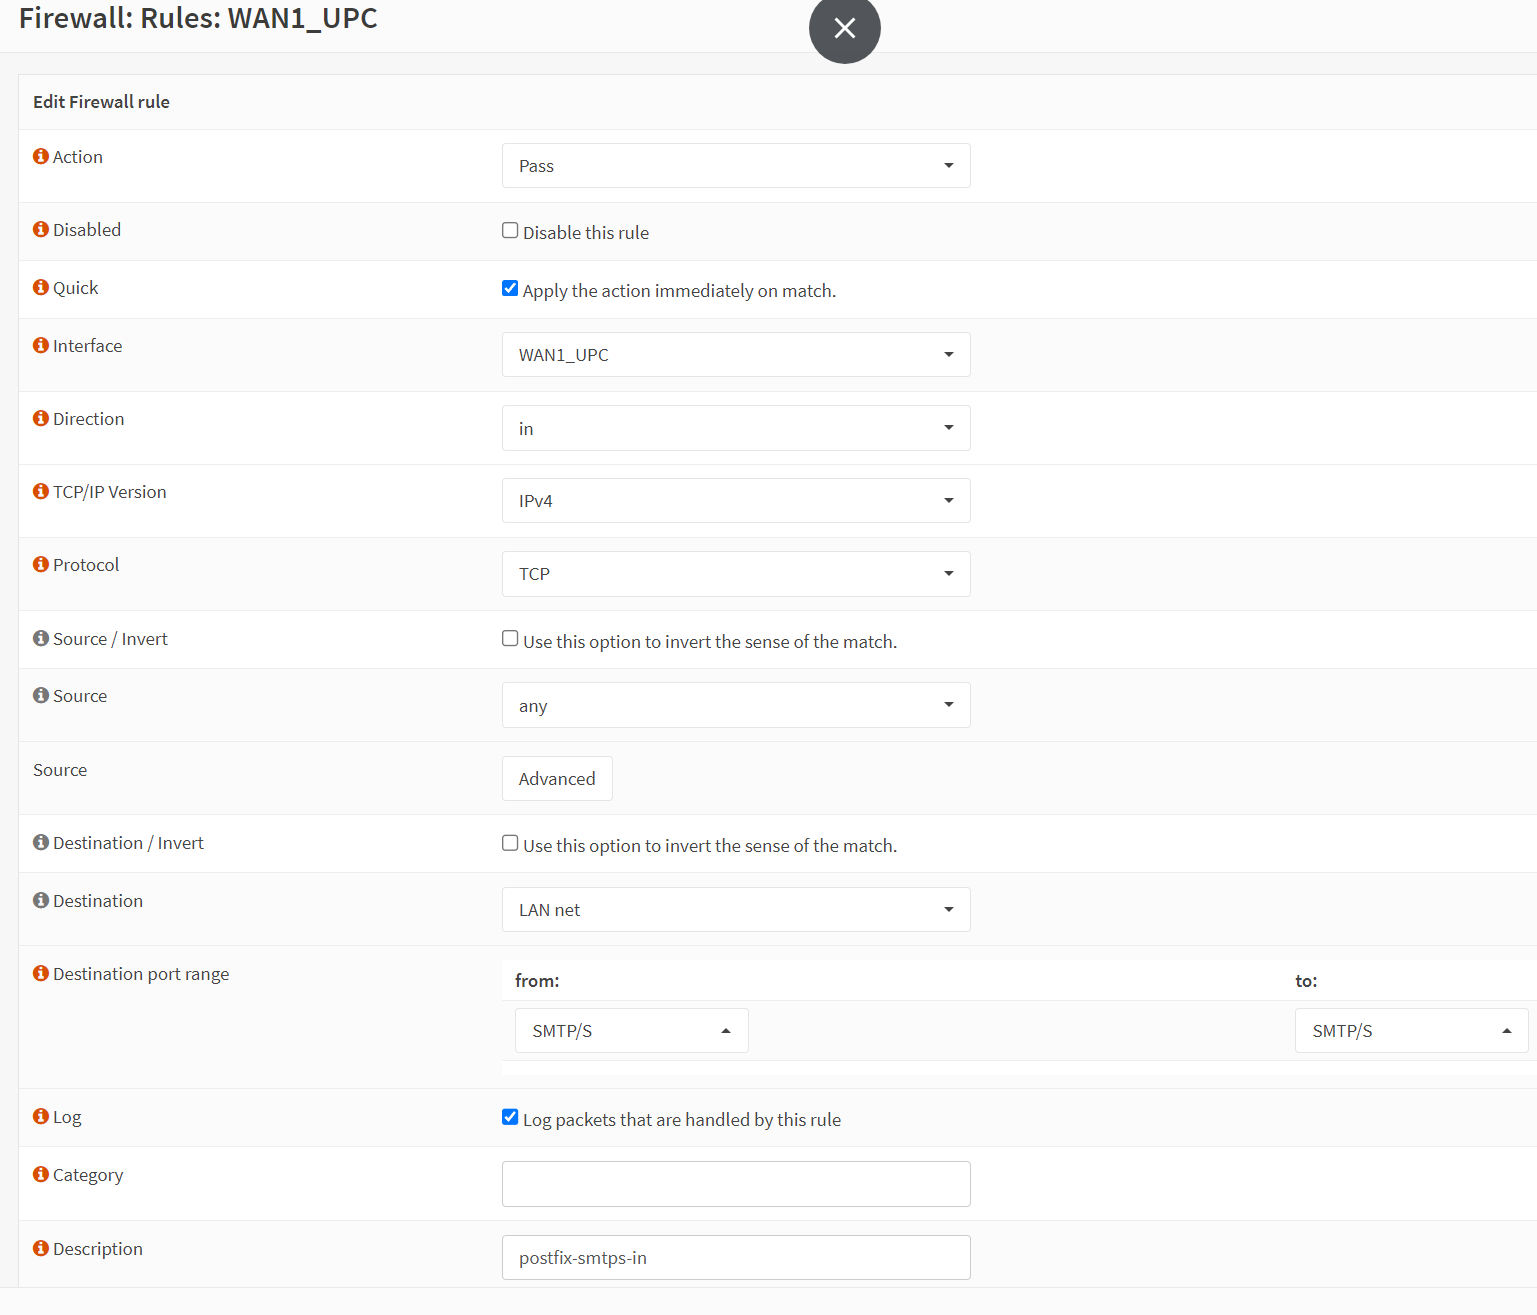
  • Upon creation of the NAT rules, remember to click on the ‘Apply’ button in OPNSense to activate it.
Firewall - Ports to open on your firewall (OPNSense)
Dynamic DNS for our ‘mail’ DNS record (CloudFlare with OPNSense)
Go back to course overview: Install iRedMail Mail Server As Proxmox VM With OPNSense As Firewall

Leave a Comment Cancel Reply

Save my name, email, and website in this browser for the next time I comment.

This site uses Akismet to reduce spam. Learn how your comment data is processed.

0 FacebookWhatsappEmail

Course Steps

  1. Starting Point and Considerations
  2. Pointing Your MX Records (DNS)
  3. Generic VM Installation (Proxmox)
  4. Firewall - static DHCP assignment (OPNsense)
  5. Firewall - Ports to open on your firewall (OPNSense)
  6. Fiirewall- Set Up NAT Rules (OPNSense)
  7. Dynamic DNS for our ‘mail’ DNS record (CloudFlare with OPNSense)
  8. Get SSL Certificate on OPNSense for Web Services (CloudFlare)
  9. HAProxy Set Up - SSL termination (OPNSense)
  10. Services To Be Installed On Our Mail Server (OPTIONAL)
  11. iRedMail installation (Debian)
  12. Nginx Configuration (Debian)
  13. Access iRedAdmin
  14. Configure Roundcube
  15. CertBot Certificate Creation
  16. Apply Certificates - Nginx
  17. A Theory Crash Course On Postfix (OPTIONAL)
  18. Securing Your Mail Server (Postfix)
  19. SMTP Relay With Brevo
  20. Testing your outgoing email ranking
  21. Connect Your Device To The Mail Server Via Email Client
Previous Next

Recent Comments

  • Jan Bachelor on Dynamic DNS Set Up with DuckDNS on OPNSenseHi Jake, that's awesome, congratulations on getting…
  • Jake on Dynamic DNS Set Up with DuckDNS on OPNSensefollowed guide above to the T and all is working. i…
  • Fastbrain on Dynamic DNS Set Up with DuckDNS on OPNSenseThanks for the guide. For some reason, after follow…

Other courses

Install iRedMail Mail Server As Proxmox VM With...

October 31, 2024

Remote Bucket Storage for Proxmox VM Backups

August 16, 2024

Concur Alternative: Import Employees’ Credit Card Expenses to...

January 19, 2024

Create an automated Gravity workflow that will allow...

January 19, 2024

Dynamically Populate Gravity Forms from Google Sheets (GSheets...

March 16, 2021
Bachelor Tech
  • Home
  • Tutorials
  • Portfolio
  • About Jan
  • Contact Jan

Recent Posts

  • How to join two Proxmox nodes into a cluster (PVE 8.x)

  • How to Rename a Proxmox Node

  • How to mount an NFS share on an Android box

Facebook Twitter Instagram Pinterest Linkedin Youtube

All Rights Reserved. The theme was customized from Soledad, see PenciDesign