Bachelor Tech
  • Home
  • Tutorials
  • Portfolio
  • About Jan
  • Contact Jan

Dynamic DNS for our ‘mail’ DNS record (CloudFlare with OPNSense)

by Jan Bachelor October 31, 2024
  • In order to make sure that our mail server is reachable even if our ISP changes the public-facing IP address, you can leverage OPNSense’s DDNS service with CloudFlare.
  • In CloudFlare, create a token that can handle records for your domain:
CloudFlare – Create an API Token
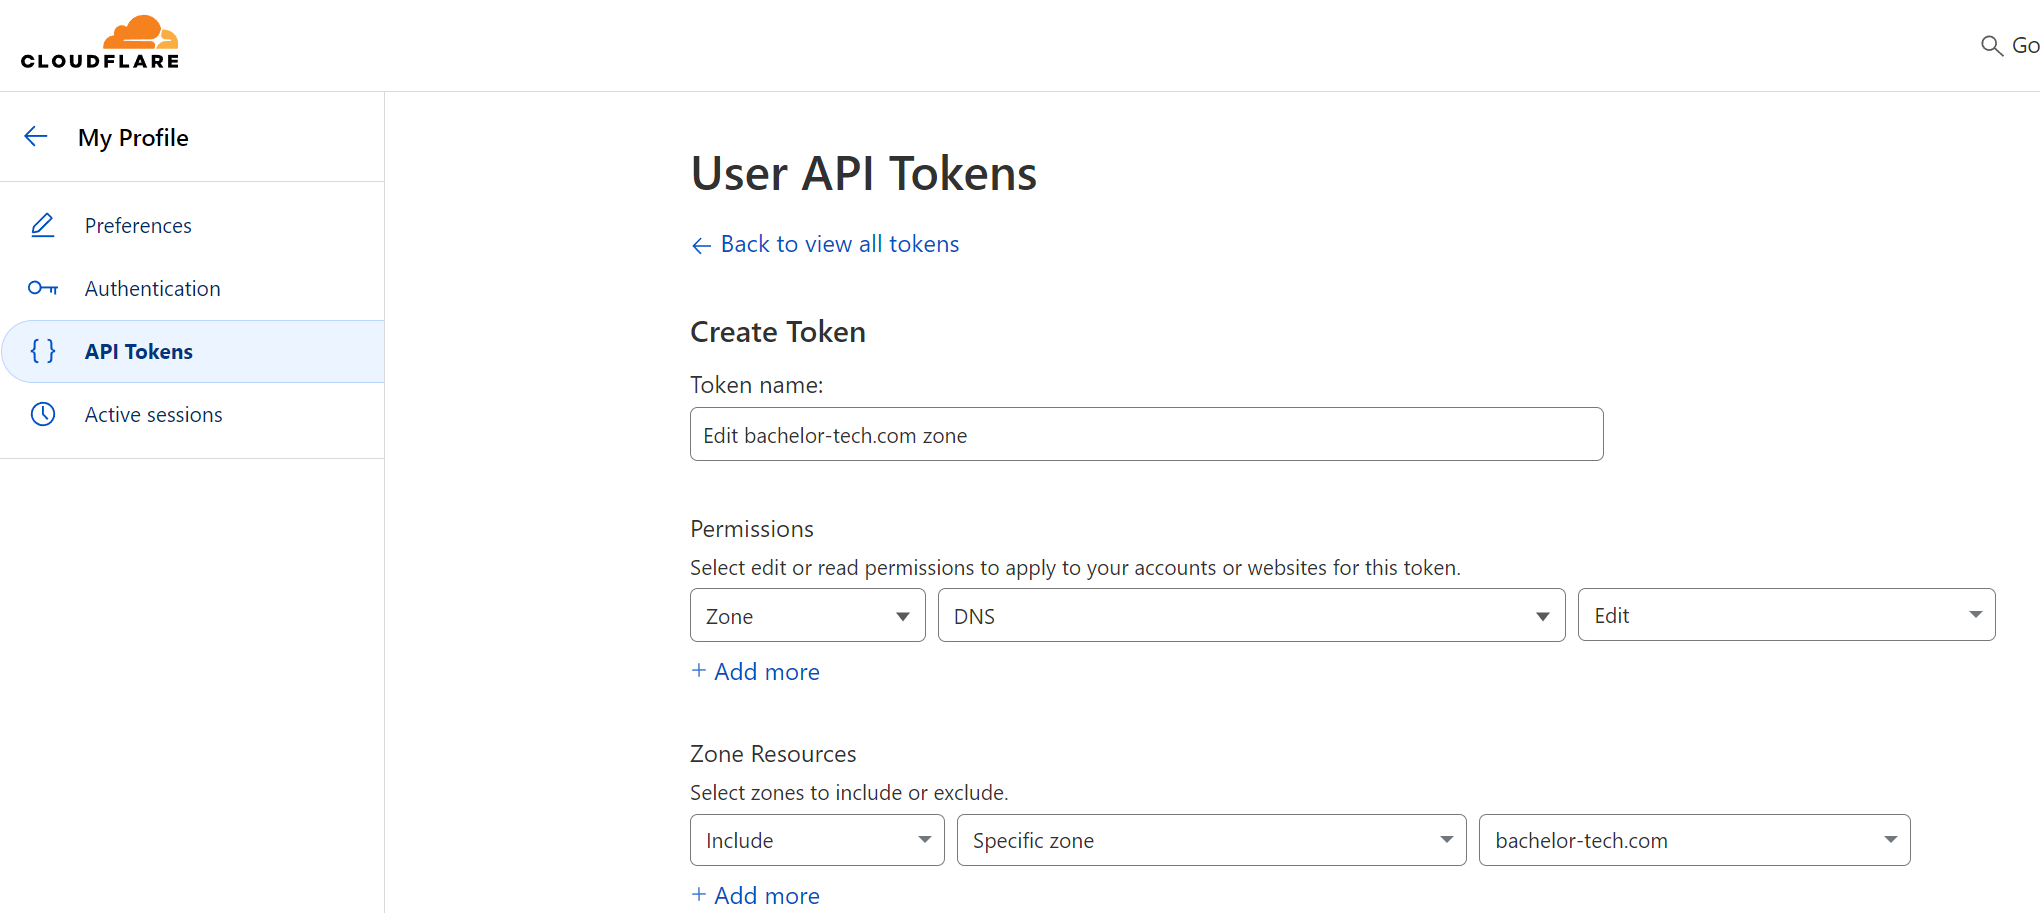
  • Confirm the creation of the token and save it somewhere safe.
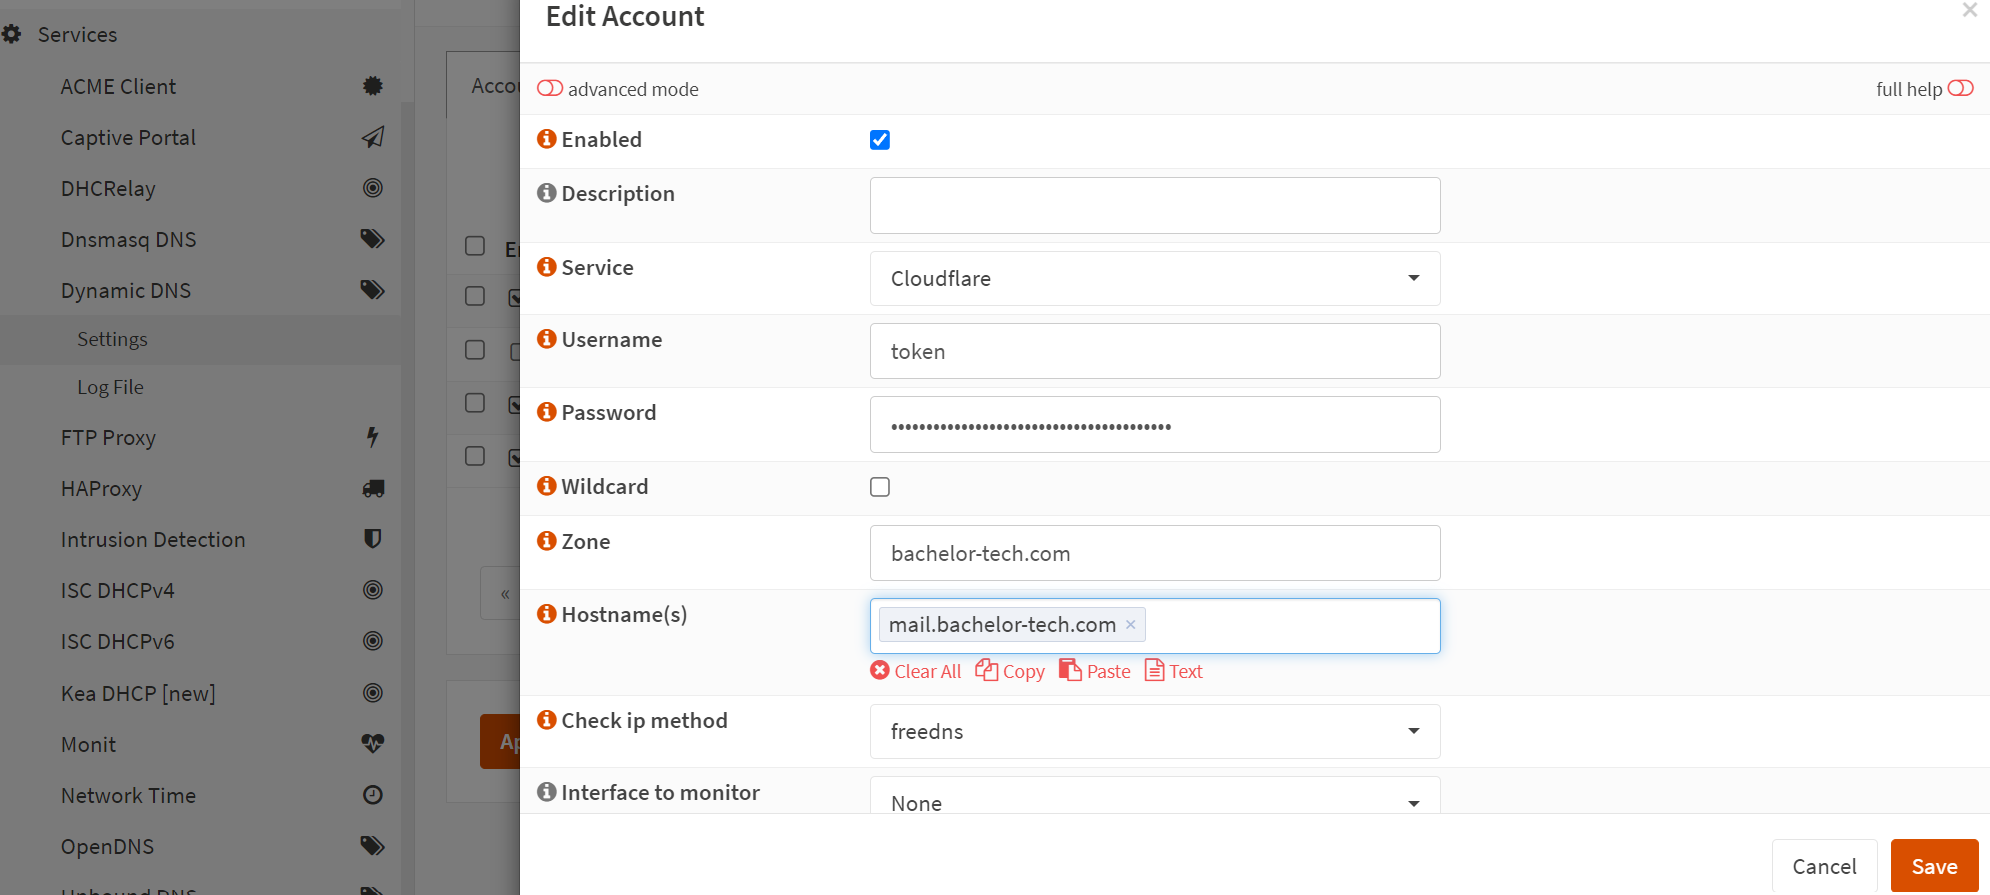
  • In OPSense, go to Services → Dynamic DNS → Settings → and click on the + sign.
  • From the list, choose:
    • Service: CloudFlare
    • Username: the word ‘token’
    • Password: the long token ID that you have received from CloudFlare
    • Zone: your domain’s name
    • Hostname: the A or CNAME record that you want to edit
    • Check ip method – use ‘freedns’
OPNSense – Dynamic DNS Set Up
  • Once done, click on the ‘Apply’ button and check the Log file under Settings to see that it completed successfully.
  • You can even change the IP in CloudFlare to something else and wait 1-2 minutes to see that it changes in CloudFlare. Cool, hmm?
Fiirewall- Set Up NAT Rules (OPNSense)
Get SSL Certificate on OPNSense for Web Services (CloudFlare)
Go back to course overview: Install iRedMail Mail Server As Proxmox VM With OPNSense As Firewall

Leave a Comment Cancel Reply

Save my name, email, and website in this browser for the next time I comment.

This site uses Akismet to reduce spam. Learn how your comment data is processed.

0 FacebookWhatsappEmail

Course Steps

  1. Starting Point and Considerations
  2. Pointing Your MX Records (DNS)
  3. Generic VM Installation (Proxmox)
  4. Firewall - static DHCP assignment (OPNsense)
  5. Firewall - Ports to open on your firewall (OPNSense)
  6. Fiirewall- Set Up NAT Rules (OPNSense)
  7. Dynamic DNS for our ‘mail’ DNS record (CloudFlare with OPNSense)
  8. Get SSL Certificate on OPNSense for Web Services (CloudFlare)
  9. HAProxy Set Up - SSL termination (OPNSense)
  10. Services To Be Installed On Our Mail Server (OPTIONAL)
  11. iRedMail installation (Debian)
  12. Nginx Configuration (Debian)
  13. Access iRedAdmin
  14. Configure Roundcube
  15. CertBot Certificate Creation
  16. Apply Certificates - Nginx
  17. A Theory Crash Course On Postfix (OPTIONAL)
  18. Securing Your Mail Server (Postfix)
  19. SMTP Relay With Brevo
  20. Testing your outgoing email ranking
  21. Connect Your Device To The Mail Server Via Email Client
Previous Next

Recent Comments

  • Jan Bachelor on Dynamic DNS Set Up with DuckDNS on OPNSenseHi Jake, that's awesome, congratulations on getting…
  • Jake on Dynamic DNS Set Up with DuckDNS on OPNSensefollowed guide above to the T and all is working. i…
  • Fastbrain on Dynamic DNS Set Up with DuckDNS on OPNSenseThanks for the guide. For some reason, after follow…

Other courses

Install iRedMail Mail Server As Proxmox VM With...

October 31, 2024

Remote Bucket Storage for Proxmox VM Backups

August 16, 2024

Concur Alternative: Import Employees’ Credit Card Expenses to...

January 19, 2024

Create an automated Gravity workflow that will allow...

January 19, 2024

Dynamically Populate Gravity Forms from Google Sheets (GSheets...

March 16, 2021
Bachelor Tech
  • Home
  • Tutorials
  • Portfolio
  • About Jan
  • Contact Jan

Recent Posts

  • How to join two Proxmox nodes into a cluster (PVE 8.x)

  • How to Rename a Proxmox Node

  • How to mount an NFS share on an Android box

Facebook Twitter Instagram Pinterest Linkedin Youtube

All Rights Reserved. The theme was customized from Soledad, see PenciDesign