Finally, we are getting to the main part of this tutorial! The idea is that on both LAN and WAN interfaces, there is one IP that acts as a gateway on which only the main OPSense unit is listening and the other ones are on stand-by via pfSync. In a failover scenario, the ‘backup’ unit takes over the IP address if the primary device fails. This ensures continuous availability of services. The communication in the form of regular heartbeat takes place from the interface towards the firewall and typically needs to be explicitly allowed by a firewall rule. So what is CARP and the other relevant terms we should know?
Explanation of terms
- CARP (Common Address Redundancy Protocol): It is used to allow multiple devices to share a single IP address. It operates on the IP protocol 112, which is derived from OpenBSD.
- advbase: The base internal at which CARP advertisements are sent. Should be the same on each CARP virtual line across OPNSense boxes. If it differs then you may experience sync flapping (regular undesired fail-overs).
- advskew: A fractional delay (1/256 seconds) that helps to indicate which unit should be the main one (’master’) once back online. The value is between 1 to 100.
What are we trying to achieve here with CARP?
- On the WAN interface(s), we will want the WAN router to forward traffic to just one IP address on which either OPNSense will be listening (only one is ‘main’, any other is ‘backup’ – if we have more units, then one is ‘main’ and all others are ‘backups’). For example, if on your WAN interface, your OPNSense1 box has a statically assigned IP of 192.168.70.10 and OPNSense2 box uses 192.168.70.11, then the WAN router would be forwarding web traffic (HTTP and HTTPS) to a shared interface of 192.168.70.254, for example.
- On the LAN interface, we would want the DHCP (and likely also DNS) server to be the shared IP address for your hosts, as there can be only one gateway. For example, if your OPNsense1 host runs on 192.168.1.1 and the second one on 192.168.1.2, the shared interface can be 192.168.1.254.
- CARP traffic is always handled on the interface that we are ‘carping’, i.e. the WAN and LAN interfaces, never on the SYNC interface, which is used only for pfSync.
Firewall rules to set up for CARP
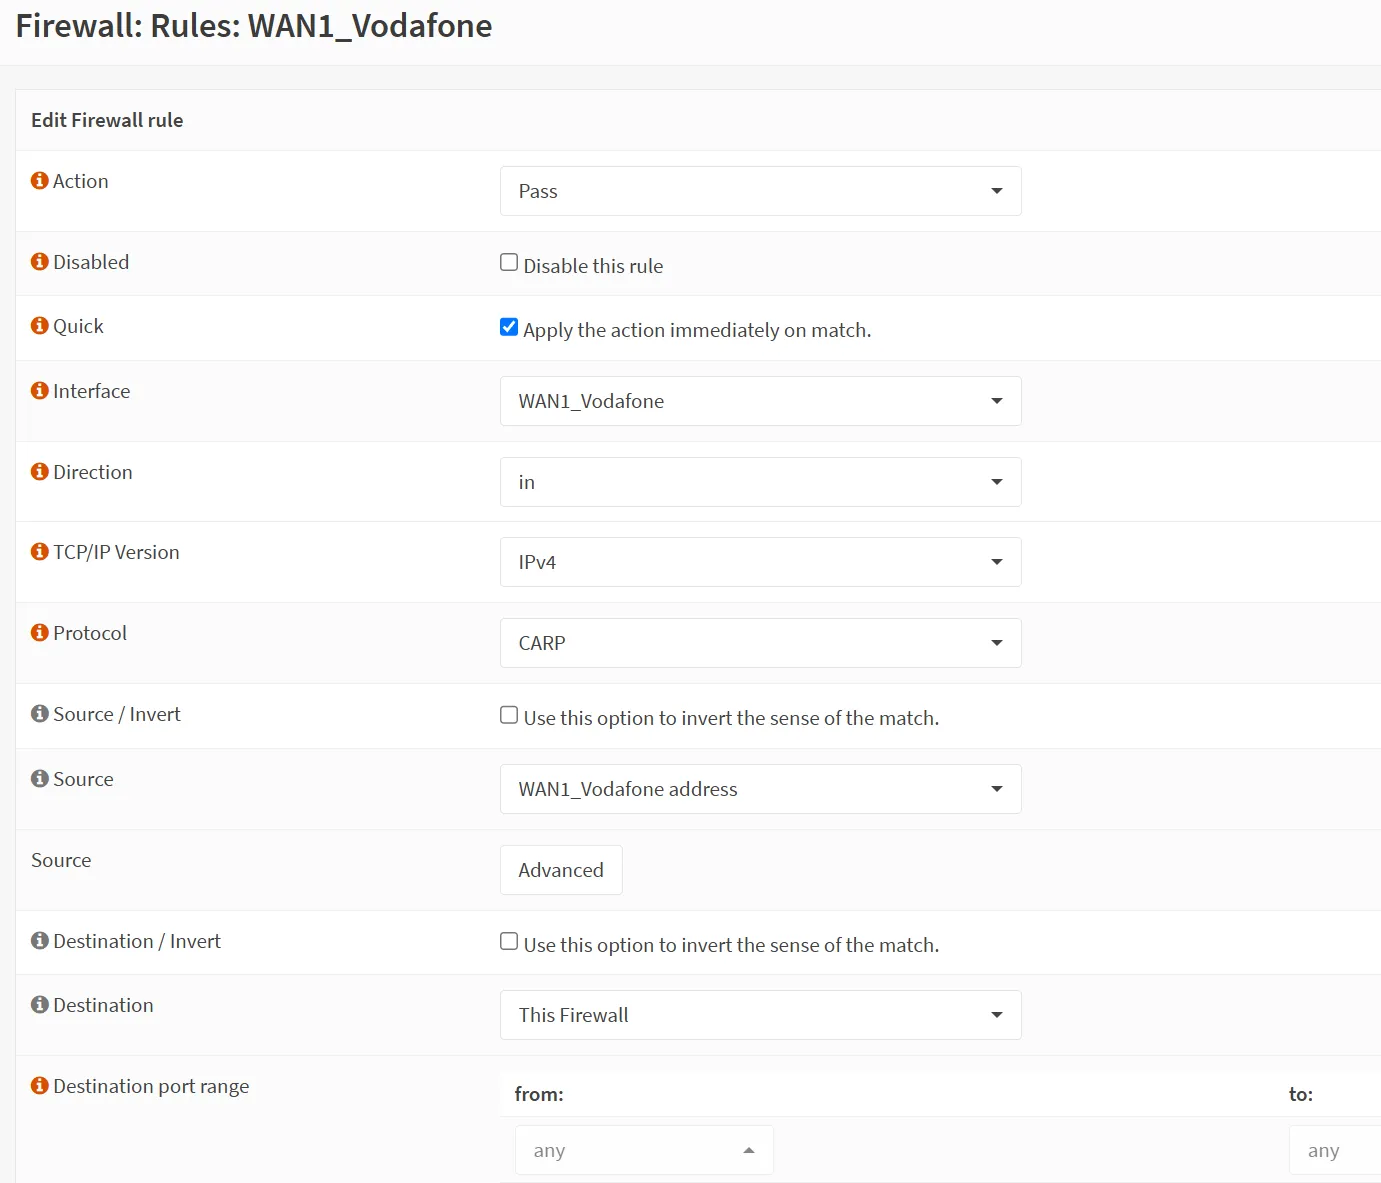
- To set up CARP, let us firstly set up firewall rules to allow CARP traffic on the respective interfaces. Go to ‘Firewall’ → ‘Rules’ → ‘WAN’ interface and click on the + sign.
- WAN CARP Rule
- Action: Pass
- Interface: WAN1
- Direction: in
- TCP/IP: IPv4
- Protocol: CARP
- Source: WAN1 net
- Destination: This Firewall
- Destination port: any
- Set up the exact same rule on your other OPNSense (backup) box (unless you have them syncing via XML-RPC already and thus the config can be synced over).
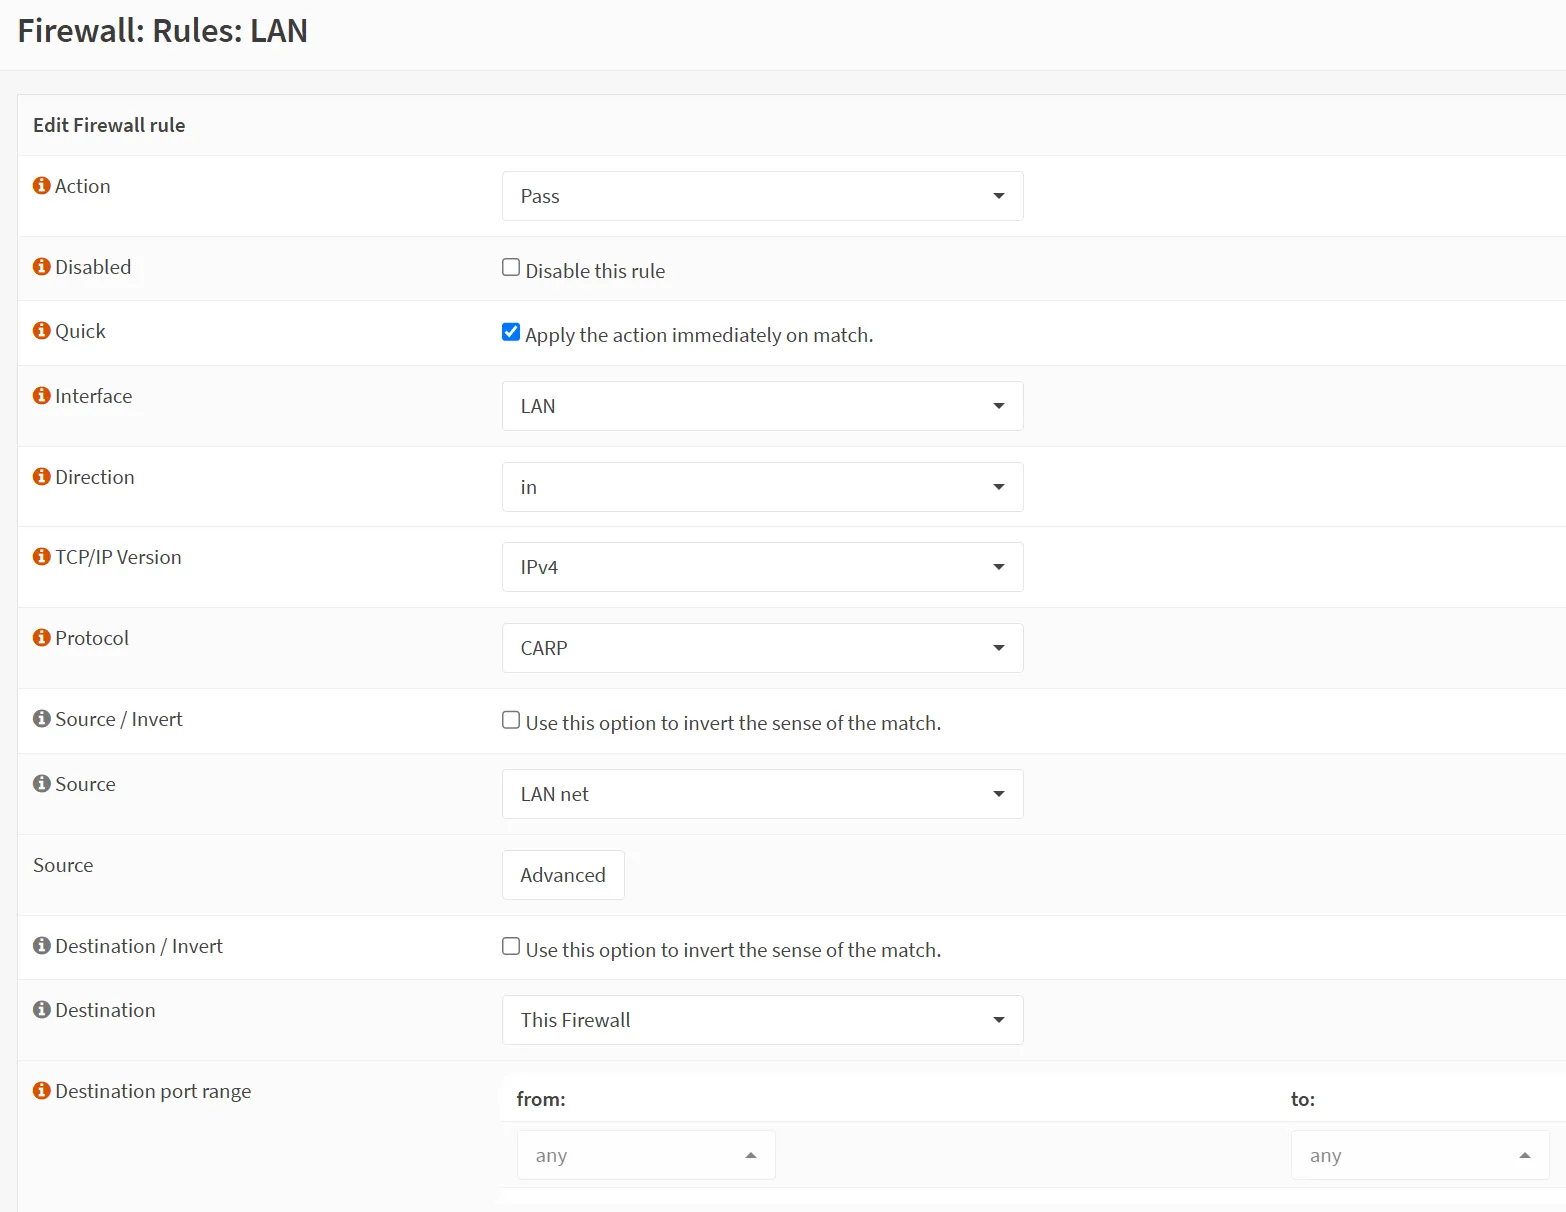
- Then, since we are on it, let us do the very same thing for the LAN interface. Just switch into ‘Firewall’ → ‘Rules’ → ‘LAN’ → click on the + sign.
- LAN CARP Rule:
- Action: Pass
- Interface: LAN
- Direction: in
- TCP/IP: IPv4
- Protocol: CARP
- Source: LAN net
- Destination: This Firewall
- Destination port: any
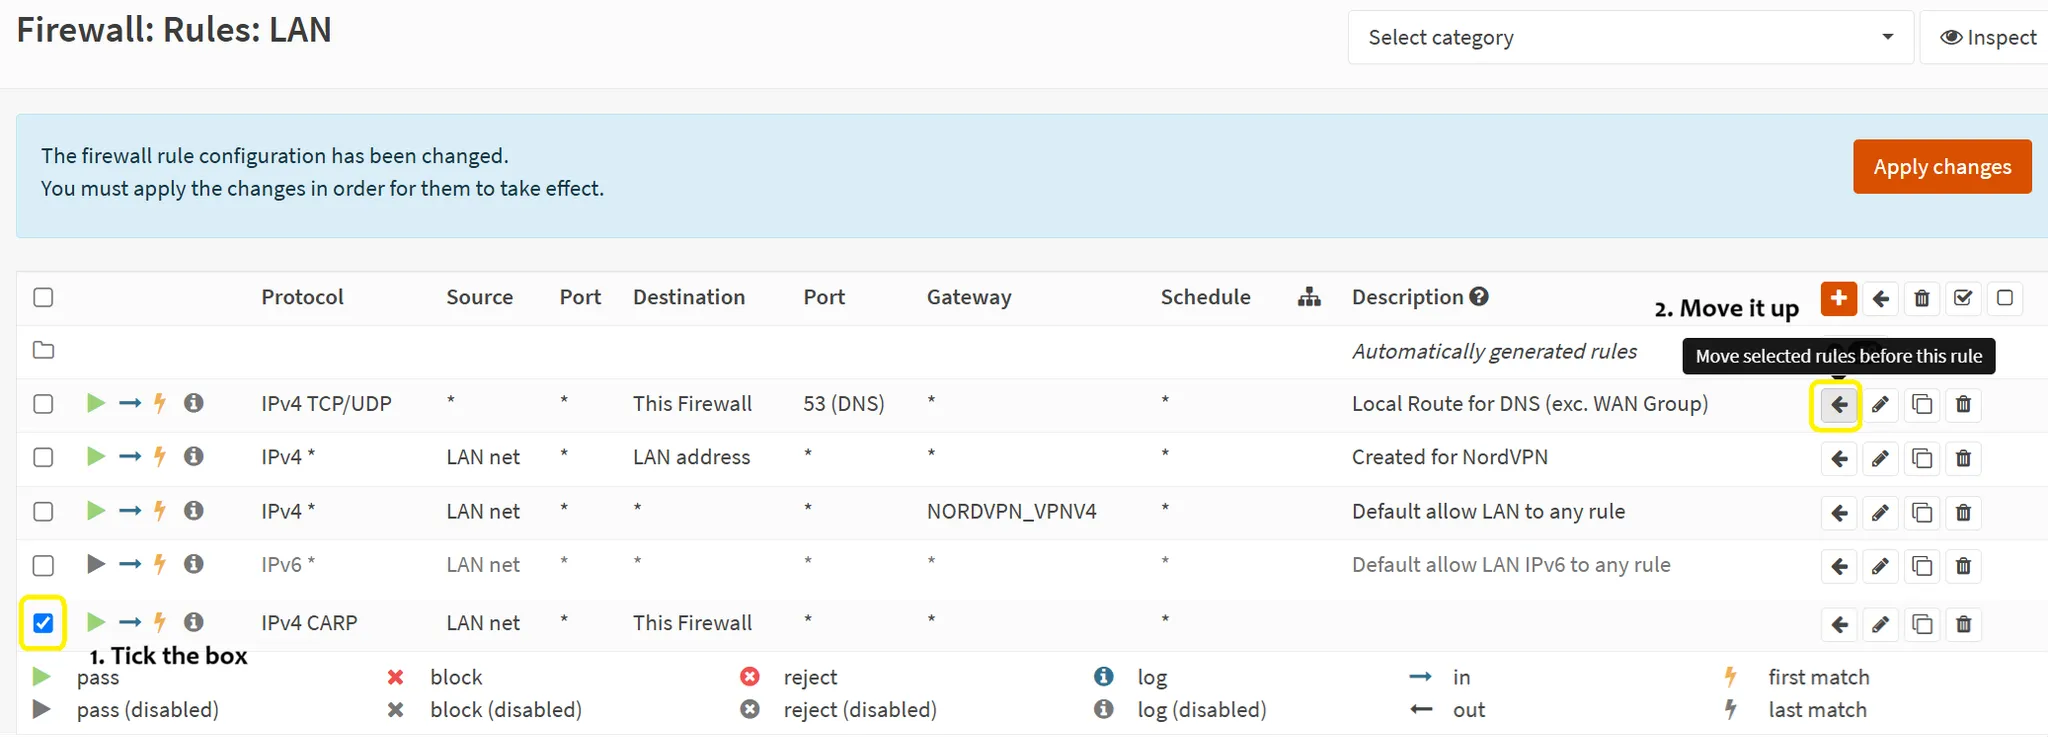
- You might ask why to create this rule if, usually, all traffic is already allowed on the LAN? Well, just in case. I also recommend increasing the priority for this rule on both interfaces. Why? Well, in case you create a rule later on that would trump this one and accidentally forward the traffic elsewhere.
Create virtual interface for LAN
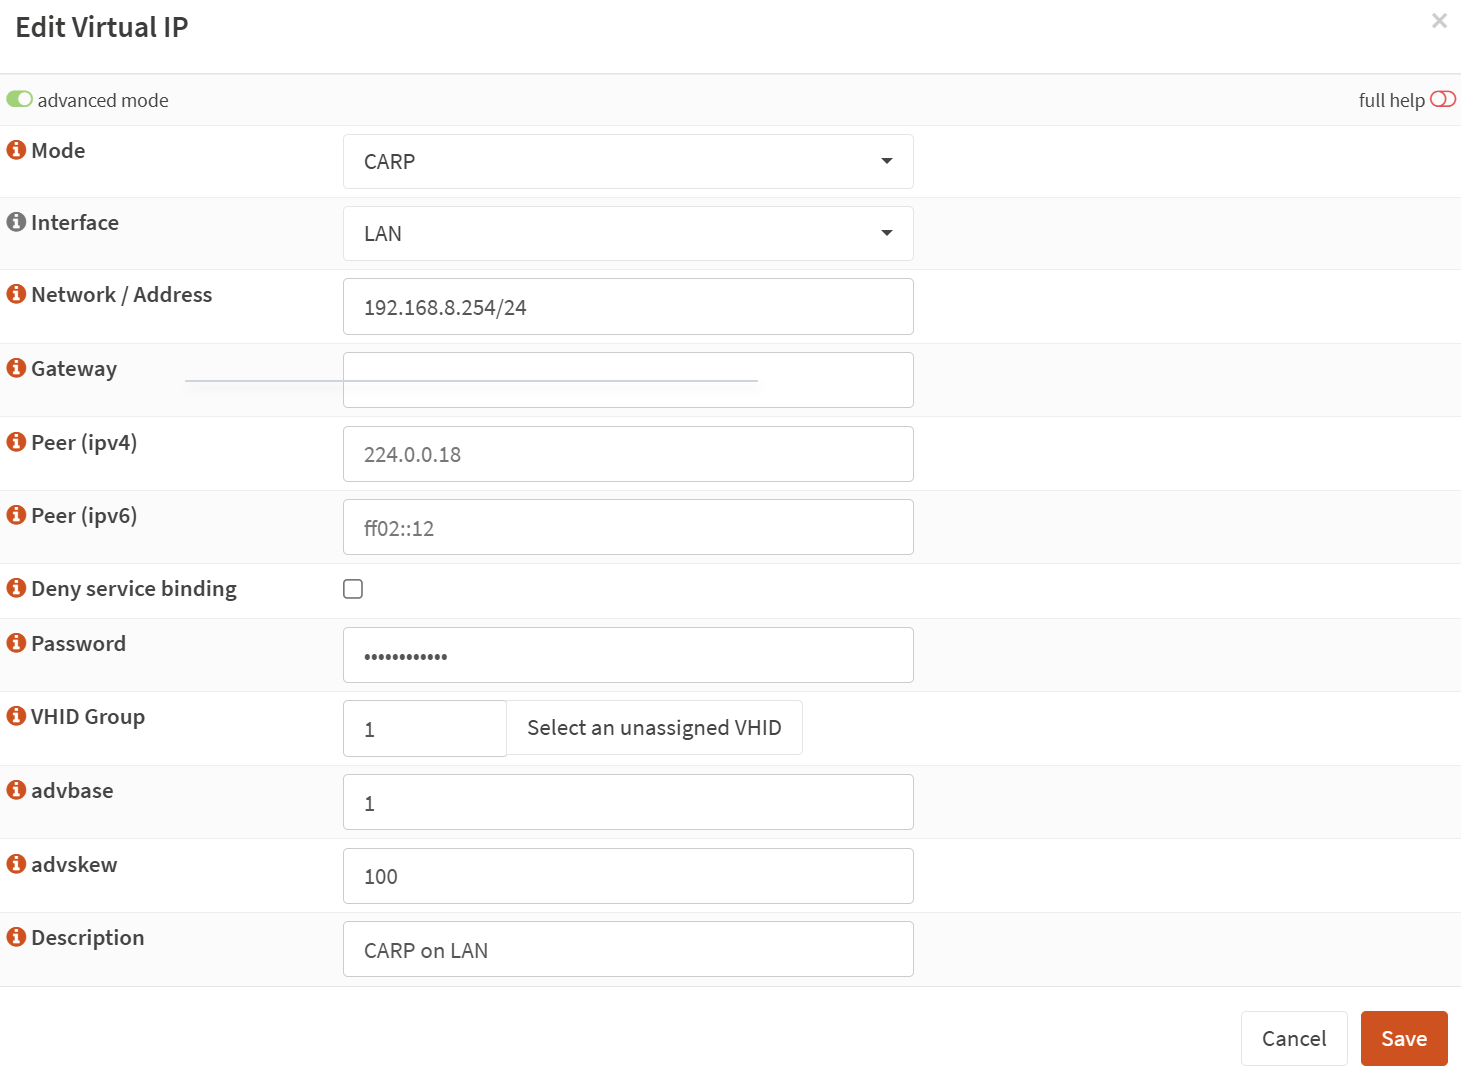
- Now let us create the actual virtual IPs for each interface. Let us start with LAN. On the main OPNSense unit, go to ‘Interfaces’ → ‘Virtual IPs’ → ‘Settings’ and create a new rule. Expand the ‘advanced mode’ to see additional options.
- Mode: CARP
- Interface: LAN
- Network address: your LAN / subnet, such as 192.168.1.254/24
- Peer (ipv4 + ipv6): Leave blank for default.
- Password: A unique password for this virtual IP line. You will use the same on other OPNSense box(es).
- VHID Group: if you do not have any yet, then 1. Has to be unique for each virtual IP line.
- advbase: 1 (= every one second)
- adskew: 1 for primary and 50-80 recommended for the backup unit. If you have more backups, then spread it more like 1 (primary) – 30 (secondary) – 50 (tertiary).

- Do the same on the backup unit(s), just increase the adskew values to give the main unit higher priority, so that if it comes back online after a fail-over, the original backup would go back to being a backup.
- Then go to the ‘Virtual IPs’ → ‘Status’ section to see if the main unit is really ‘Master’ and the secondary unit is ‘Backup. If not, on the backup unit, click on the ‘Temporarily disable CARP’ and then re-enable it to force a re-sync.
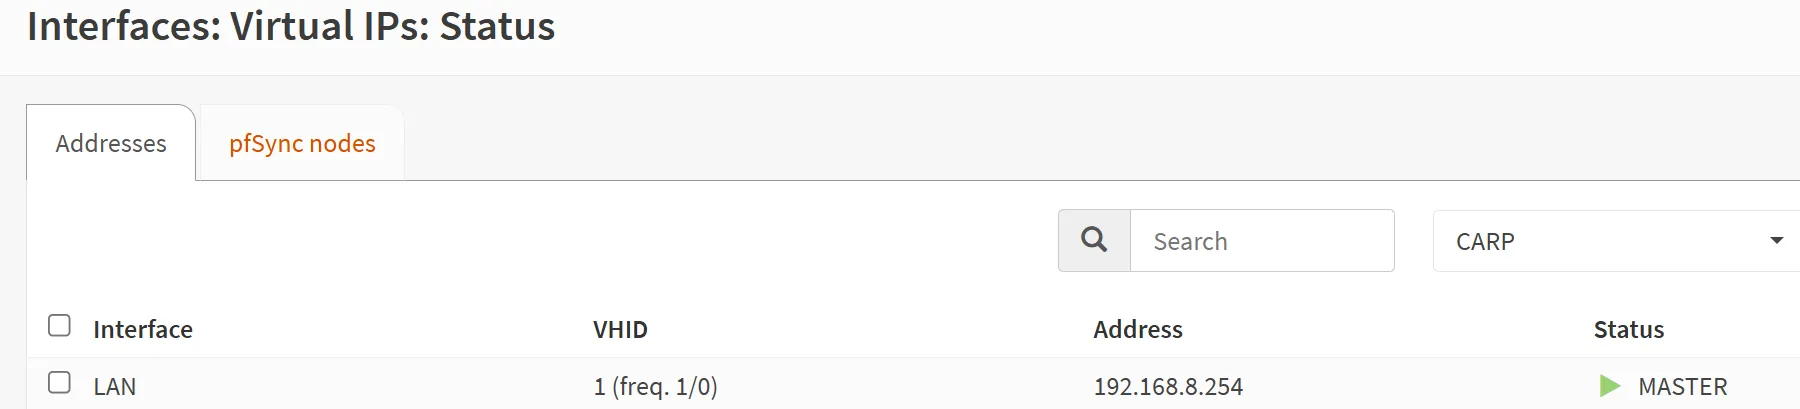
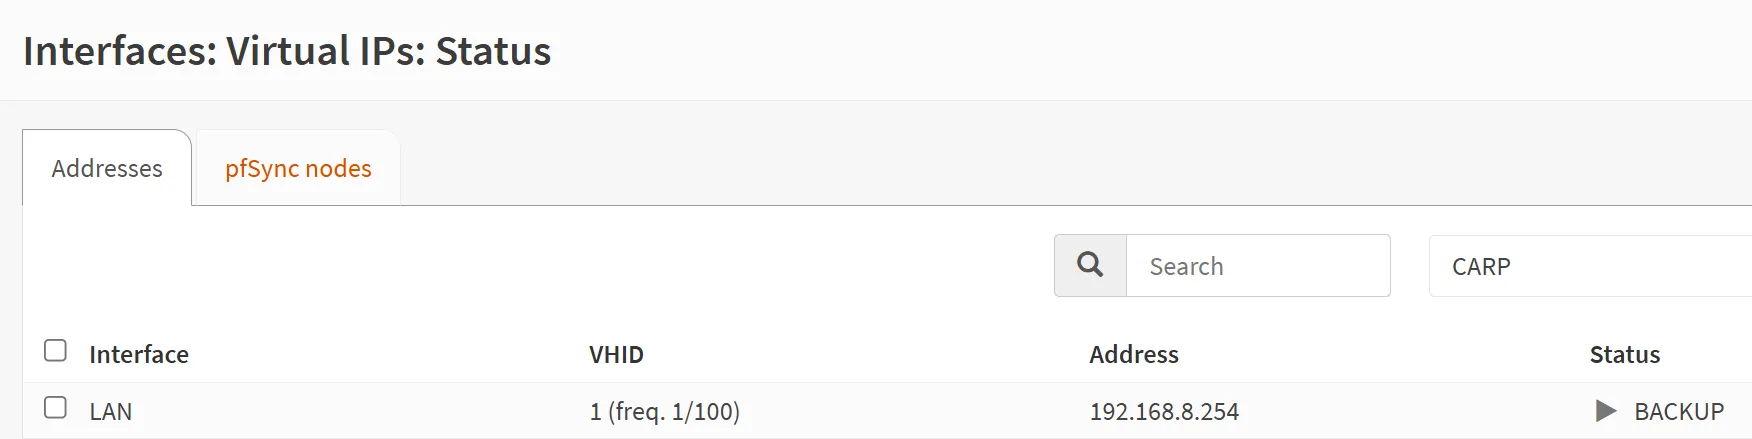
- In case they are both ‘Master’, then likely, CARP communication on the interface is being blocked. Check the rules.
- Once happy with it, switch gateway + local DNS resolver information on any devices (virtual servers and containers) that have a staticaly assigned gateway + on your DHCP.
- On OPNSense, go to ‘Services’ → ‘ISC DHCPv4’ → [LAN] → change ‘Gateway’ to the virtual IP.
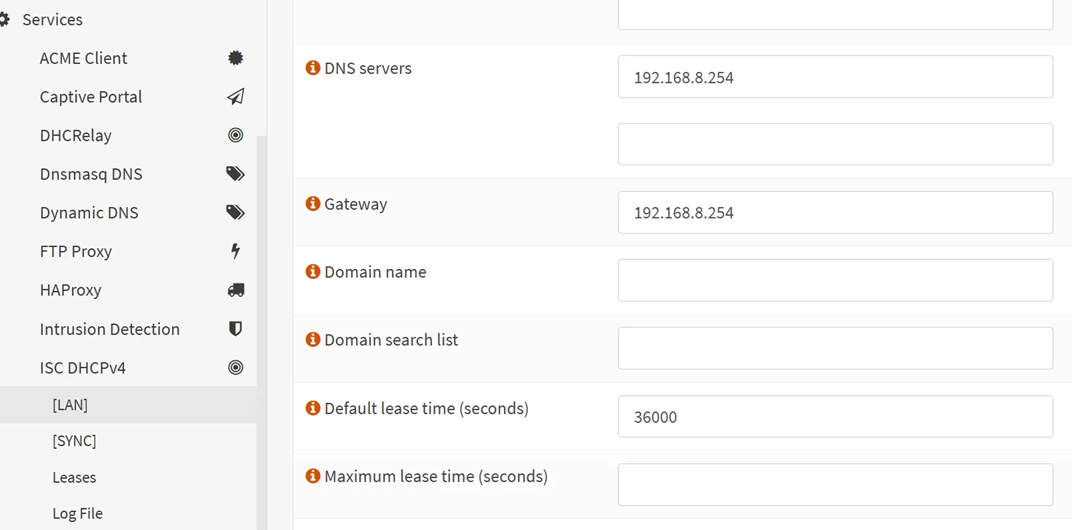
- Now your devices connect to the virtual IP address and no longer to the specific OPNSense box! They do not need to know which one is active at that time, which is the beauty of this abstraction layer.
- For devices connected via DHCP, they will get the new address when rebooted or after their previous DHCP lease expires, which could be a few hours or even days.
- For devices that have static configuration, you will need to change the settings manually. Or better, record their MAC addresses and create a static assignment in OPNSense for them, so that you can still keep them on DHCP while using the benefits of assigned configuration in OPNSense.
Create virtual interface for WAN
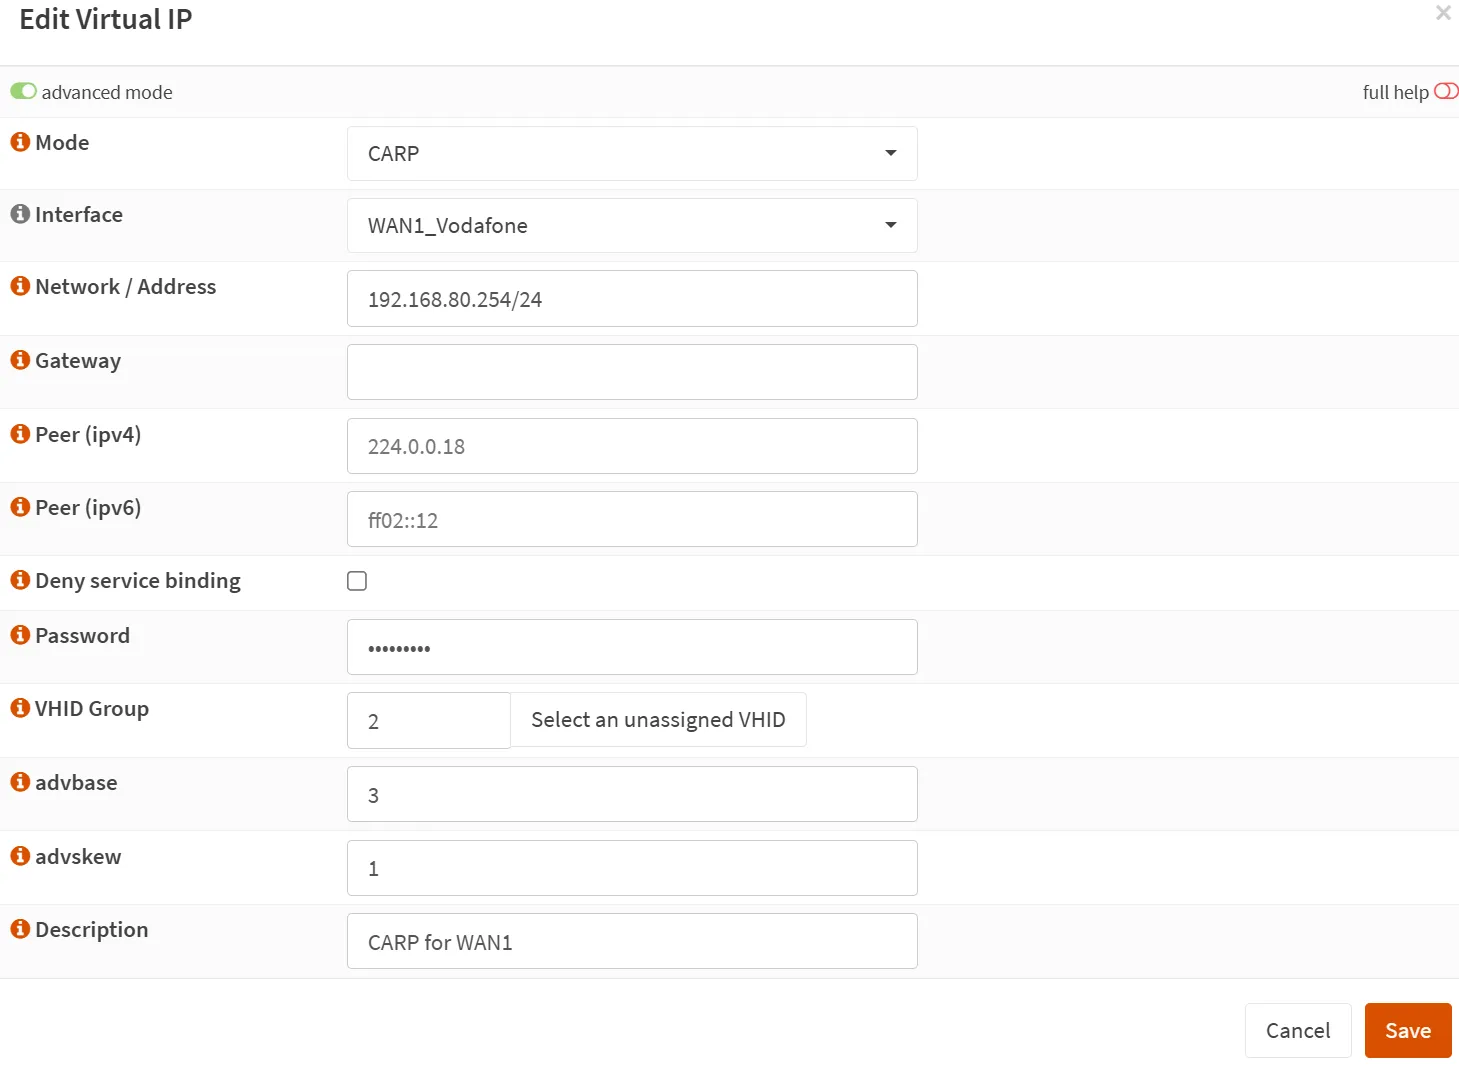
- Let’s do the same for the WAN interface. On the main OPNSense unit, go to ‘Interfaces’ → ‘Virtual IPs’ → ‘Settings’ and create a new rule.
- Mode: CARP
- Interface: WAN1
- Network address: your WAN / subnet, such as 192.168.10.254/24
- Peer (ipv4 + ipv6): Leave blank for default.
- Password: A unique password for this virtual IP line. You will use the same on other OPNSense box(es).
- VHID Group: if you do not have any yet, then 2. Has to be unique for each virtual IP line.
- advbase: 3 (= every three seconds)
- adskew: 1 for primary and 50-80 recommended for the backup unit. If you have more backups, then spread it more like 1 (primary) – 30 (secondary) – 50 (tertiary).
- Again, to the same on the backup unit(s) with a higher advskew value and then check the ‘Status’ page.

- In case you are struggling to make them sync (e.g. both appear as ‘Master’), it could be that the WAN router has its own firewall on or is not allowing the traffic. Also, ensure that traffic is not blocked on ‘private networks’ under ‘Interfaces’ → ‘WAN’ interface on all your OPNSense boxes.

- At this point it is important to verify what the WAN router settings are. We will need to log in and check the settings. Perhaps we can start setting it up from scratch as an example.