Bachelor Tech
  • Home
  • Tutorials
  • Portfolio
  • About Jan
  • Contact Jan

Mount Storage on Proxmox + Set up Regular Backups

by Jan Bachelor November 23, 2024

Assuming that you have already completed the installation of the ‘fuse3’ package and got the storage mounted in /mnt/gcp, you can now do the following:

  • On your computer, open Proxmox’s web interface and go to ‘
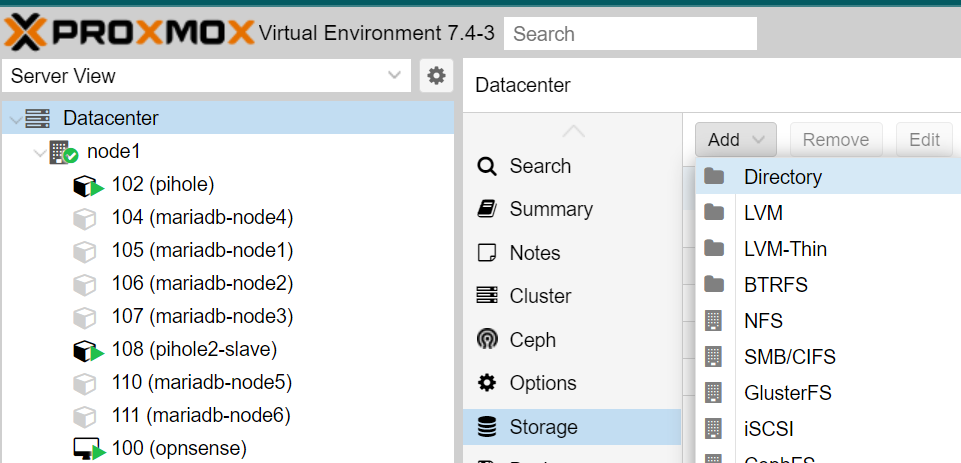
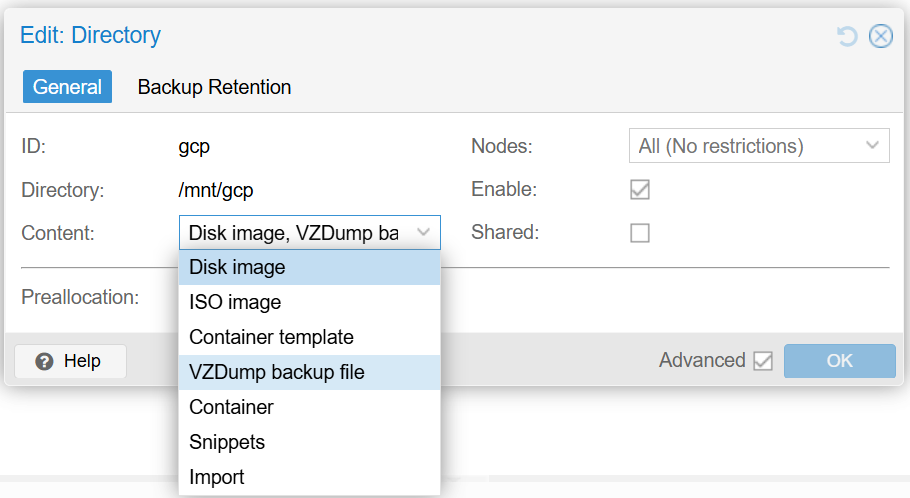
Datacenter‘ → ‘Storage‘ → Add. Choose ‘Directory’ as the option.
  • As ID, write a name that you will easily remember, such as ‘gcp’.
  • For Directory, enter the full path to the folder where the bucket is mounted, such as /mnt/gcp .
  • Make sure to select all at least ‘VZDump backups‘ from the list.
  • You can ignore the ‘Retention’ tab as we will configure it in another section.
Mount new storage into Proxmox as a directory
Allow at least VZDump backups on the remote storage
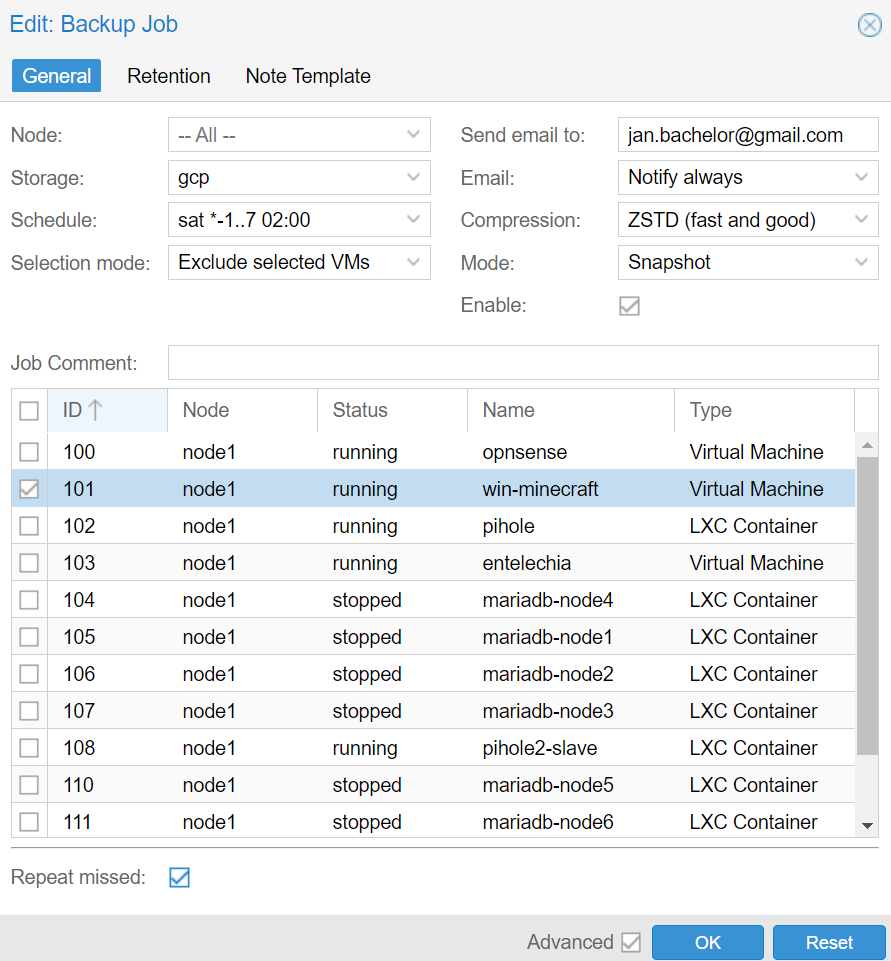
  • Once you confirm your selection, head to ‘Datacenter’ → ‘Backup’ → and click on the ‘Add’ button.
    • Storage → your newly added one cloud storage.
    • Schedule → best to choose a regular time in the night.
    • Selection mode → choose which VMs / containers you would like to have backed up (or, as I prefer, choose ‘Exclude selected VMs’, which means all but some that you do not want, which makes it more future proof).
    • Repeat missed → in case there is downtime, it is good to tick it
    • Then go to the ‘
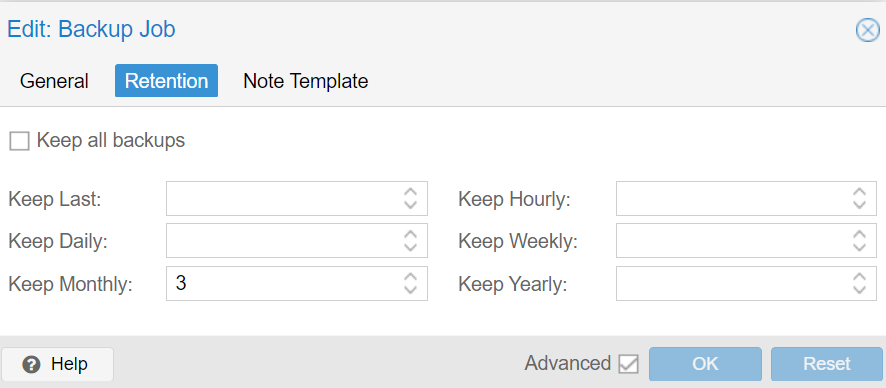
Retention’ tab to choose the lifecycle options of your backups. For example, if you run the remote backups monthly, you may wish to have a copy of the last three months in there.
Choose which VMs to include or exclude in your backups
Set up retention of your backups on Proxmox

It may be a good idea to run the first backup manually to see how it goes. If interested, I can update this guide with how to backup some of the Proxmox settings as well as how to run a restore from another node – let me know!

Auto-mount your bucket on reboot + log rotation (Ubuntu)
Go back to course overview: Remote Bucket Storage for Proxmox VM Backups

Leave a Comment Cancel Reply

Save my name, email, and website in this browser for the next time I comment.

This site uses Akismet to reduce spam. Learn how your comment data is processed.

0 FacebookWhatsappEmail

Course Steps

  1. Overview of Cloud Storage Providers’ Pricing
  2. Bucket Set Up - Google Archive Storage
  3. rClone Set up - connect to your bucket
  4. Auto-mount your bucket on reboot + log rotation (Ubuntu)
  5. Mount Storage on Proxmox + Set up Regular Backups
Previous Next

Recent Comments

  • Jan Bachelor on Dynamic DNS Set Up with DuckDNS on OPNSenseHi Jake, that's awesome, congratulations on getting…
  • Jake on Dynamic DNS Set Up with DuckDNS on OPNSensefollowed guide above to the T and all is working. i…
  • Fastbrain on Dynamic DNS Set Up with DuckDNS on OPNSenseThanks for the guide. For some reason, after follow…

Other courses

Install iRedMail Mail Server As Proxmox VM With...

October 31, 2024

Remote Bucket Storage for Proxmox VM Backups

August 16, 2024

Concur Alternative: Import Employees’ Credit Card Expenses to...

January 19, 2024

Create an automated Gravity workflow that will allow...

January 19, 2024

Dynamically Populate Gravity Forms from Google Sheets (GSheets...

March 16, 2021
Bachelor Tech
  • Home
  • Tutorials
  • Portfolio
  • About Jan
  • Contact Jan

Recent Posts

  • How to join two Proxmox nodes into a cluster (PVE 8.x)

  • How to Rename a Proxmox Node

  • How to mount an NFS share on an Android box

Facebook Twitter Instagram Pinterest Linkedin Youtube

All Rights Reserved. The theme was customized from Soledad, see PenciDesign