Bachelor Tech
  • Home
  • Tutorials
  • Portfolio
  • About Jan
  • Contact Jan

Get SSL Certificate on OPNSense for Web Services (CloudFlare)

by Jan Bachelor December 24, 2024
  • Whereas for postfix and dovecot (IMAP), we will use the OPNSense firewall and NAT rules to the mail server and terminate SSL there, we will terminate SSL on OPNSense using haproxy for the web services.
  • This is required if you run more than one website and want to use your public IP for those as well (rather than just running a TCP passthrough, which does not care about hostnames, since it is L4 vs L7).
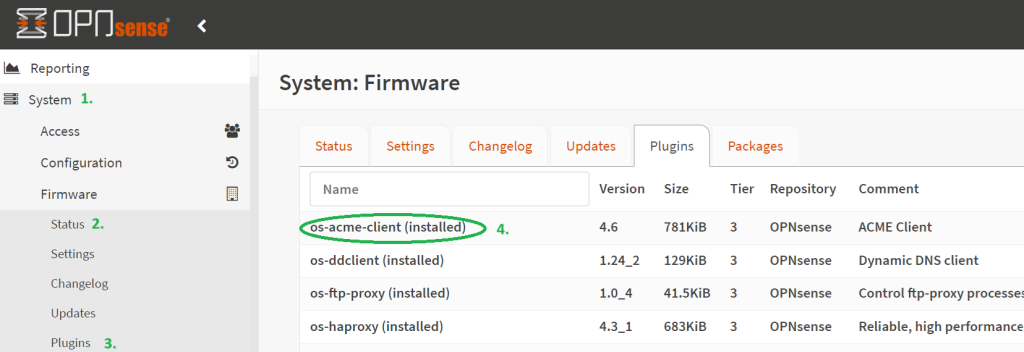
  • In OPNSense, go to System → Status → Plugins and make sure that the os-acme-client is installed (if not, click on the + sign to install it).
OPNSense – Install ACME Client
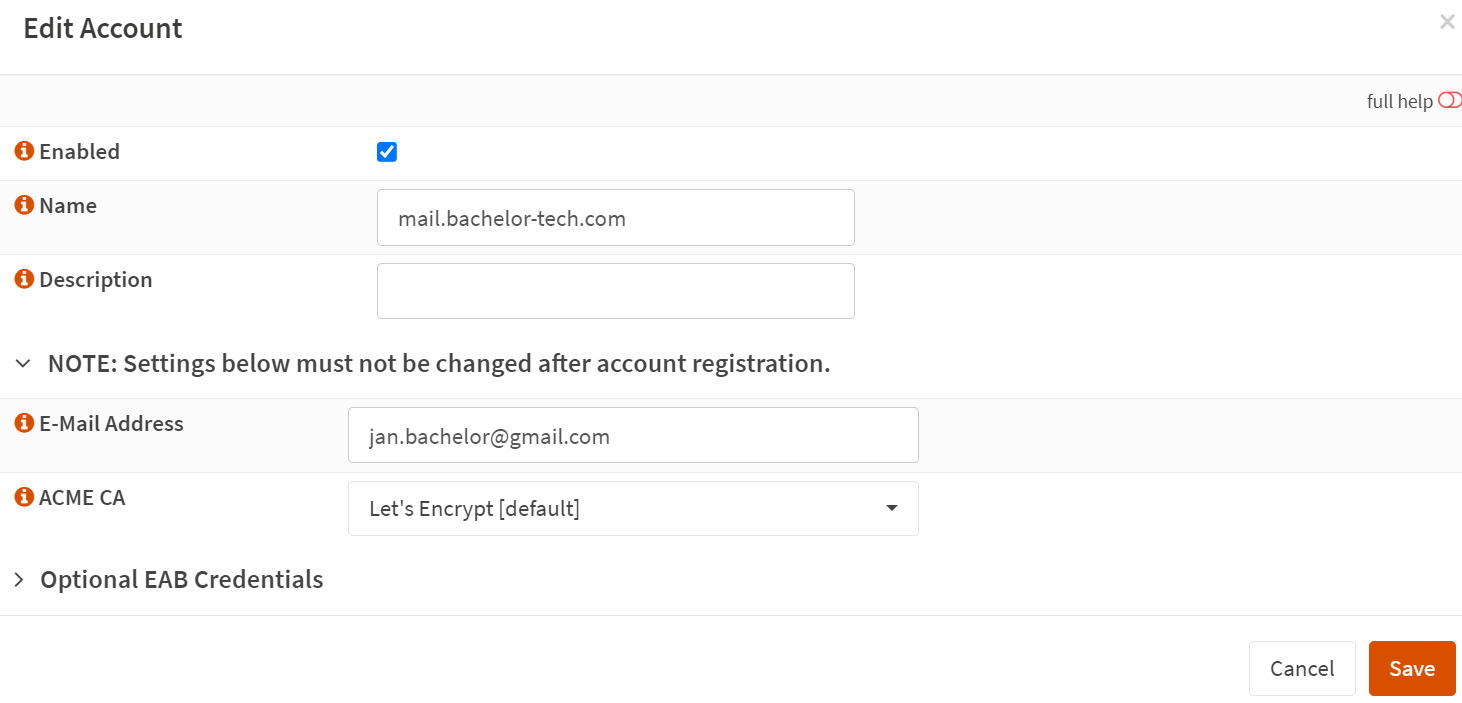
  • Then go to Services → ACME Client → Accounts. Create a new account with Let’s Encrypt. Fill in the name (ideally the name of the domain for easier tracking) and your email address. The email address should be something you actually use so that you can get warned in case renewal fails in the future.
OPNSense – Set Up Your ACME Account
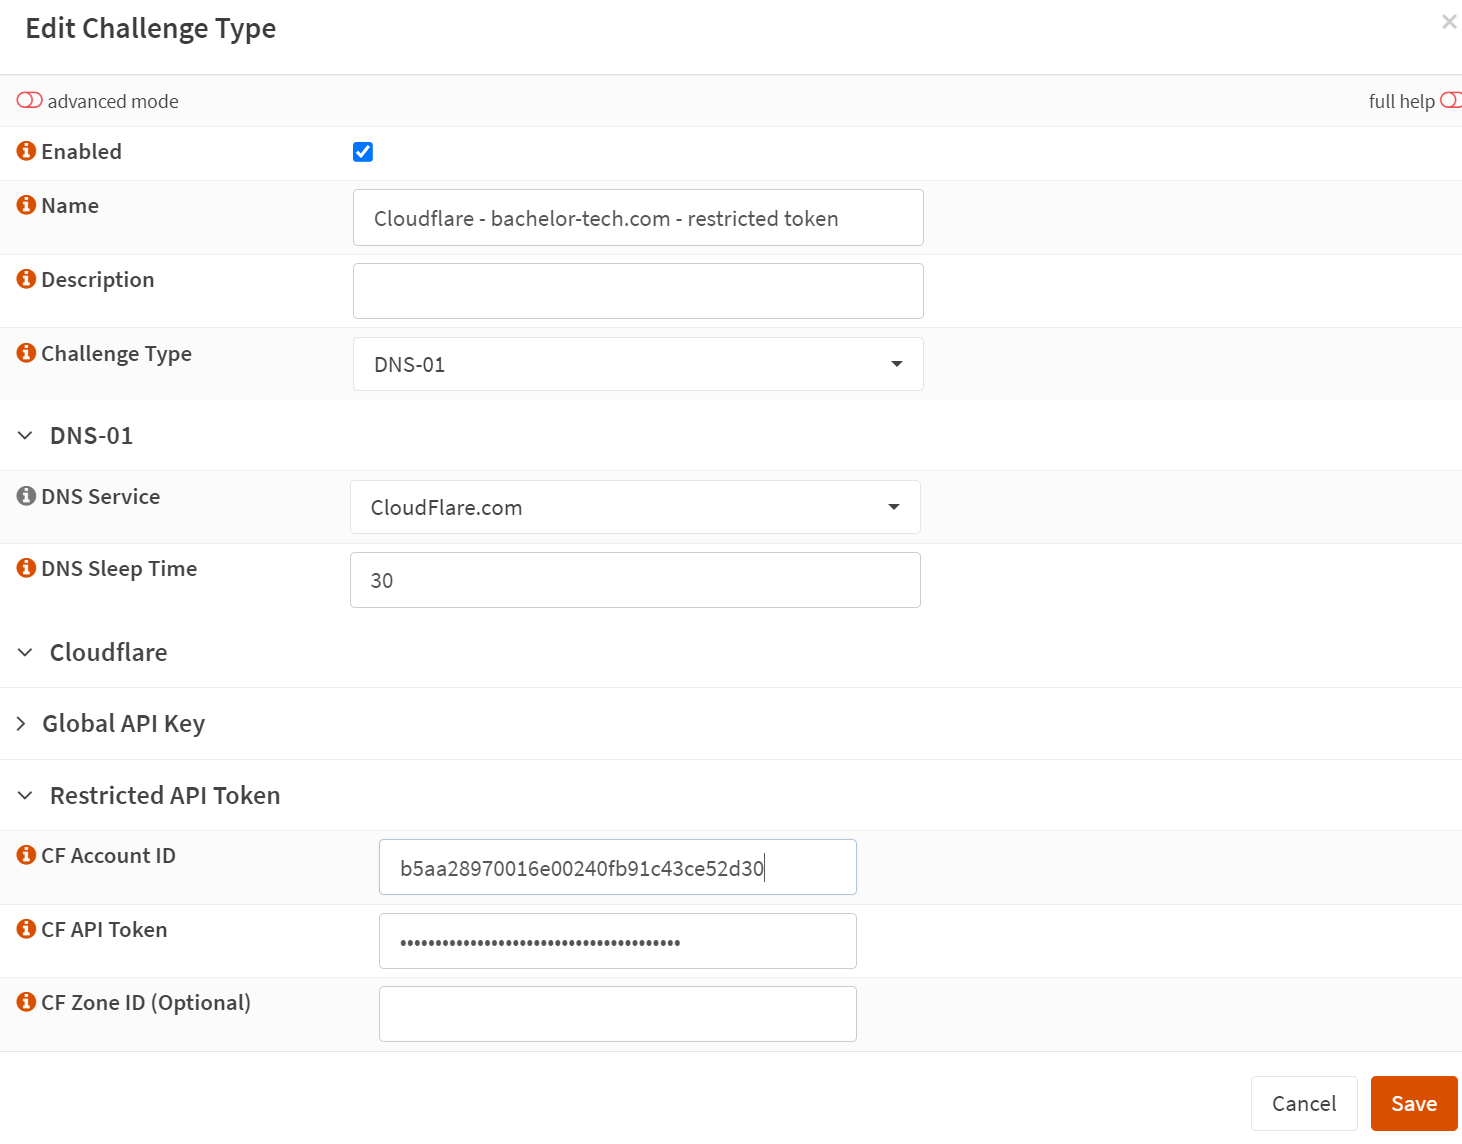
  • Then go to the ‘Challenges Type’ section menu item on the left (within ACME Client) and add a new challenge type. The challenge type should be DNS-01 using the Cloudflare.com service. Leave some sleep time just in case. Then as your CF Account ID, copy over the ID from your CloudFlare account (after dash.cloudflare.com).
  • The API Token is the same as we created earlier for Dynamic DNS.
OPNSense – ACME – Set Up Challenge Type via DNS
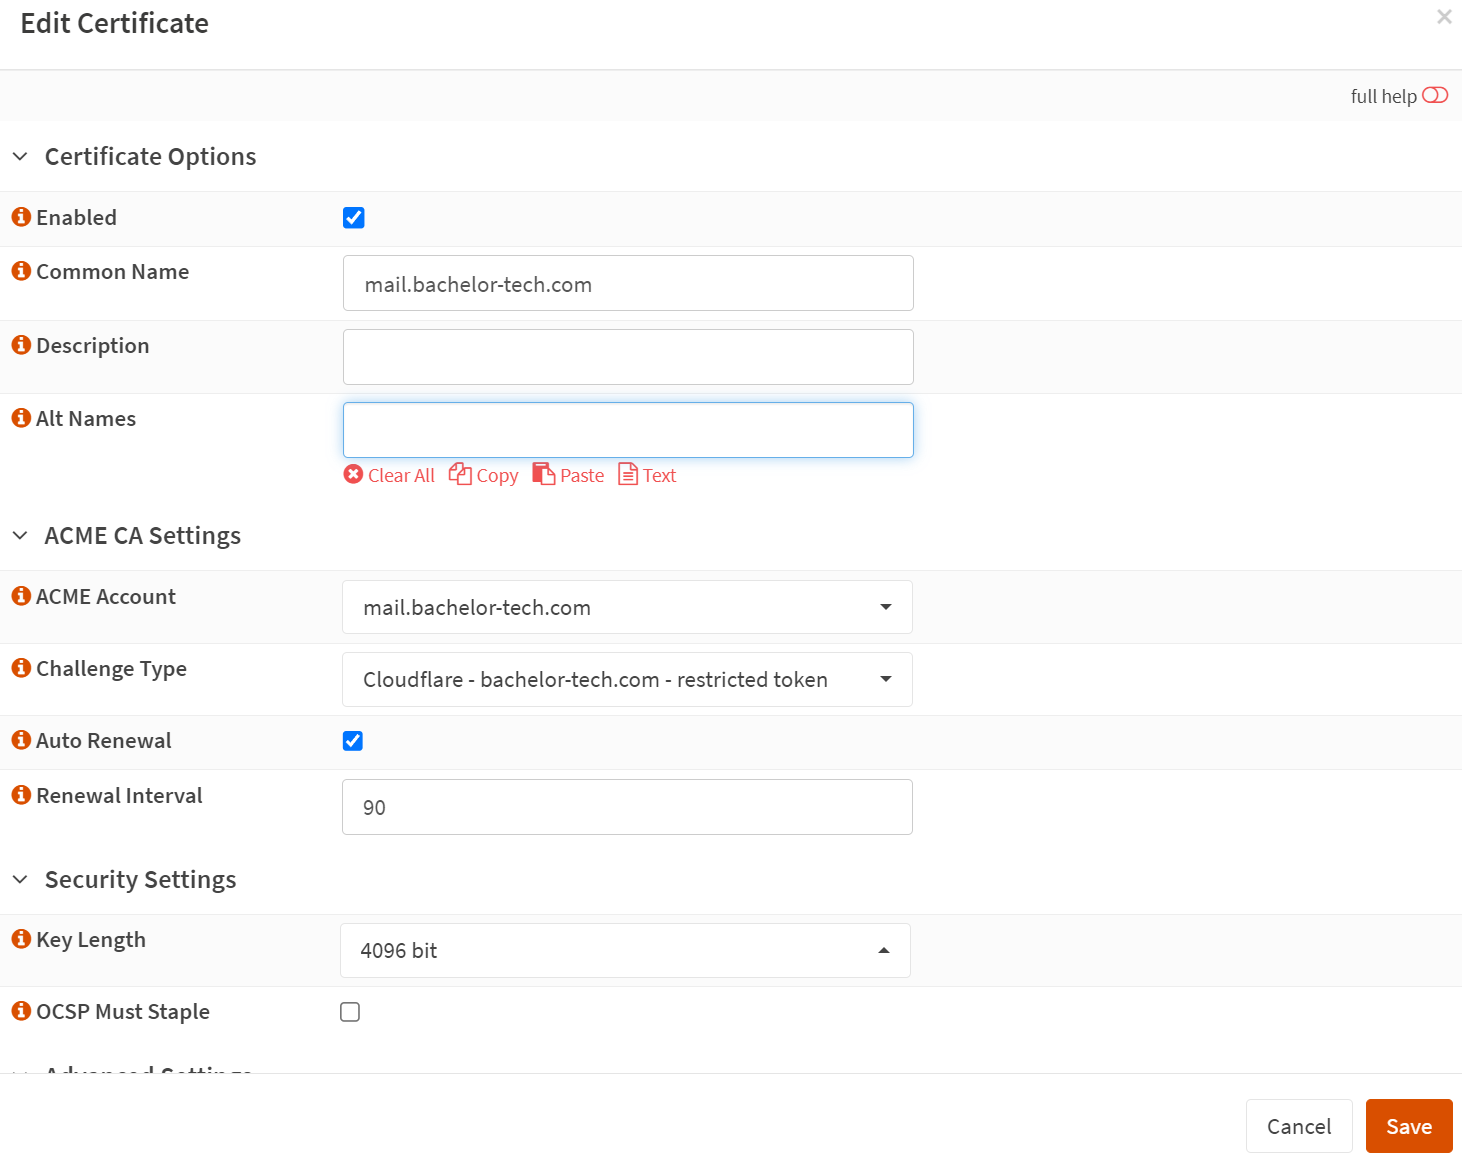
  • Then lastly, go to the ‘Certificates’ section within the ‘ACME Client’ menu on the left and create a new certificate using the challenge type and the cert authority you defined earlier:
OPNSense – ACME – SSL Certificate Creation
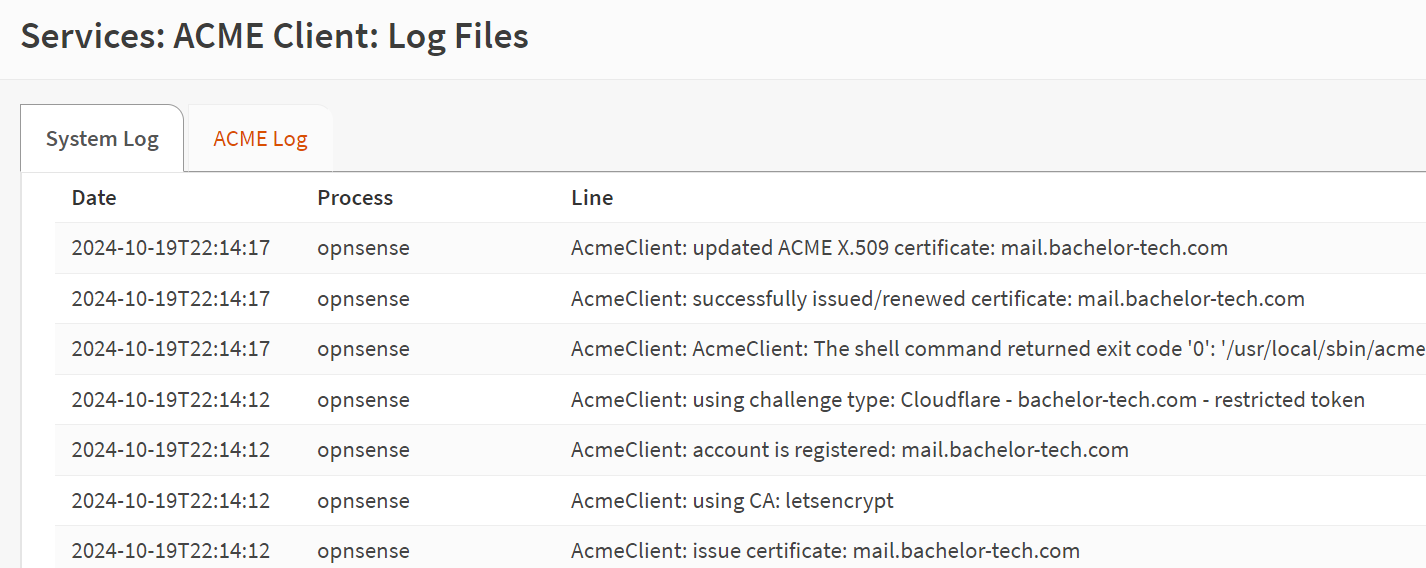
  • Wait for a bit and check the ‘Log Files’ menu option on the left to see what the result was. If successfully created (or updated), it may look similar to the output below:
OPNSense – ACME Logs
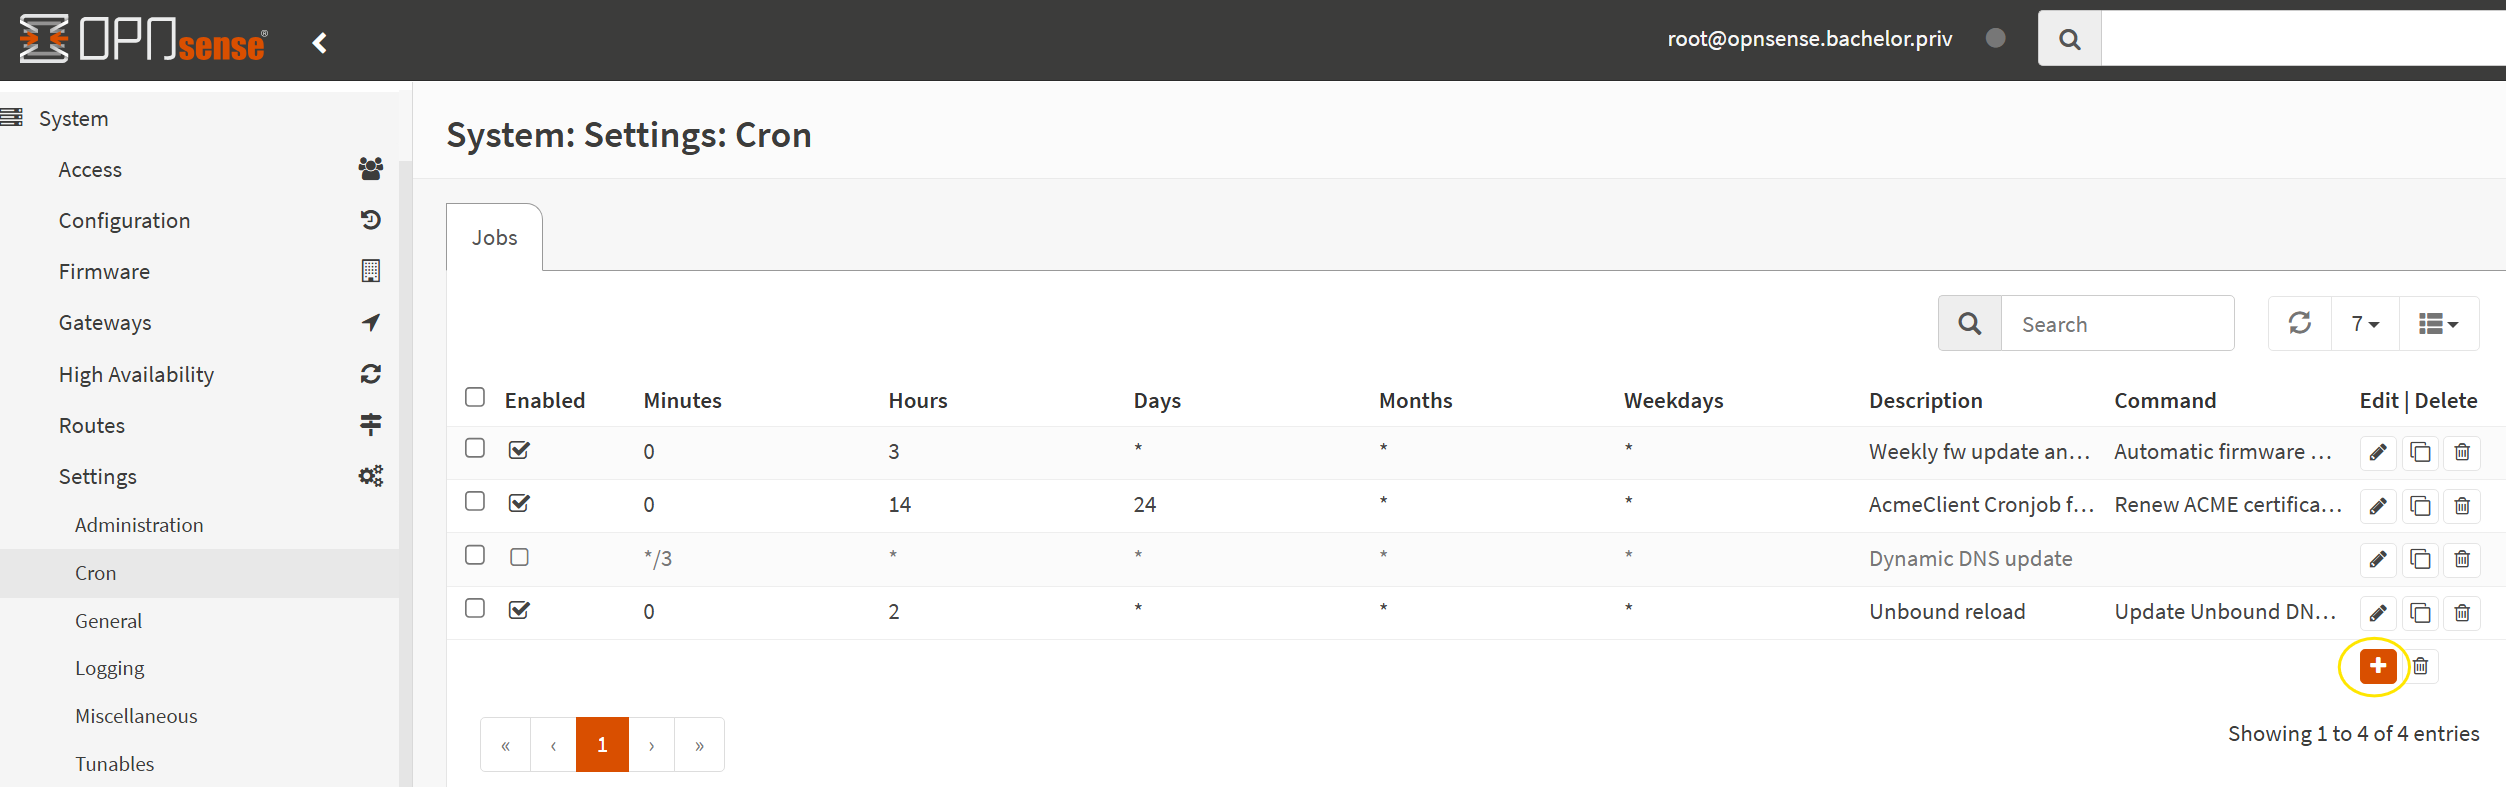
  • We will also need to create an automation (i.e. a cron job) to ensure that the ACME-provided certificate gets renewed and then reload haproxy afterwards.
  • On OPNSense, go to System -> Settings -> Cron and add a new job.
Create a cron job for the certificate renewal
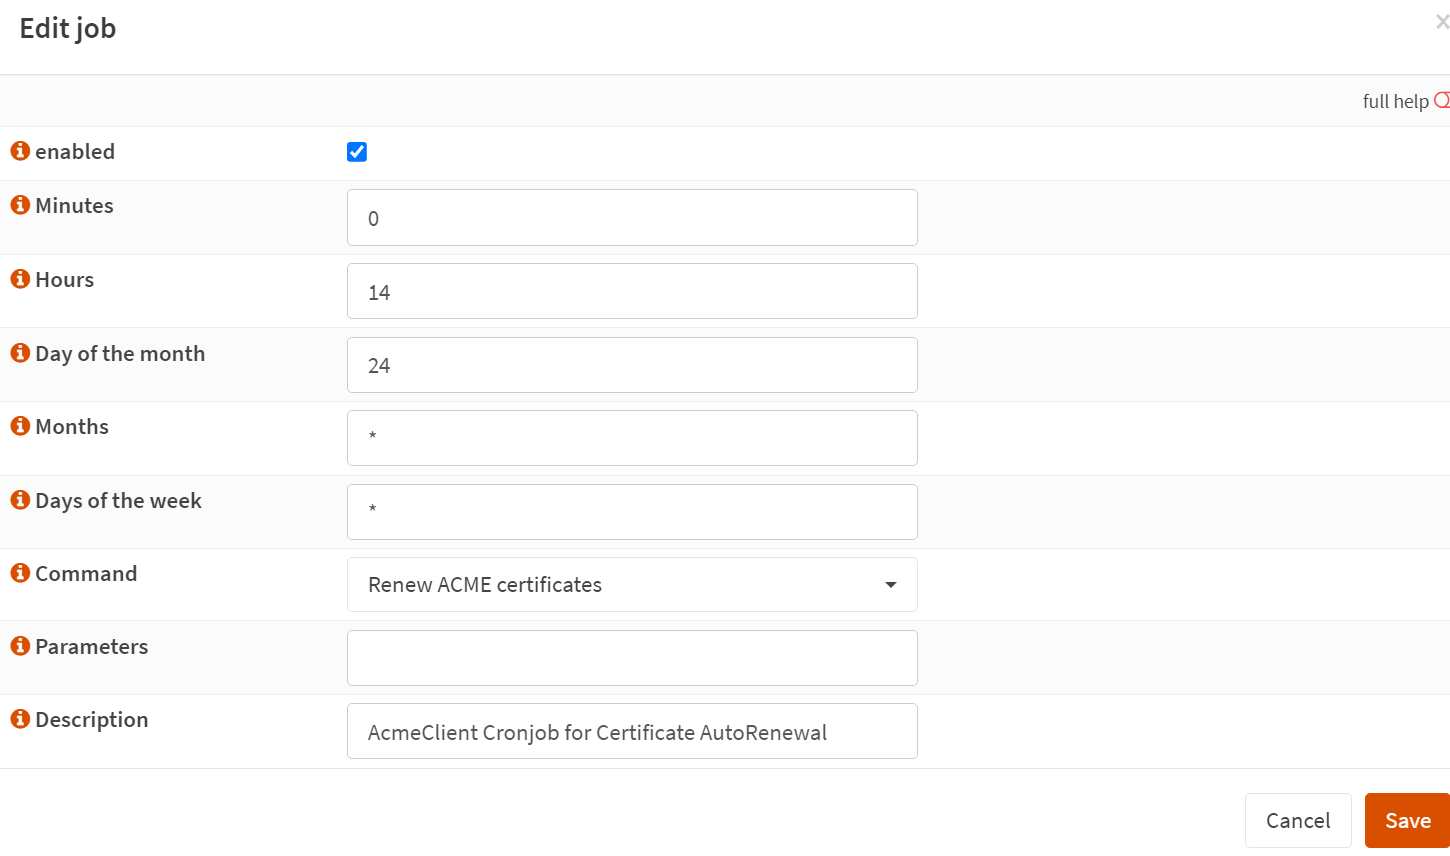
  • Add one job for the cert renewal (monthly):
Add a monthly cron job for the renewal of ACME certificates
  • Then clone the cron item and several minutes later, reload the HAPRoxy service, so that the new certificates are applied.
Create a cron job that reloads the HAProxy after certificates are issued

Dynamic DNS for our ‘mail’ DNS record (CloudFlare with OPNSense)
HAProxy Set Up - SSL termination (OPNSense)
Go back to course overview: Install iRedMail Mail Server As Proxmox VM With OPNSense As Firewall

Leave a Comment Cancel Reply

Save my name, email, and website in this browser for the next time I comment.

This site uses Akismet to reduce spam. Learn how your comment data is processed.

0 FacebookWhatsappEmail

Course Steps

  1. Starting Point and Considerations
  2. Pointing Your MX Records (DNS)
  3. Generic VM Installation (Proxmox)
  4. Firewall - static DHCP assignment (OPNsense)
  5. Firewall - Ports to open on your firewall (OPNSense)
  6. Fiirewall- Set Up NAT Rules (OPNSense)
  7. Dynamic DNS for our ‘mail’ DNS record (CloudFlare with OPNSense)
  8. Get SSL Certificate on OPNSense for Web Services (CloudFlare)
  9. HAProxy Set Up - SSL termination (OPNSense)
  10. Services To Be Installed On Our Mail Server (OPTIONAL)
  11. iRedMail installation (Debian)
  12. Nginx Configuration (Debian)
  13. Access iRedAdmin
  14. Configure Roundcube
  15. CertBot Certificate Creation
  16. Apply Certificates - Nginx
  17. A Theory Crash Course On Postfix (OPTIONAL)
  18. Securing Your Mail Server (Postfix)
  19. SMTP Relay With Brevo
  20. Testing your outgoing email ranking
  21. Connect Your Device To The Mail Server Via Email Client
Previous Next

Recent Comments

  • Jan Bachelor on Dynamic DNS Set Up with DuckDNS on OPNSenseHi Jake, that's awesome, congratulations on getting…
  • Jake on Dynamic DNS Set Up with DuckDNS on OPNSensefollowed guide above to the T and all is working. i…
  • Fastbrain on Dynamic DNS Set Up with DuckDNS on OPNSenseThanks for the guide. For some reason, after follow…

Other courses

Install iRedMail Mail Server As Proxmox VM With...

October 31, 2024

Remote Bucket Storage for Proxmox VM Backups

August 16, 2024

Concur Alternative: Import Employees’ Credit Card Expenses to...

January 19, 2024

Create an automated Gravity workflow that will allow...

January 19, 2024

Dynamically Populate Gravity Forms from Google Sheets (GSheets...

March 16, 2021
Bachelor Tech
  • Home
  • Tutorials
  • Portfolio
  • About Jan
  • Contact Jan

Recent Posts

  • How to join two Proxmox nodes into a cluster (PVE 8.x)

  • How to Rename a Proxmox Node

  • How to mount an NFS share on an Android box

Facebook Twitter Instagram Pinterest Linkedin Youtube

All Rights Reserved. The theme was customized from Soledad, see PenciDesign