- In this tutorial, I used a micro SD card for storing backups. The performance of those differ greatly based on which card you go for. In this case, it is a 1 TB Samsung Evo 2024 micro-SD class 10 UHS-I U3 / A2 / V30 card which is labelled as suitable for 4k video read and write. Its theoretical max read speed is 160 MB/s and upload speed of up to 120 MB/s. So let’s see how it did!
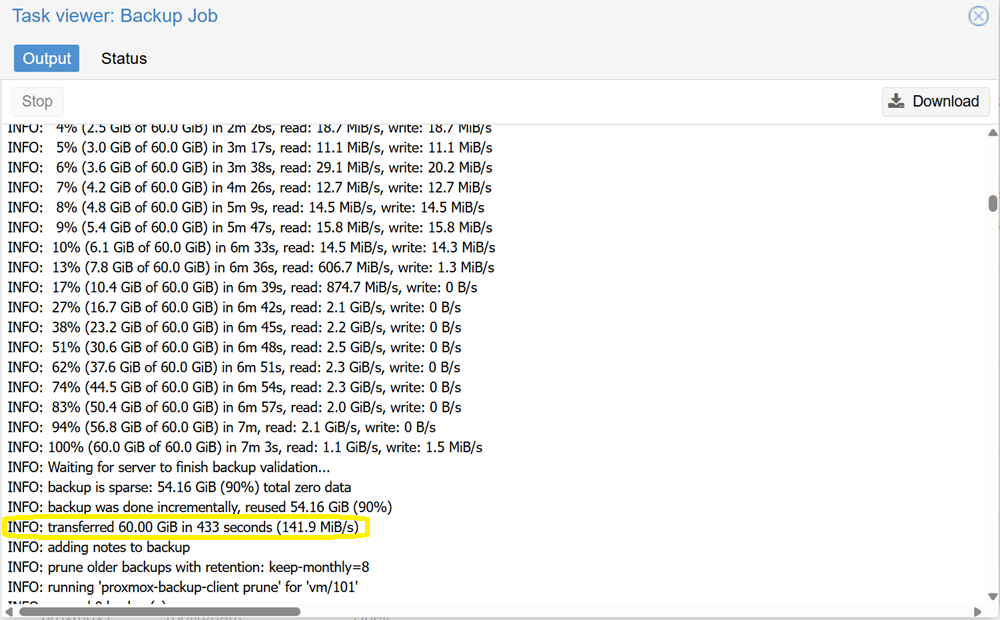
- In the case below, a 60 GB large Windows image was backed up in a single job scenario. The speed shown surpasses the expectations with a speed of 141.9 MB/s!
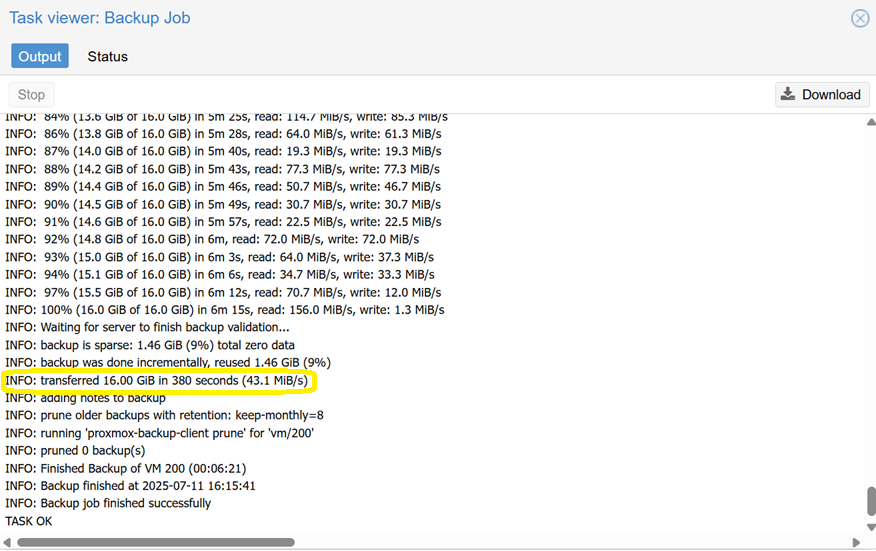
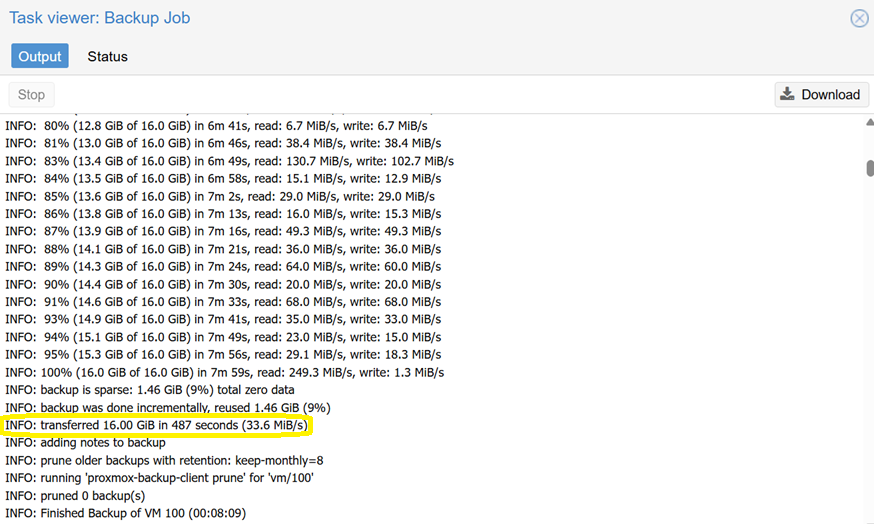
- In a dual job scenario where I was transferring a backup job from two Proxmox nodes, the speed went down accordingly to about 35-43 MB/s. This was expected and is still a decent value.
- How about read speed? Let’s run a restore job. Find a VM or a container of a decent size (10 GB+) and run a restore job. In my case, I decided to restore that 60 GB size backup that was previously backed up:
- To do a restore, you have at least two options on how to trigger it from a Proxmox node:
- OPTION 1: Overwrite the existing one in case it is corrupted – simply select your VM (or container) and click on the ‘Backup’ tab, followed by clicking on the ‘Restore’ button. The requirement here is that the VM (or container) is switched off. You will be prompted with a warning that the existing data will be overwritten.
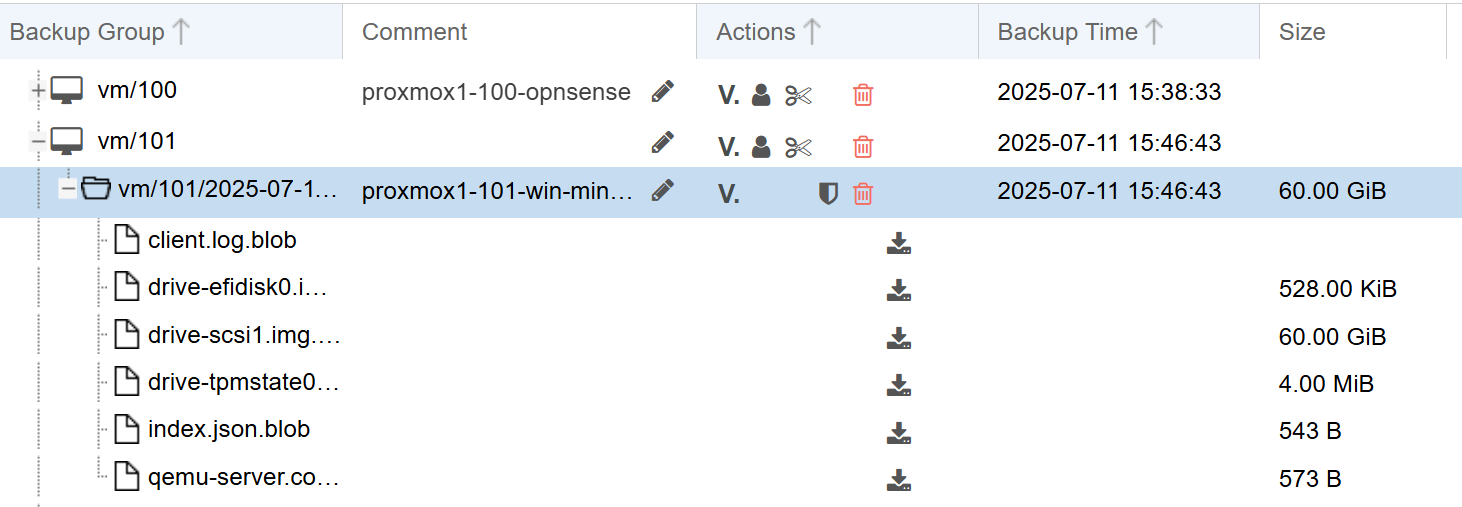
- OPTION 2 (preferred): Restore a VM/LXC into a different location on the same or different node. To get there, find the PBS storage within your node (such as ‘pbs_rpi’ if you followed this guide to the T) and go to its ‘Backups’ tab.
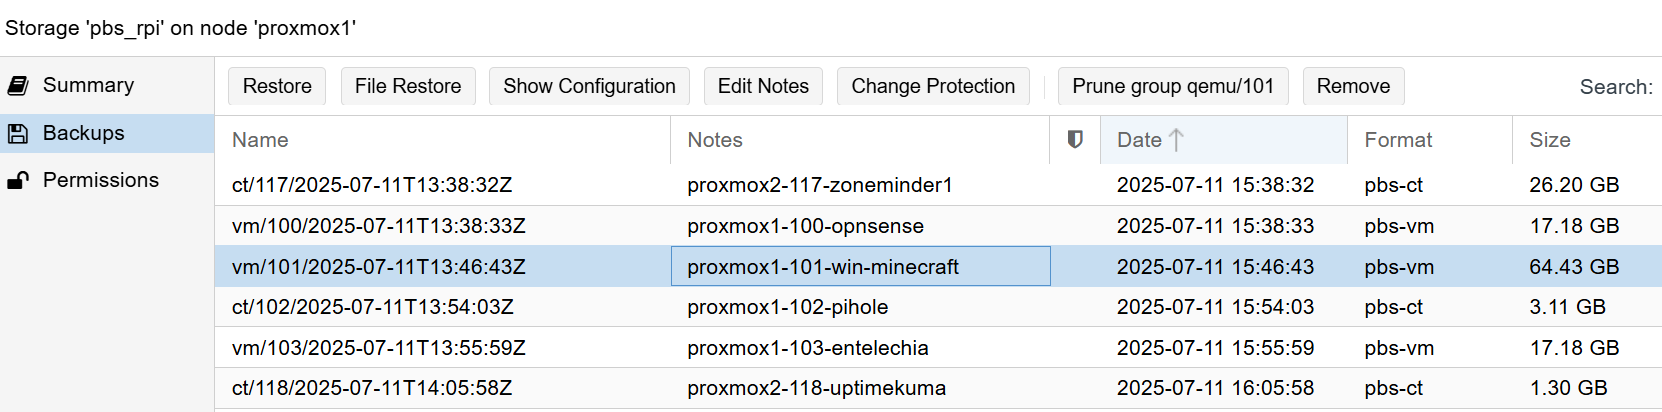
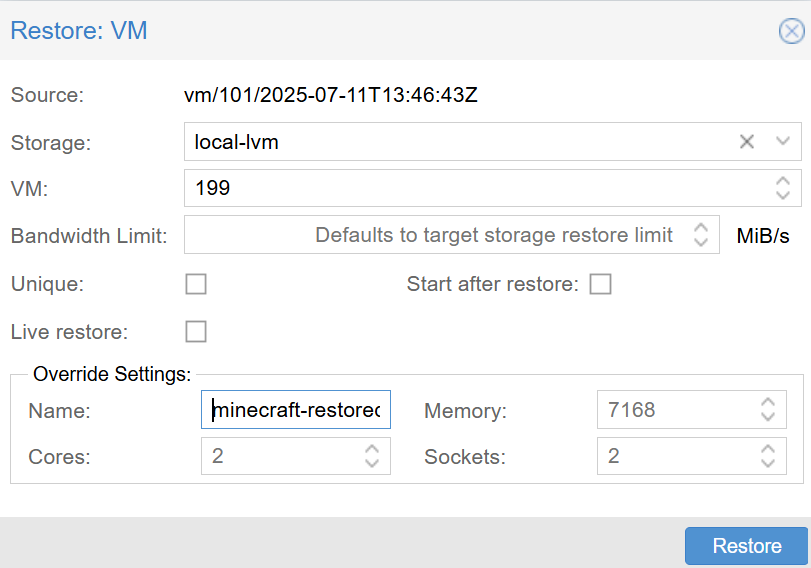
- There you can see all the backups – select one and click on the ‘Restore’ button and restore it under another ID. You can also change its name, RAM and CPU assignment, although you can also do so after the restore before you switch it back on.
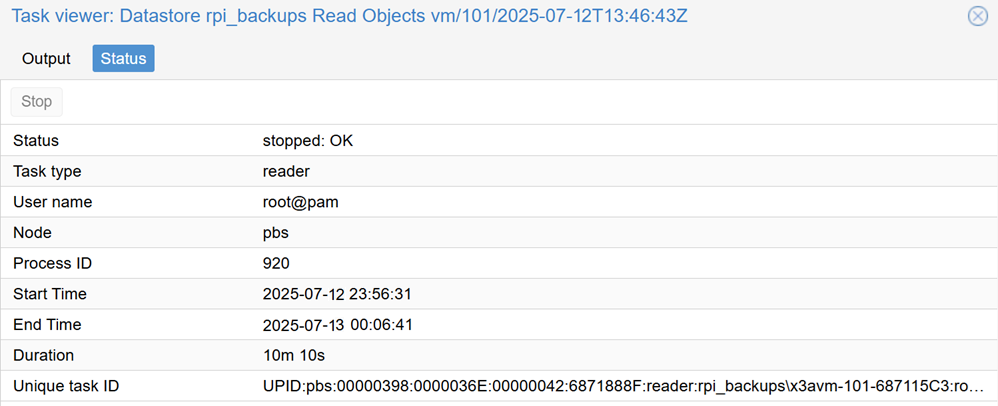
- Once it is running, the log on the specific Proxmox node may not reveal much. But you can see more info if you head to your PBS on https://<your_pbs_ip>:8007/#pbsServerAdministration:tasks or under ‘Administration’ → ‘Tasks’.
- Here is the output of the log once the restore job finished. It took 10 minutes and 10 seconds to transfer approx. 60 GB. This indicates a speed of 100.72 MB/s. That is just fine with me. Ping me in the comments below if you would like me to run more tests.
- It is highly advisable to run a restore test from time to time to verify that the backed up data works. You can restore a container or a VM to another node, even disable networking in it afterwards to verify that it boots without interfering with existing projects.