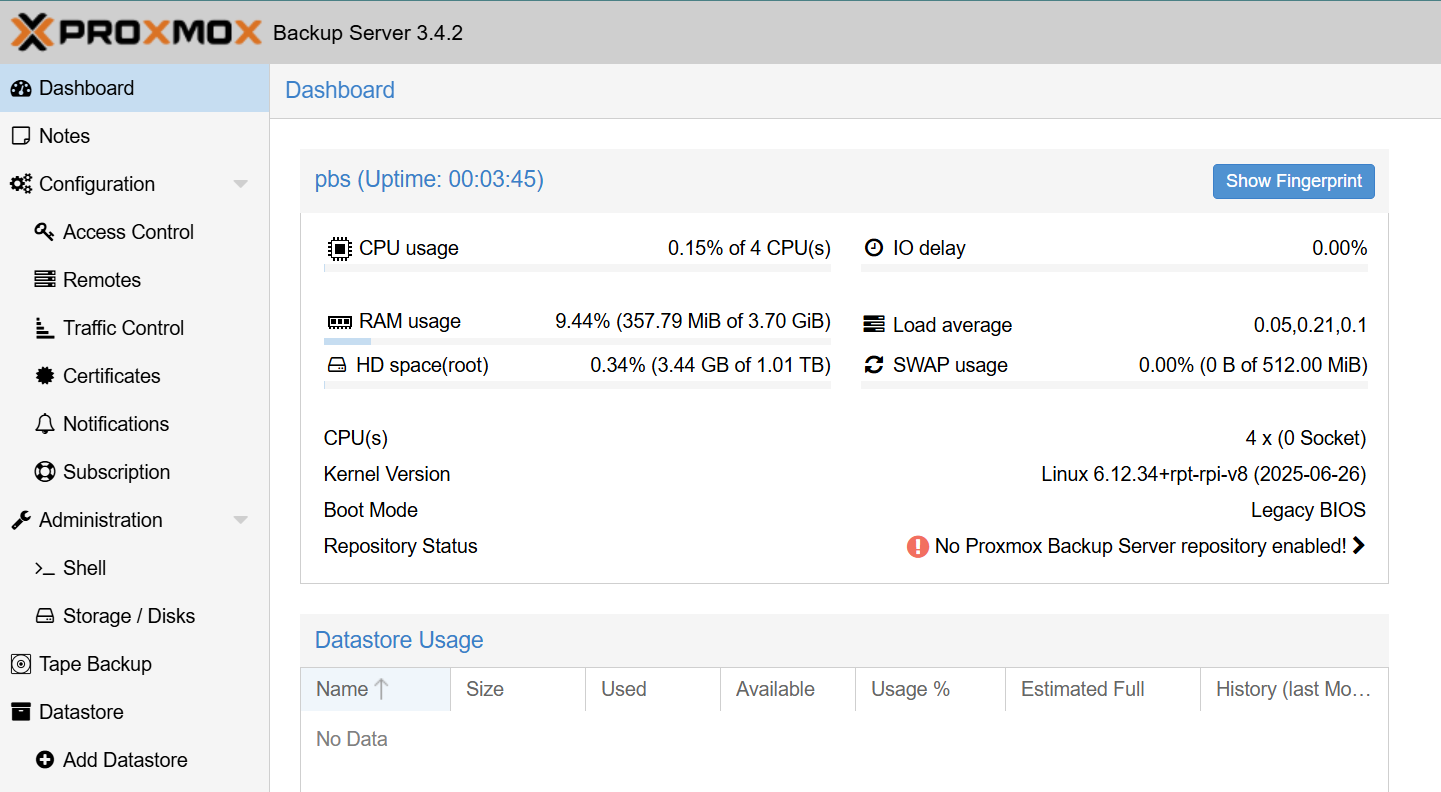
- Now it is the exciting moment! You can access your Proxmox Backup Server GUI. Head to a browser of your choice on the same network:
https://<your_ip>:8007
- Pass through the warning sign and there you go:
- Head to ‘Administration’ and notice the warning about updates:
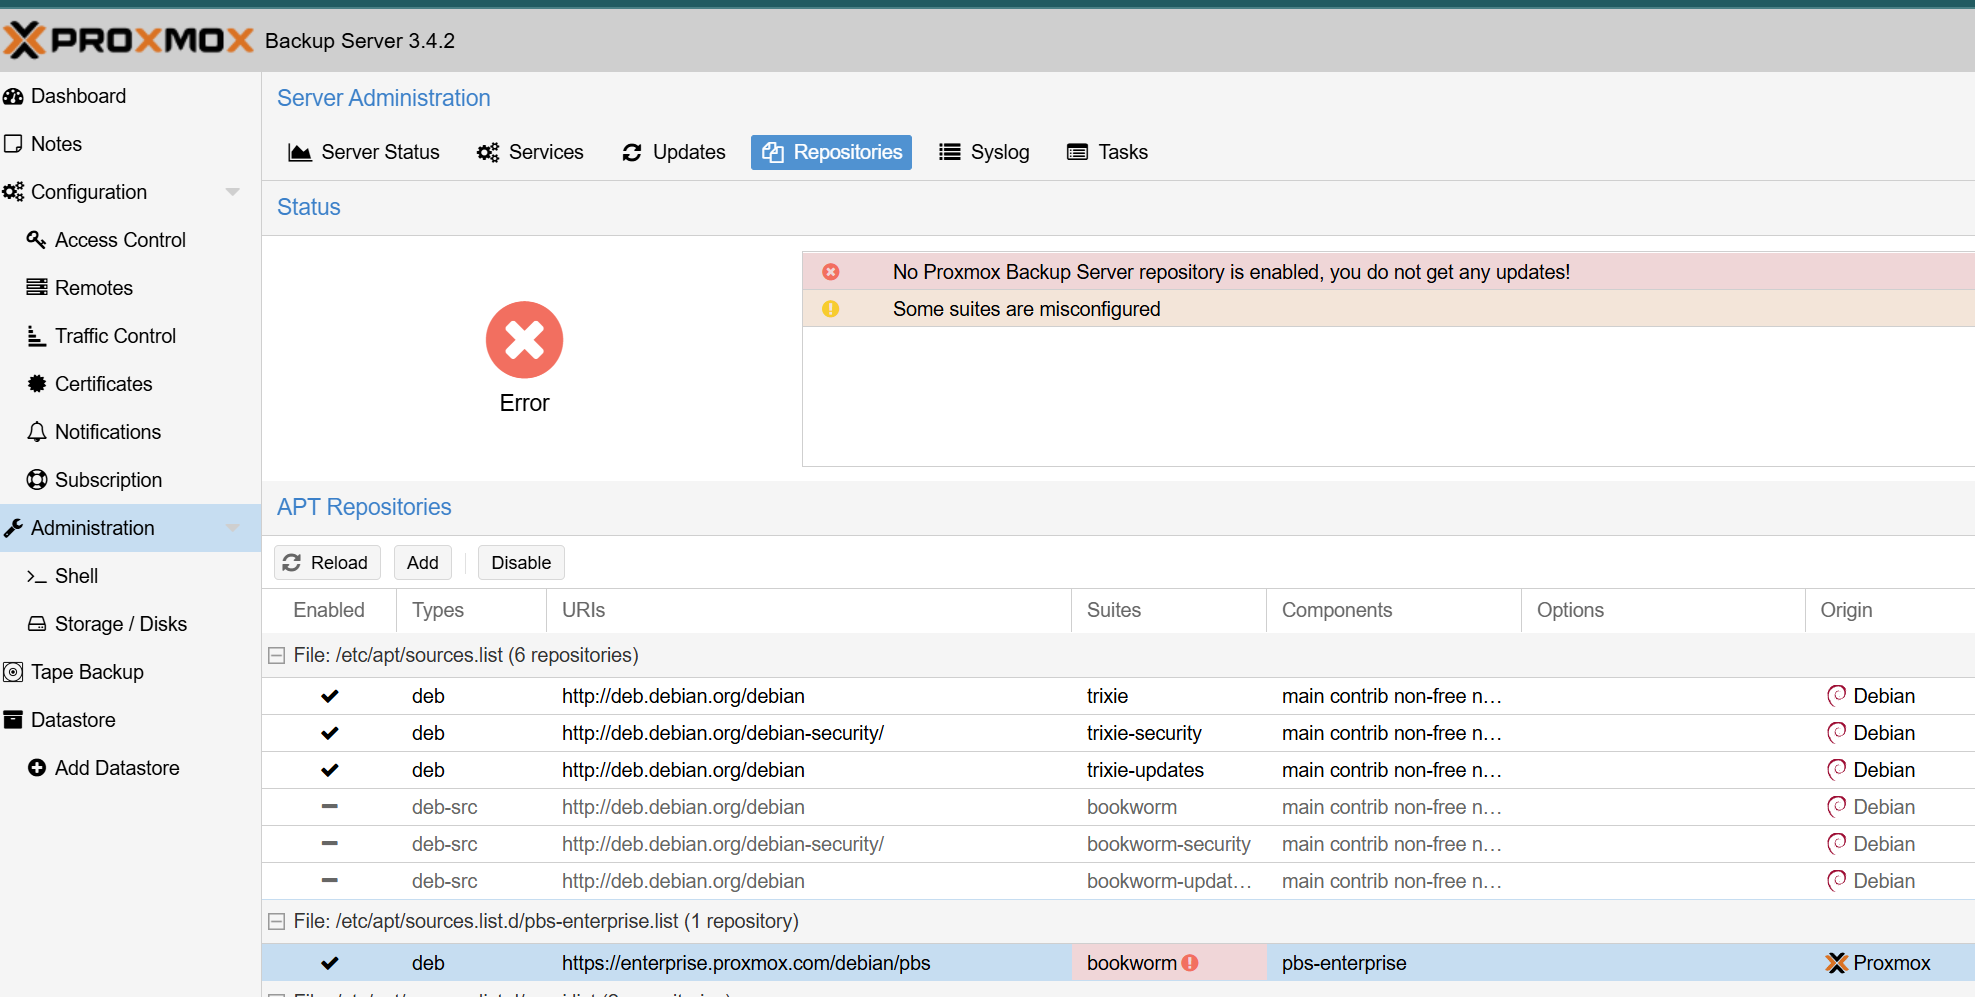
- This is because we upgraded to Trixie before the PBS repo was ready for it.
- Firstly, add a new repo for ‘No-Subscription:
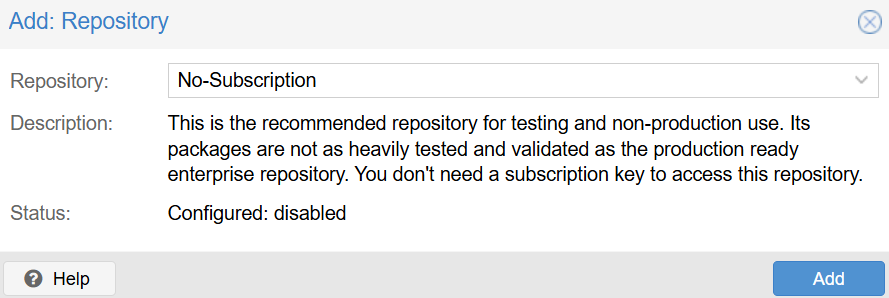
- Then disable the one under pbs.enterprise.list that is meant for ‘bookworm’.
- The final state can look like this:

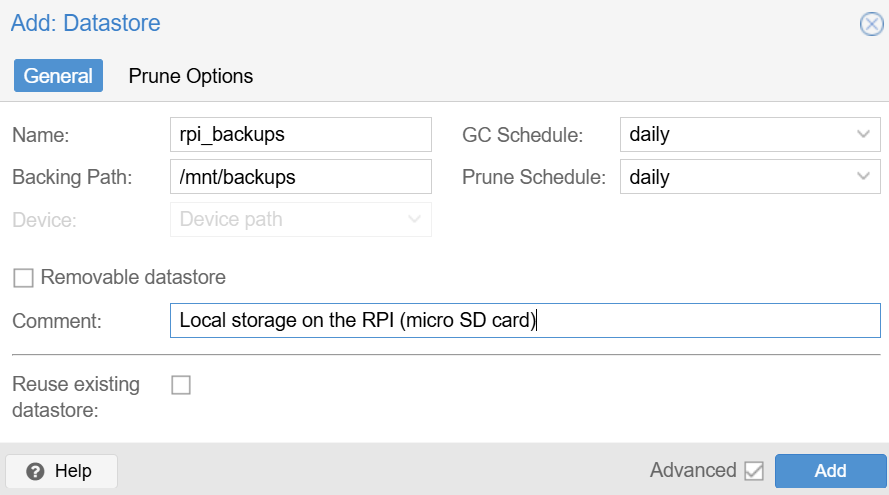
- Now you can head to the ‘Add Datastore’ button. If you just want to use the same drive as the one used for PBS, you can simply add a new folder such as /mnt/rpi_backups (in a typical production set up, a different drive would be used for backups). Keep the ‘Name’ parameter simple without spaces, as shown below:
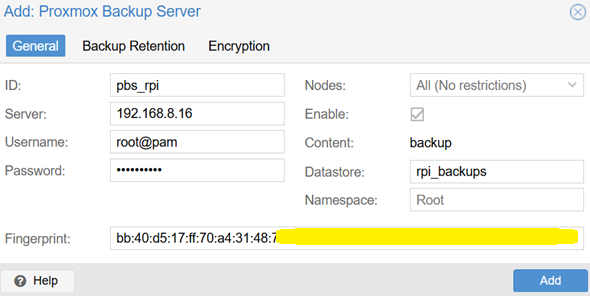
- Log into your Proxmox VE web interface. Go to Datacenter -> Storage. Click on the ‘Add’ button and select ‘Proxmox Backup Server’.
- Fill in the details:
- ID: A name for this storage within Proxmox VE (e.g.,
pbs_rpi). - Server: The IP address of your Raspberry Pi.
- Username:
root@pam(or the user you’ve configured on PBS). Please note that this for home lab use only. If you plan to use it in production environment, it is crucial to implement access based on the principle of least privilege. See the section below related to security hardening tips. - Password: The password for that user.
- Datastore: The name of the datastore you created in Step 1 (e.g.,
rpi_backups). - Fingerprint: Click the Show Fingerprint button in your PBS dashboard (as seen in your screenshot) and copy-paste the long string of characters here. This ensures you’re connecting to the correct server.
- Click on the ‘Add‘ button.
- ID: A name for this storage within Proxmox VE (e.g.,
- The new PBS storage should now appear in the storage list for both of your Proxmox node. Repeat for any other node you may have.
- Let’s create a scheduled backup job! On your Proxmox node, go to ‘Datacenter (home)’ → ‘Backup’ and click on the ‘Add’ button.
- Choose which nodes you want to cover (leaving it to default covers all)
- Storage: choose your new Proxmox Backup unit
- Schedule: as per your preference
- Selection mode: as per your preference
- Mode: Snapshot
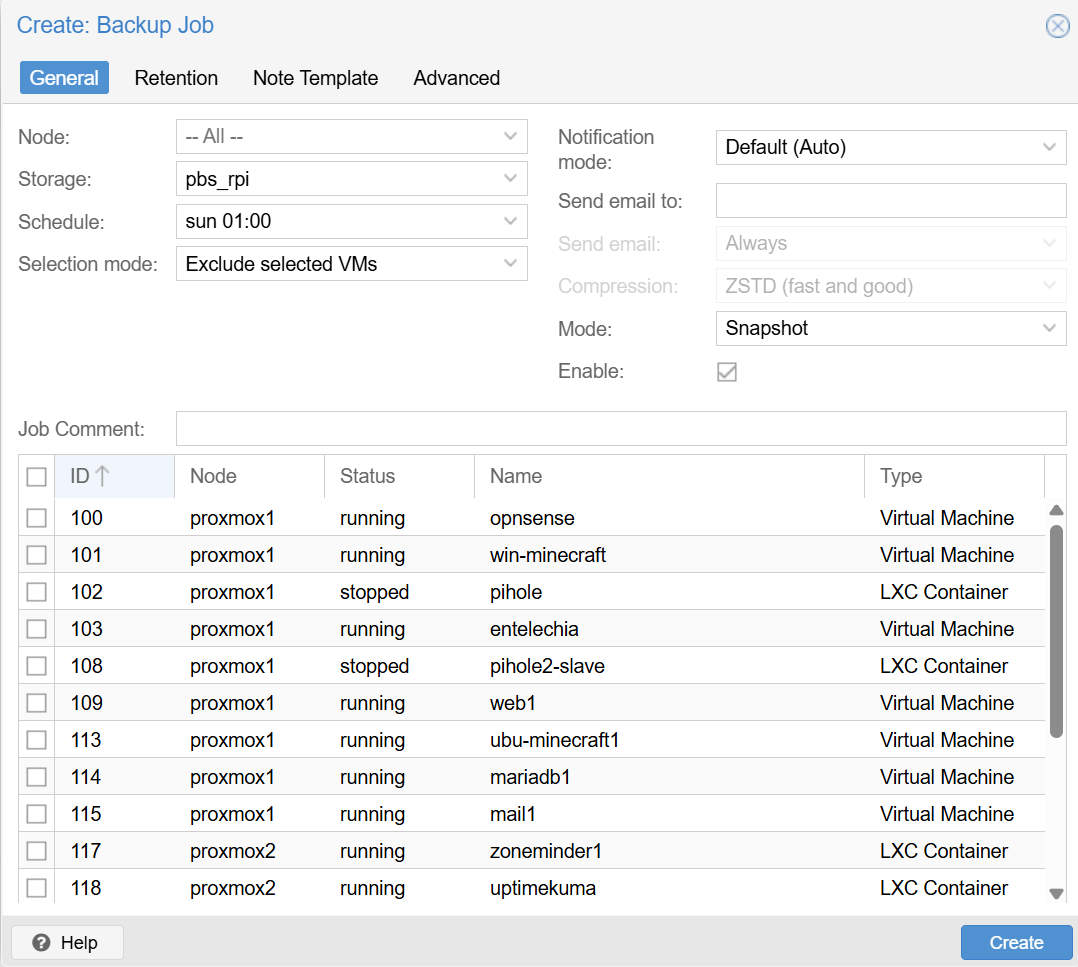
- Retention tab – leave blank, as this is better configured on the PBS side.
- Node template – in case you have more than just one more, it is advisable to change it to something like this:
{{node}}-{{vmid}}-{{guestname}} - Once you are happy with your configuration and click on the ‘Create’ button, you can execute the backup job instantly by clicking on the ‘Run now’ button.
3 comments
Hi Jan – Great work! Just a note, I had to add the following —> wget https://enterprise.proxmox.com/debian/proxmox-archive-keyring-trixie.gpg -O /usr/share/keyrings/proxmox-archive-keyring.gpg
I figured it out.
PBS will not login on Pi without setting the root password, despite what you may have set in RPi Imager, even if it’s the same. I’d update your guide to reflect that 😉
sudo -u root passwd
Once done, all good, and login to PBS is fine, so thanks for deleting my comments, and not getting back to me. Very professional.
Hi Rik, thank you for the updates. Your comments were held for a review and I apologize for not noticing it earlier. Good catch there with the root password, thank you! I will update the guide accordingly.