1. Wizard
- Once you log in to the OPNSense GUI, you can set some basic parameters for your network by going to System -> Wizard.
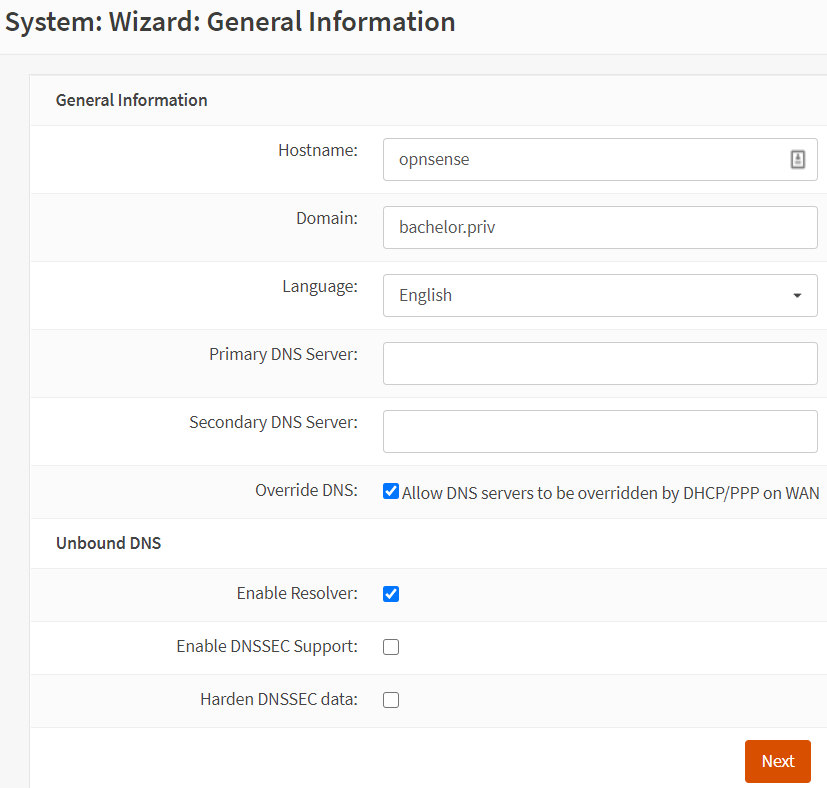
- In the first step, confirm the hostname of your VM and specify a domain. For a private network, I used a non-resolvable domain name (.priv), but you can use anything you like. Just keep in mind that if you use a resolvable domain name (e.g. hello.com), if you point to a VM that is offline, your local DNS resolver will try to reach devices on the internet.
- In the next step, choose your time zone and leave the rest as-is.
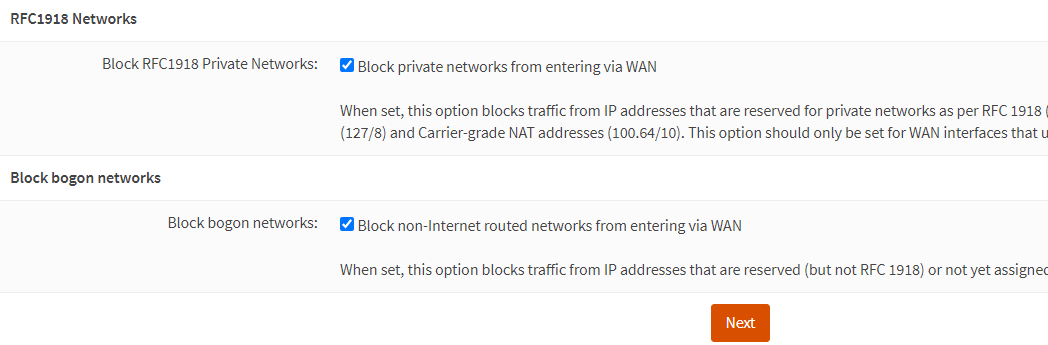
- Then in the WAN inteface settings, leave it at DHCP, since your ISP’s modem will typically provide an address for this interface (unless they provided a manual IP assignment, in which case, enter it here). Then make sure that ‘Block private networks from entering WAN’ is ticked (the only expection is if you have a manual private IP assigned from your ISP) and that you ticked ‘Block non-Internet routed networks from entering via WAN’.
- On the LAN interface tab, chose the address to be assigned to your OPNSense instance (typically, this is 192.168.1.1 with a subnet mask of 255.255.255.0 = /24).
- Then retype your root password, click ‘Next’ and then reload the configuration.
2. Apply & schedule updates
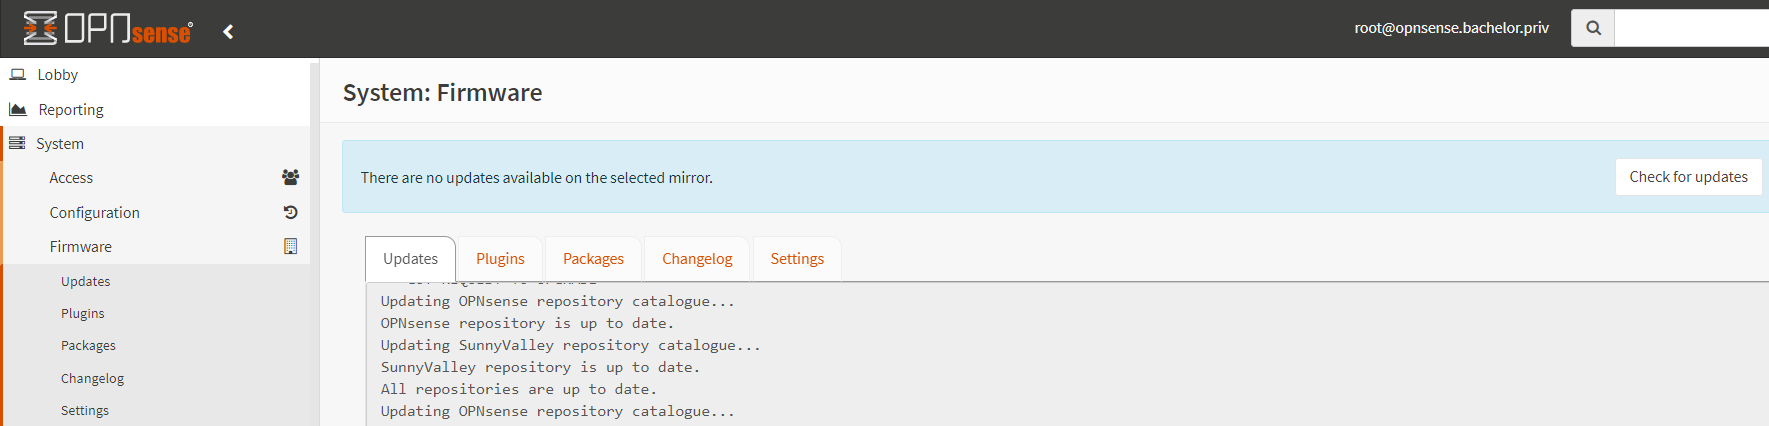
- Go to ‘System’ -> ‘Firmware’ -> ‘Updates’ -> click on ‘Check for updates’. If there any updates pending, apply them. A restart of the VM may be required.
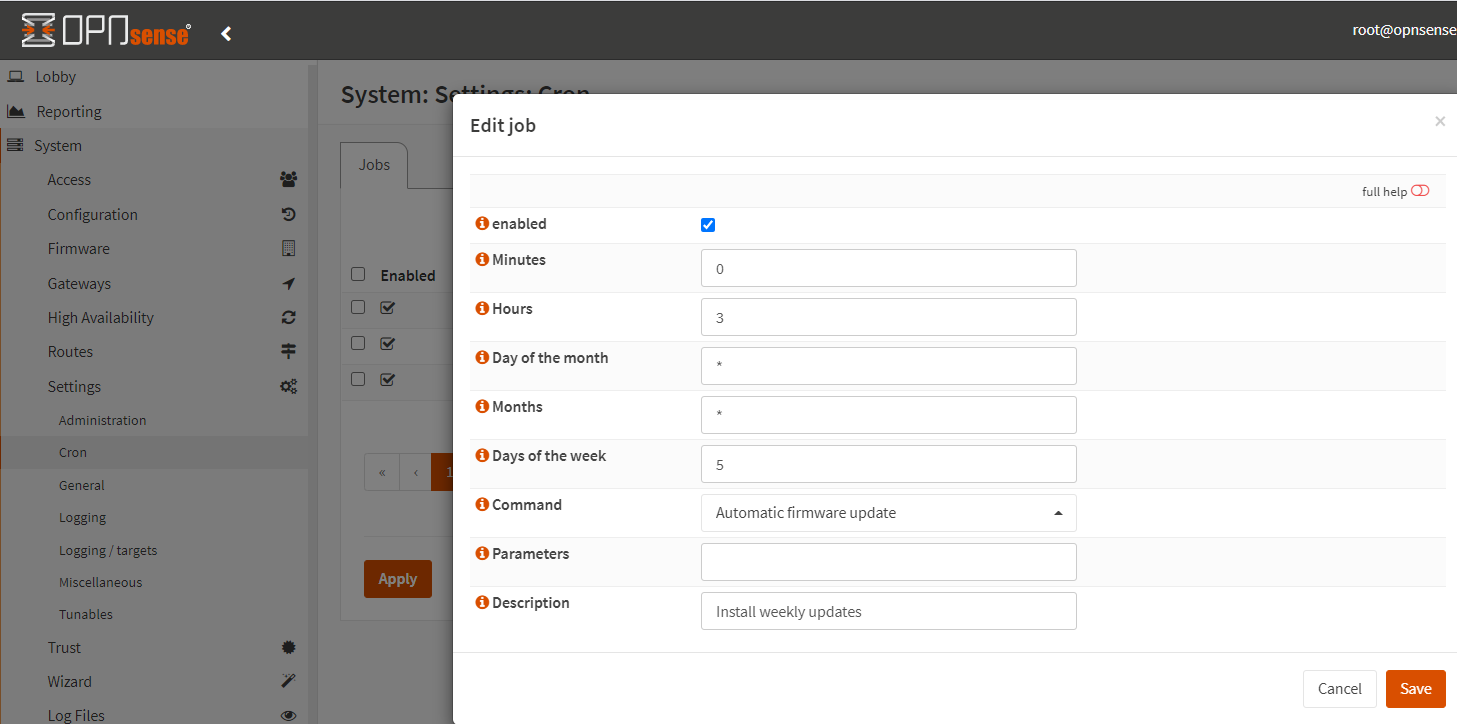
- To apply updates in future, schedule automatic firmware updates. Go to ‘System’ -> ‘Settings’ -> ‘Cron’ and add a new entry by clicking on the + sign. Choose a suitable time in the night (such as Hours: 3, Days of the week: 5) and the command to be ‘Automatic firmware update’. Description can be something like ‘Weekly fw update and reboot’. Save it. Then click on the ‘Apply’ button.
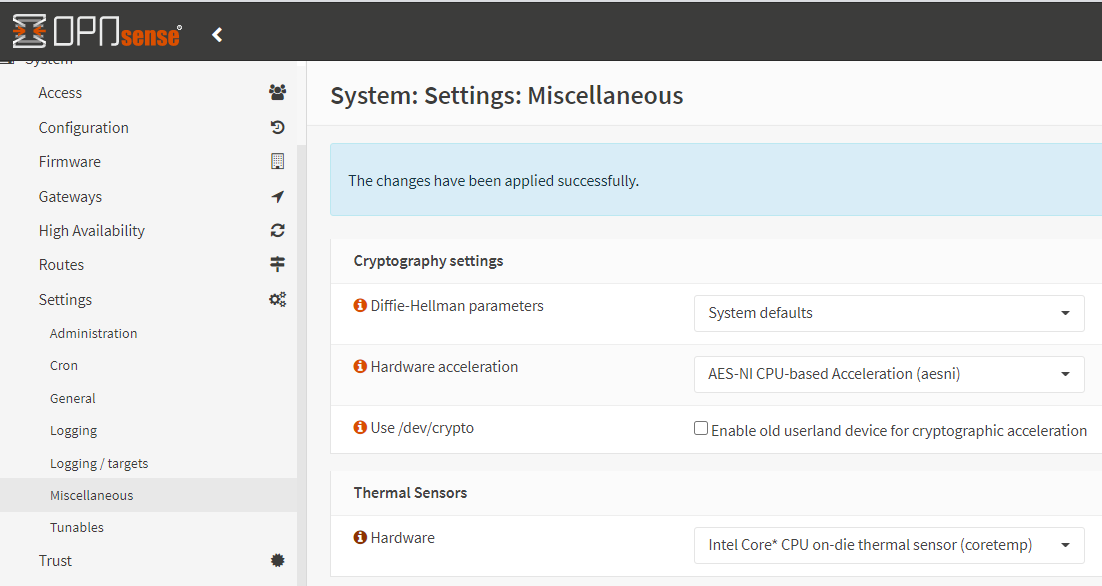
3. Confirm AES-NI support + CPU temperature monitoring
- In ‘System’ -> “Settings’ -> ‘Miscellaneous’ in the ‘Cryptography settings’ section, confirm that ‘AES-NI CPU-based Acceleration (aesni)’ is selected. This is confirms that AES-NI instructions can be used by OPNSense, if supported by your Inter/AMD CPU.
- Then in the ‘Thermal Sensors’ section below it, choose the Intel or AMD supported driver for temperature monitoring.
4. Verify interfaces (WAN / LAN) & first Proxmox snapshot
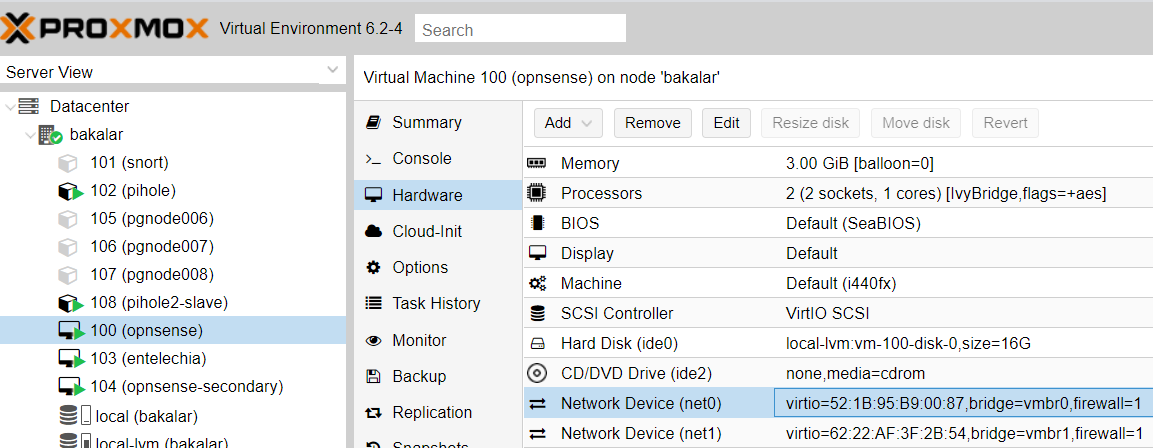
- Verify that the correct interface is assigned for WAN and LAN. Go to ‘Interfaces’ -> ‘Assignments’. The vnet0 (and its MAC address) should match the first virtual network card in Proxmox, which we defined to be for all LAN physical interfaces (vmbr0).
- Similarly, since we defined the WAN interface in Proxmox (as vmbr1) and assigned it to the OPSense VM in step 5 of the OPNSense VM set up section, it should be showing as the WAN interface in Proxmox.
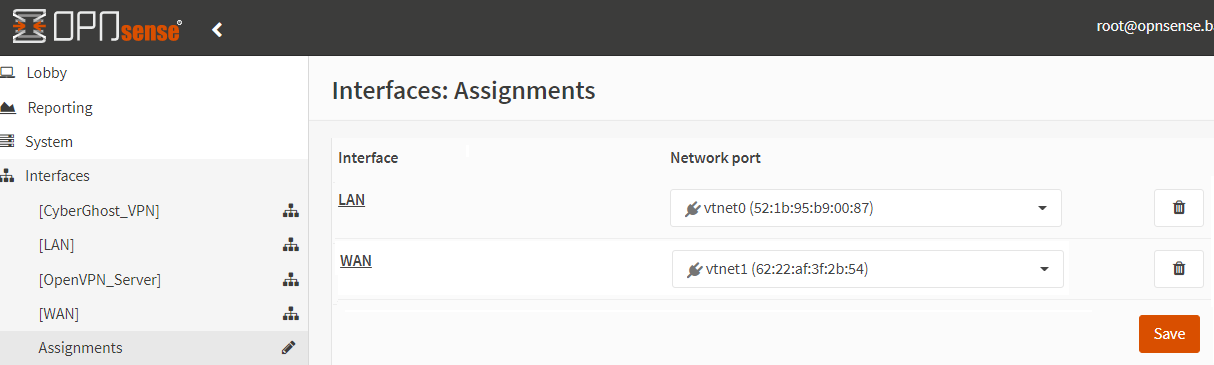
- What could be a little confusing is that for devices like Qotom, you may have 4-8 ports and you only see one LAN port here. This is because all the physical LAN ports are under one virtual LAN port, as shown below:

5. Take the first snapshot of your configuration
- Go to Proxmox -> ‘Datacenter’ -> your node -> locate your VM -> Snapshots -> click on the ‘Take Snapshot’ button. Give it a name without spaces and dashes (underscores are allowed). Leave the ‘Include RAM’ button as ticked.

- In future, at any point, if you cut yourself off or have some other issues, you can always recover the VM to the working state in which it was before.
6. Restart and switch-over
- It is highly advisable to perform a ‘warm’ reboot of your OPSense VM to ensure it reboots after the many configuration changes we made earlier.
- While you could reboot it directly from Proxmox, because there is no Qemu agent for FreeBSD (at the time of writing this guide, at least), Proxmox would perform a ‘cold’ restart, potentially damaging system files. For this reason, rather go to ‘Power’ -> ‘Reboot’ and confirm ‘Yes’.

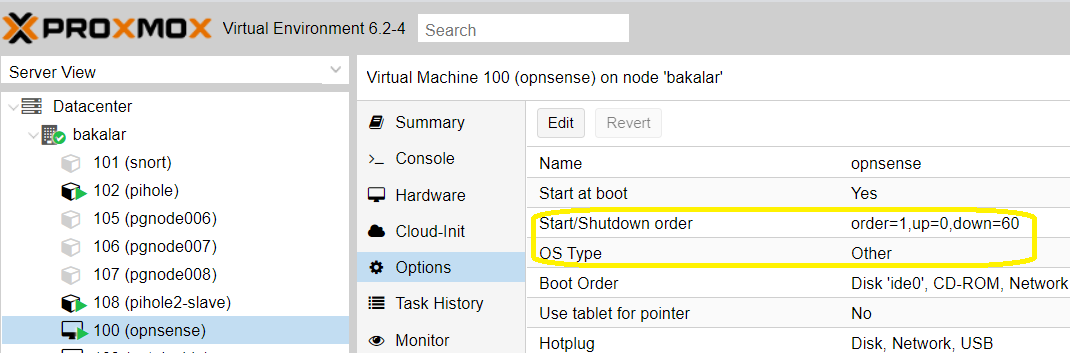
- While you are waiting for VM to reboot, make sure that the OPNSense VM is set up to autostart at Proxmox’s boot:
- After the restart, it is time to power it off again, followed by powering off your Proxmox and swap your Qotom for your ISP router! This could be a daunting operation, but I encourage you to give it a go!
Troubleshooting
- When you switch over, be patient with the booting time. You can connect to the QOTOM box via HDMI to see whether Promox has successfully booted and then assign your computer a static IP (e.g. 192.168.1.10 with network mask of 255.255.255.0 and gateway of 192.168.1.1) to connect without a router directly to access the web interface of Proxmox, and then to check OPNSense’s console.
- Keep in mind that even if you cannot reach the web GUI of OPNSense, you can always access the console from Proxmox and navigate to the console view of the VM.
1 comment
All worked as described here, thank you!