Configure APC config files
- Configure the APC configuration files – the values below may be spread out across the document. Ensure these lines are set correctly. If using nano, use
Ctrl+Winnanoto find them (or / in vim).
sudo nano /etc/apcupsd/apcupsd.conf

# For a USB-connected UPS
UPSCABLE usb
UPSTYPE usb

# Leave DEVICE blank for USB auto-detection
DEVICE

# Enable the network server so other devices can query the Pi
NETSERVER on
NISIP 0.0.0.0
NISPORT 3551

# It is also good to enable a self test every two weeks
SELFTEST 336
- Change the readiness value from ‘no’ to ‘yes’ to indicate the config file is ready.
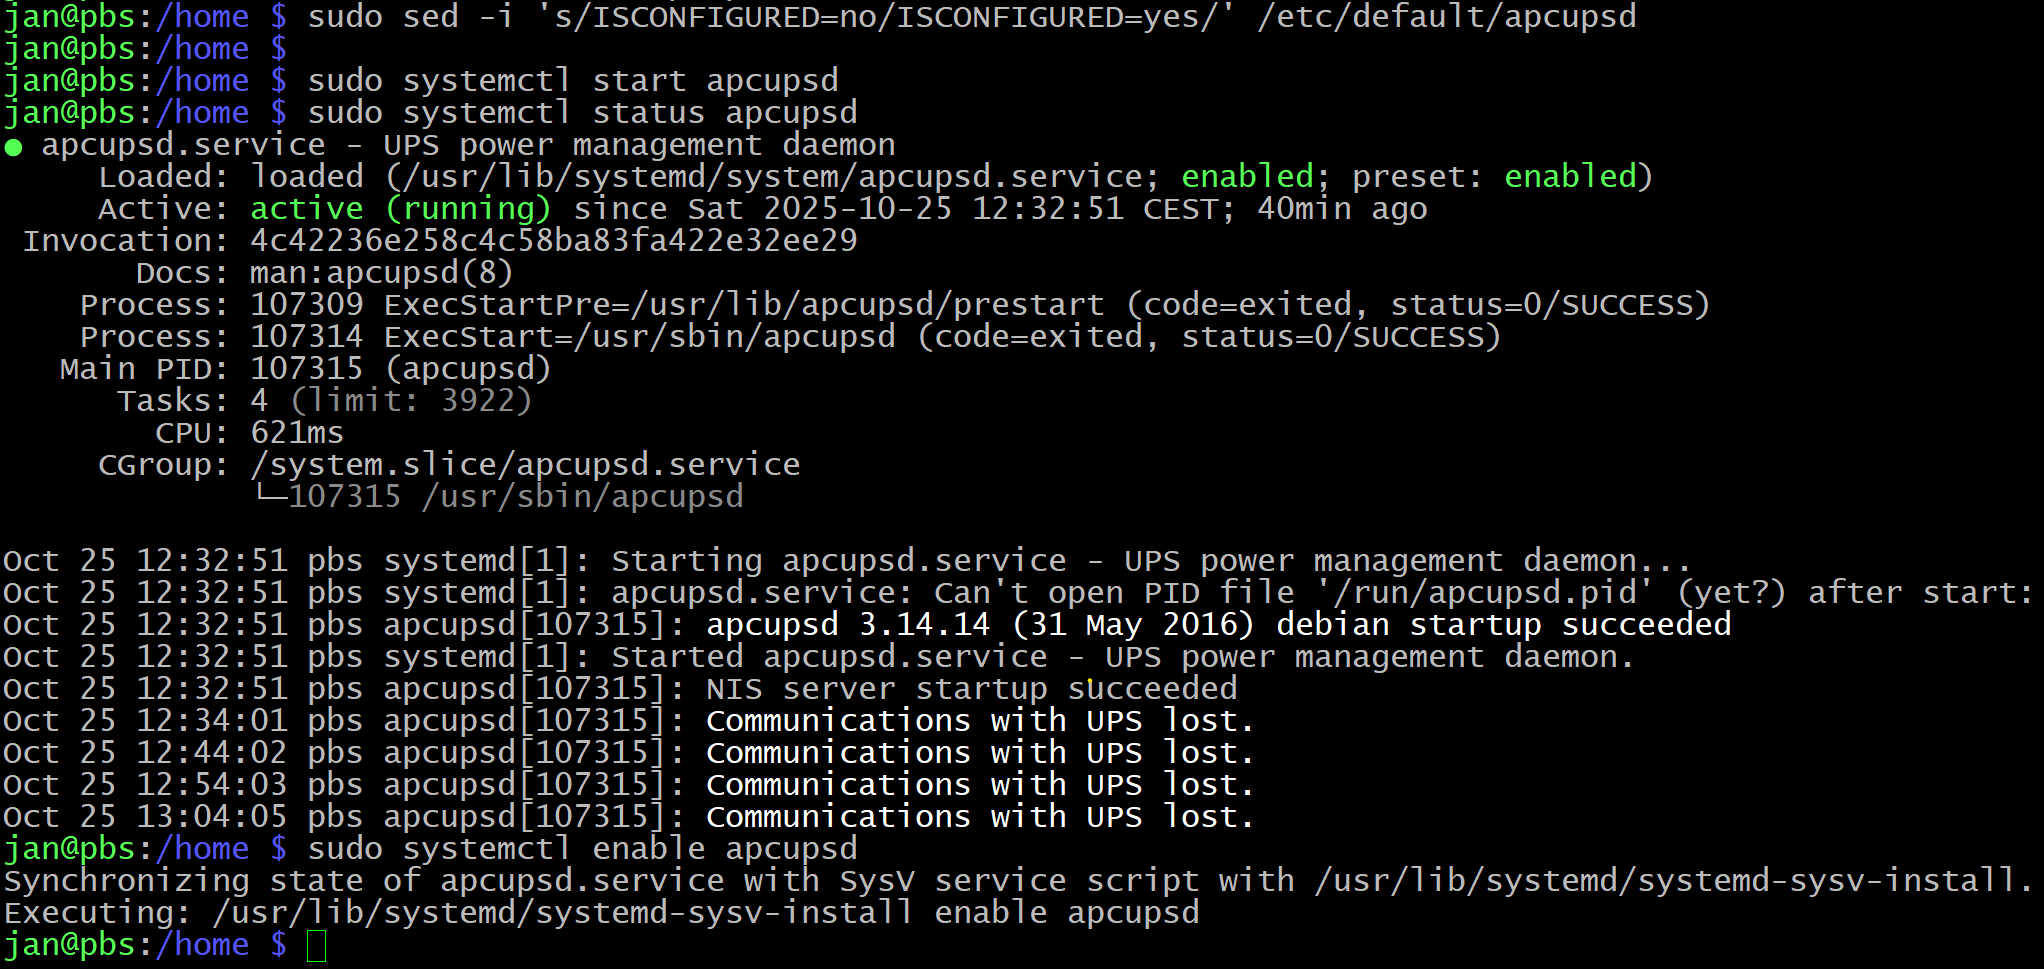
sudo sed -i 's/ISCONFIGURED=no/ISCONFIGURED=yes/' /etc/default/apcupsd
- Start the service, ensure the config is accepted and enable it to start upon boot:
sudo systemctl start apcupsd
sudo systemctl status apcupsd
sudo systemctl enable apcupsd
- Here is how it went in my case – you can see that the service is running but it is reporting communication lost every ca. 10 minutes. This is an indication that something is not quite right – without the communication working, the RPi would not know if UPS switched to battery mode and what is the status of the battery.
- In such cases, try rebooting your RPi and/or connecting it to another USB port.
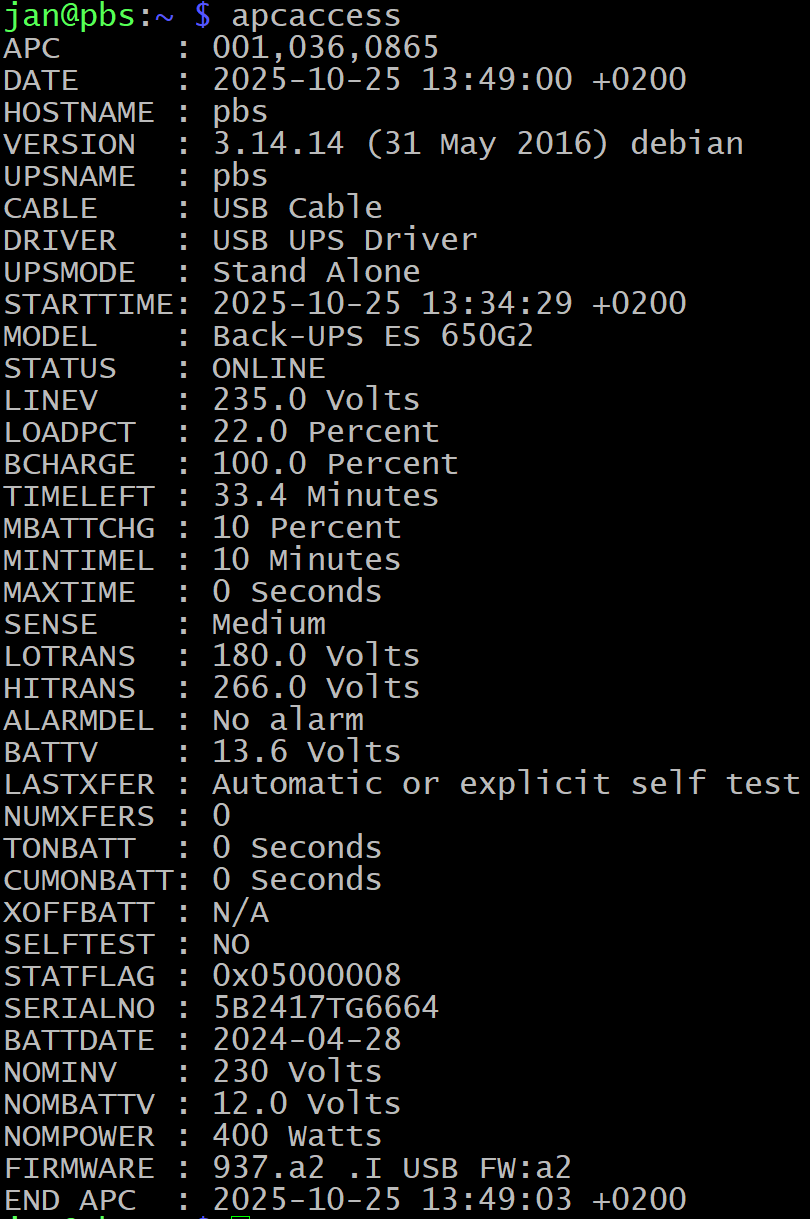
- To verify that communication is working, run
apcaccess. Check specifically for:STATUS—> Usually eitherONLINEorONBATTBCHARGE—> typically the % of the battery. Some models have it asBATTCHG– if that is your case, you will need to change that in the following scripts!
Create an SSH key for password-less access to each host
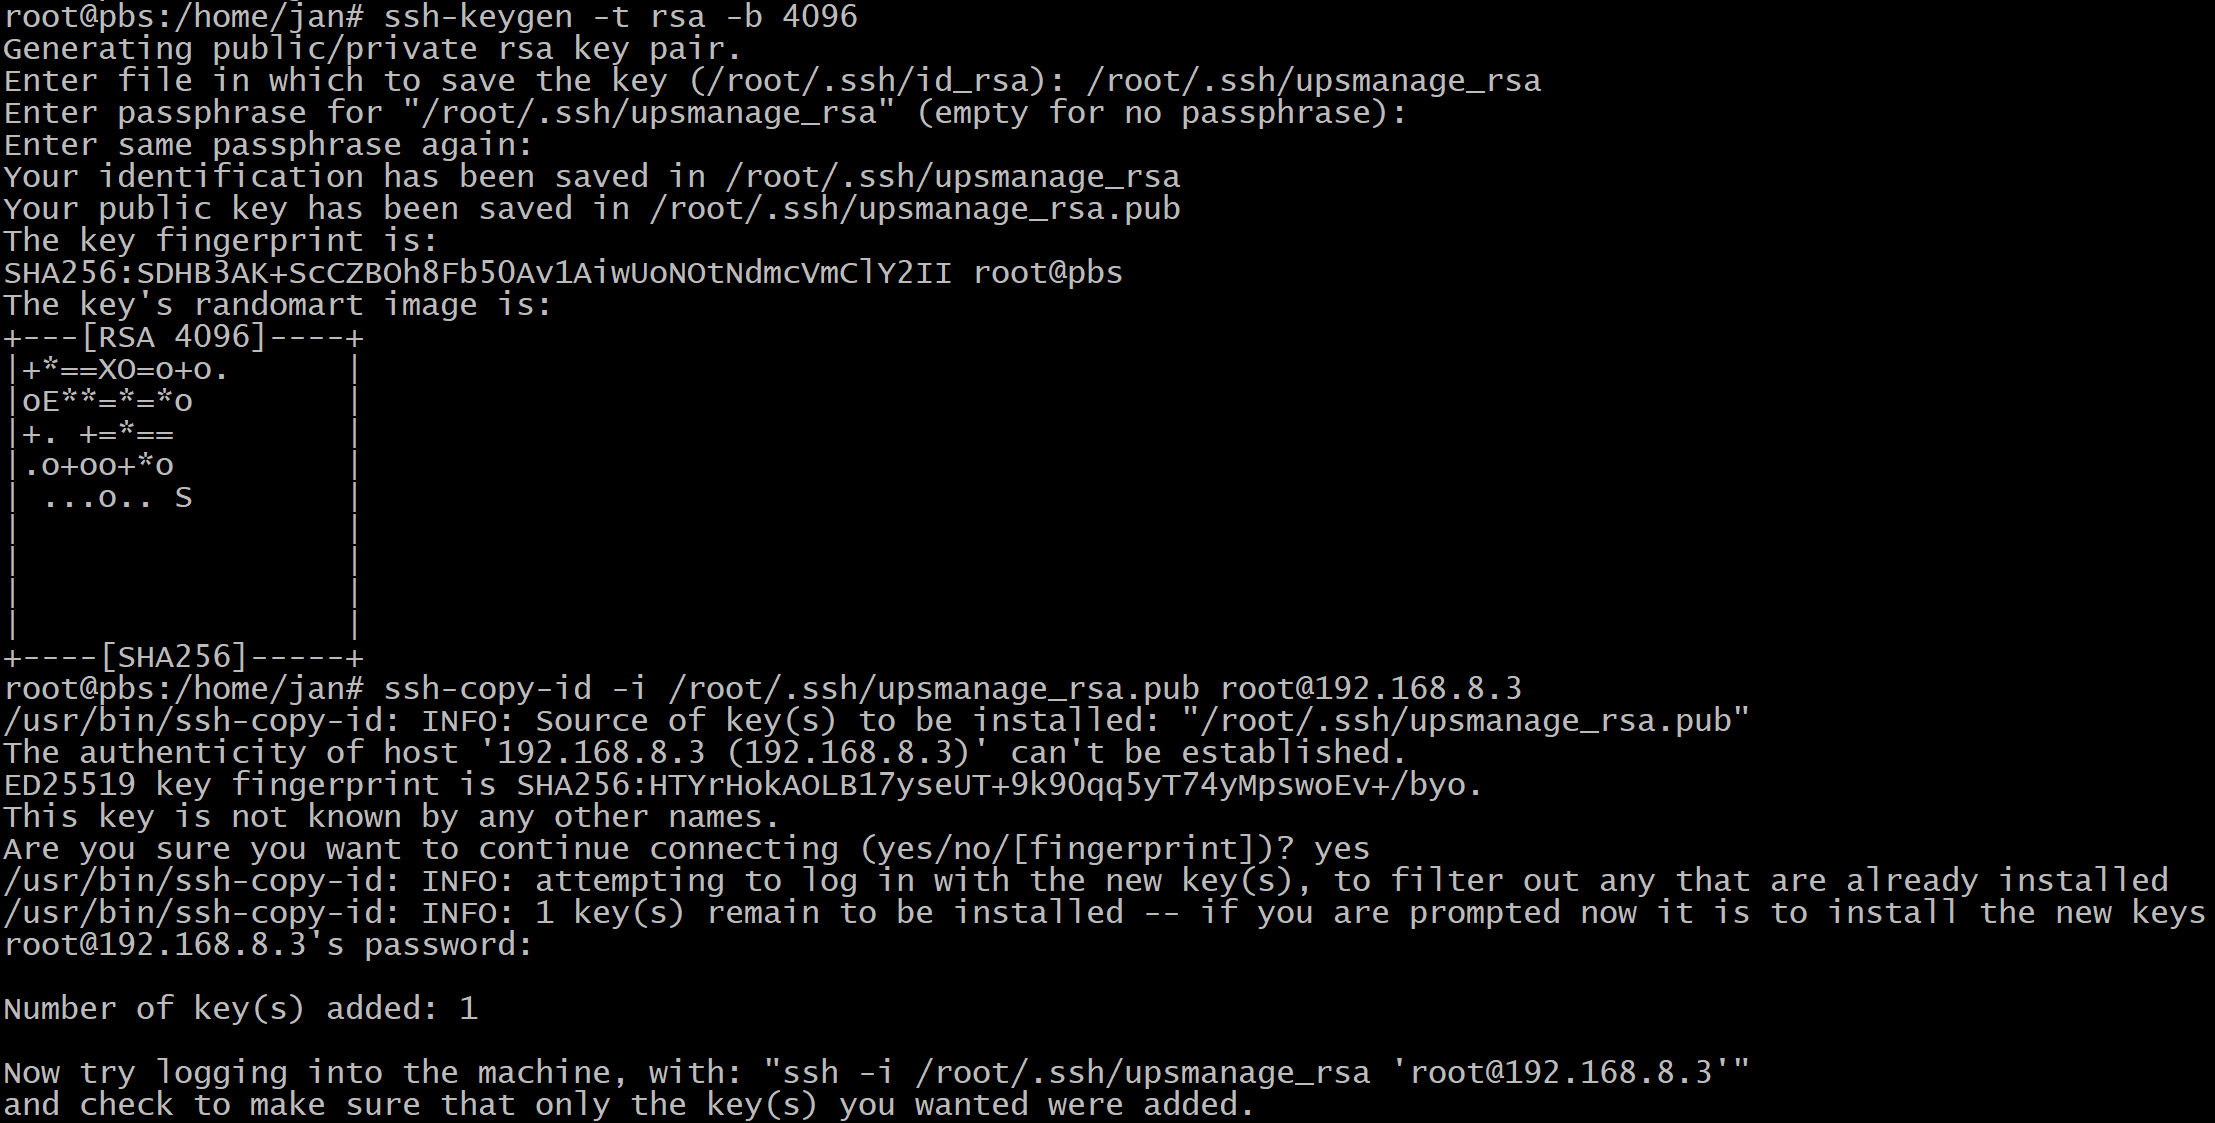
- Let’s create an SSH key and set it up to make each host reachable without needing a password.
# Switch to root
sudo -i
ssh-keygen -t rsa -b 4096
# Give the key a name and a path, such as '/root/.ssh/upsmanage_rsa' .
# This is to recognize it from other keys.

# Copy the public key to the authorized_keys of each host you want to manage.
# Replace your IPs with each host, such as your Proxmox hosts.
ssh-copy-id -i /root/.ssh/upsmanage_rsa.pub [email protected]
ssh-copy-id -i /root/.ssh/upsmanage_rsa.pub [email protected]
- Then test the connection. You should NOT be asked for a password.
# Test the connection
ssh -i /root/.ssh/upsmanage_rsa [email protected] 'hostname'  # Should return 'proxmox1'
ssh -i /root/.ssh/upsmanage_rsa [email protected] 'hostname'  # Should return 'proxmox2'

# Exit root
exit
Configure your SMTP service
- In this case, I’m using
mutt– feel free to use whichever you are comfortable with. - Let’s install it and configure it:
sudo apt install mutt -y

# Configure it (/etc/Muttrc is the global config, ~/.muttrc is for a user-specific config)
sudo nano /etc/Muttrc

# At the end the end of the file, enter your SMTP details - an example is below:

set smtp_url = "smtps://[email protected]:465/"
set smtp_pass = some_password # Use application passwords when using Gmail
set ssl_force_tls = yes
set realname = "RPI Monitoring"
set from = "[email protected]"
set use_from = yes
- Run a test from the terminal:
echo "This is the message body" | mutt -s "subject" -- [email protected]
What do we have so far?
- We know the status of our battery and can check for it periodically if we script it.
- We can reach each Proxmox host to remotely shut it down as root.
- We can send out alerts via email (later we can configure another way with a pull script with UpTime Kuma).
The next thing on the list is to create that script that can then be added as a cron job to run every minute. Let’s dive in!