In order to be able to execute these templates saved in Gitea, we will need to prepare the environment in AWX.
Create an API token to provision Hetzner-based resources using Terraform
- Create an account with Hetzner and activate 2FA.
- Create a token:
- Go to the Hetzner Cloud Console.
- Select your project (and note the ID from the browser URL, you will need it later).
- On the left, click Security.
- Select the API Tokens tab.
- Click Generate API Token.
- Give it a name (e.g.,
terraform-provisioner) and set its permissions to Read & Write. - Click Generate API Token.
- Copy the token. You will not see it again.
Automate adding your Hetzner VPS into AWX inventory after creation
- Once the VPS is set up in Hetzner, the
outputs.tfwill help us to get the public ipv4 or ipv6 address of the host and we will be able to add the host into our inventory to manage it later. - Create an AWX API Token:
- In AWX UI, go to your User Profile (bottom left).
- Click on the Tokens tab.
- Click Add and create a new Personal Access Token.
- Give it a Scope of Write.
- Copy the token immediately! You will not see it again.
- Now, let’s store this token securely. Create the credential:
# Input configuration
fields:
  - id: AWX_TOKEN
    label: AWX Token
    type: string
    secret: true

# Injector Configuration:
env:
  AWX_TOKEN: '{{ AWX_TOKEN }}'
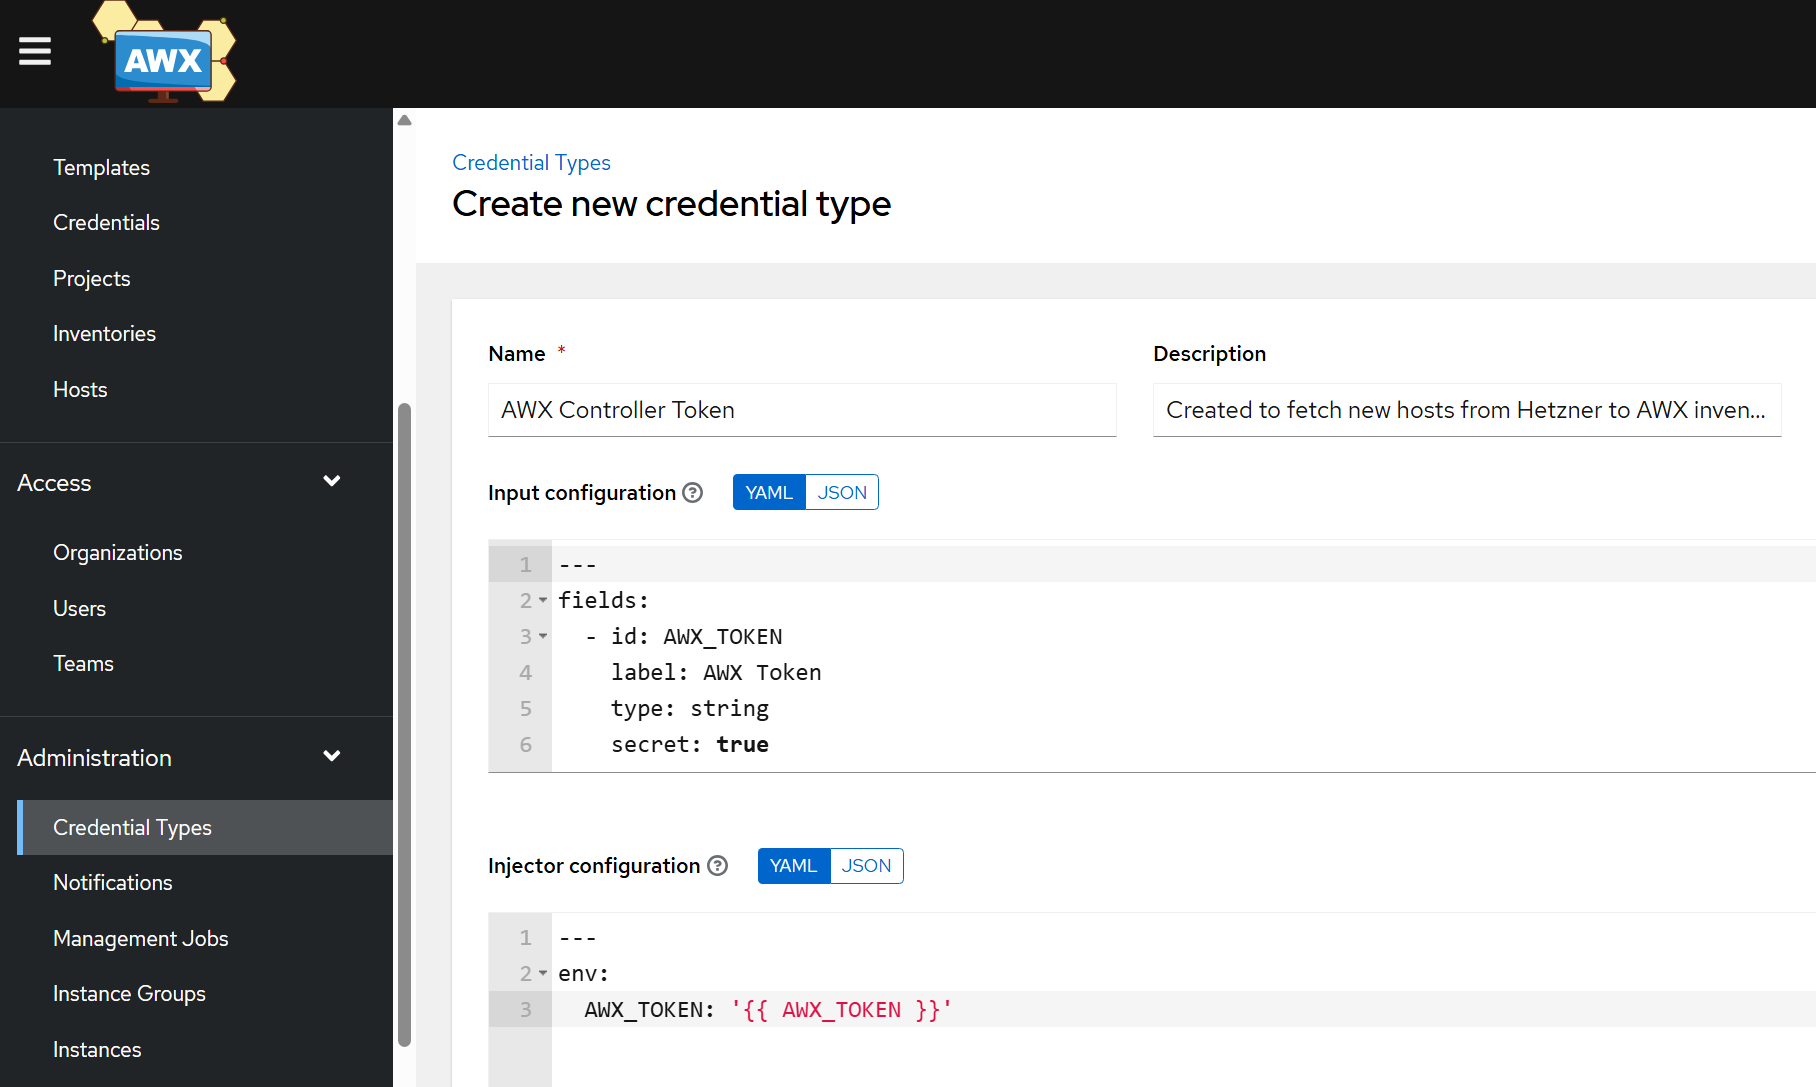
- With the credential type created, go to Resources -> Credentials. Add a new credential:
- Name:
AWX API Token - Credential Type:
AWX Controller Token - AWX Token: Paste your new token here.
- Save it.
- Name:
Create your Hetzner token + virtual local host to run jobs from
- Create the Hetzner Credential. Go to Administration -> Credential Types and create the
Hetzner Cloud Tokentype:
# Input Configuration
fields:
  - id: HCLOUD_TOKEN
    label: Hetzner API Token
    type: string
    secret: true

# Injector Configuration
env:
  HCLOUD_TOKEN: '{{ HCLOUD_TOKEN }}'
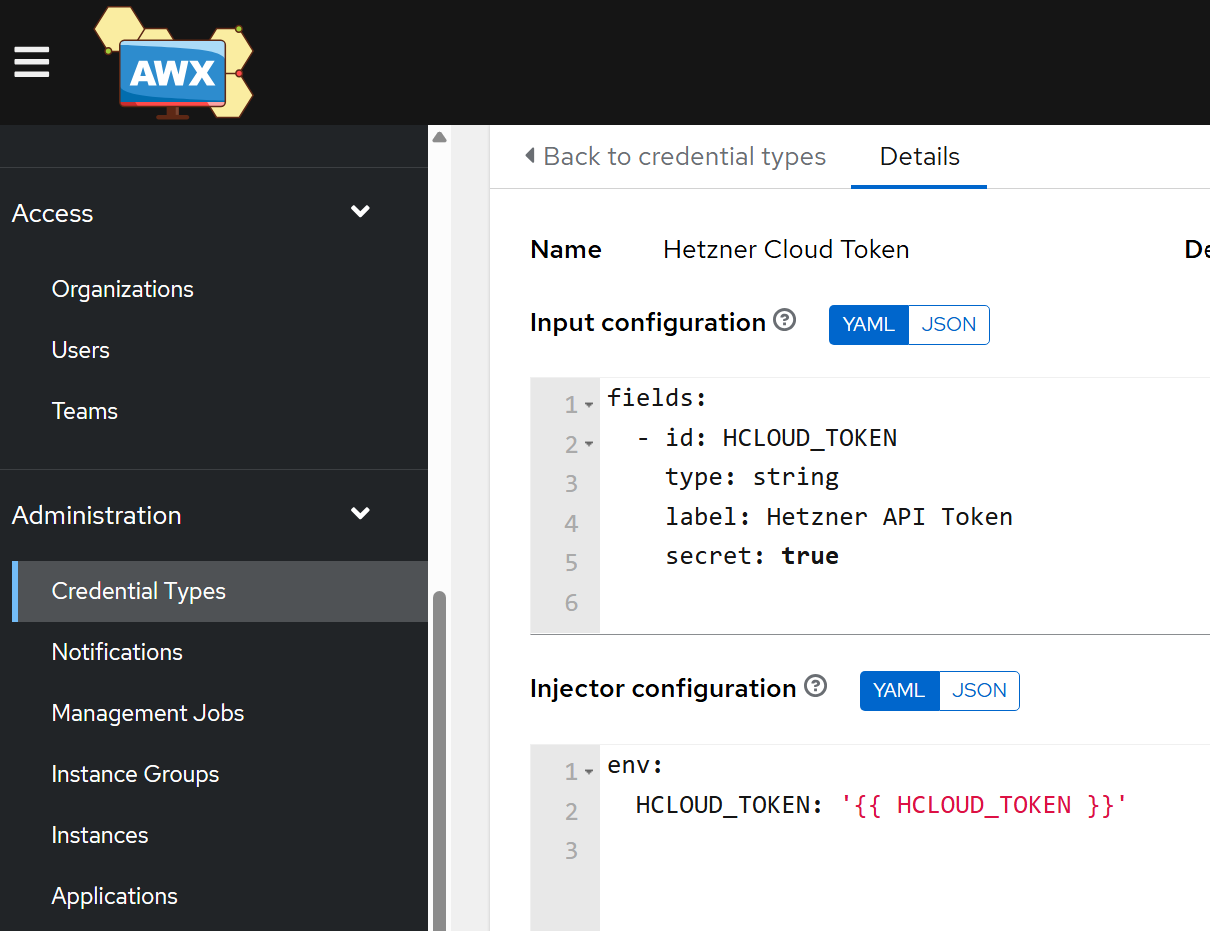
- Then go to Resources -> Credentials and create a new credential using this type. Paste in your Hetzner API token.
- In AWX UI, go to Resources → Inventory and select ‘Add inventory’ from the dropdown.
- Name:
HetznerSave it and move to the Hosts tab. Add a new host.Name:localhostVariables: copy paste the row below:
- Name:
---
ansible_connection: local
Credentials for updating DNS records in CloudFlare for Hetzner-created VPS
In order to set up the Site to Site VPN with Site 1 and Site 2 later on, providing the fact that the IP address issued by Hetzner may change during (re-)provisioning of the VPS, we should maintain a DNS record that Site 1 and Site 2 use to connect to Site 3’s endpoint and update it dynamically upon the VPS creation. Unless you have a CloudFlare token already set up, follow these steps to create it.
Create a CloudFlare token:
- In your CloudFlare dashboard, go to My Profile -> API Tokens.
- Click Create Token.
- Use the “Edit zone DNS” template.
- Set the permissions as follows:
- Permissions:
Zone–DNS–Edit - Zone Resources:
Include–Specific zone–bachelor-tech.com
- Permissions:
- Create the token and copy it, as you will not see it again.
Create a New AWX Credential Type for CloudFlare:
- Go to Administration -> Credential Types and click Add.
- Name:
CloudFlare API Token - Add int the following input & injector configuration:
# Input configuration:
fields:
  - id: cloudflare_api_token
    label: CloudFlare API Token
    type: string
    secret: true

# Injector configuration:
extra_vars:
  cloudflare_api_token: '{{ cloudflare_api_token }}'
Create the New Credential for CloudFlare:
- Go to Resources -> Credentials and click Add.
- Name:
CloudFlare (bachelor-tech.com) - Credential Type: Select your new
CloudFlare API Token. - CloudFlare API Token: Paste your new token .
Finally, all the pre-requisities are set up and we can create and trigger our first template!