Bachelor Tech
  • Home
  • Tutorials
  • Tips
  • Portfolio
  • About Jan
  • Contact Jan

7. Run a Syncthing test with your website

by Jan Bachelor December 8, 2025

If the configuration is correct, your OPNSense back-end pool will be responding to incoming requests based on a round robin principle with a sticky cookie, so that your device stays connected to the single web server. How can you know which host you have reached?

  • Here is how you can set up X-Served-By header in nginx:
nano /etc/nginx/nginx.conf

# Find the http section and add it somewhere in there:

http {

# Include web VM hostname (added for debugging)
add_header X-Served-By $hostname;

..

}
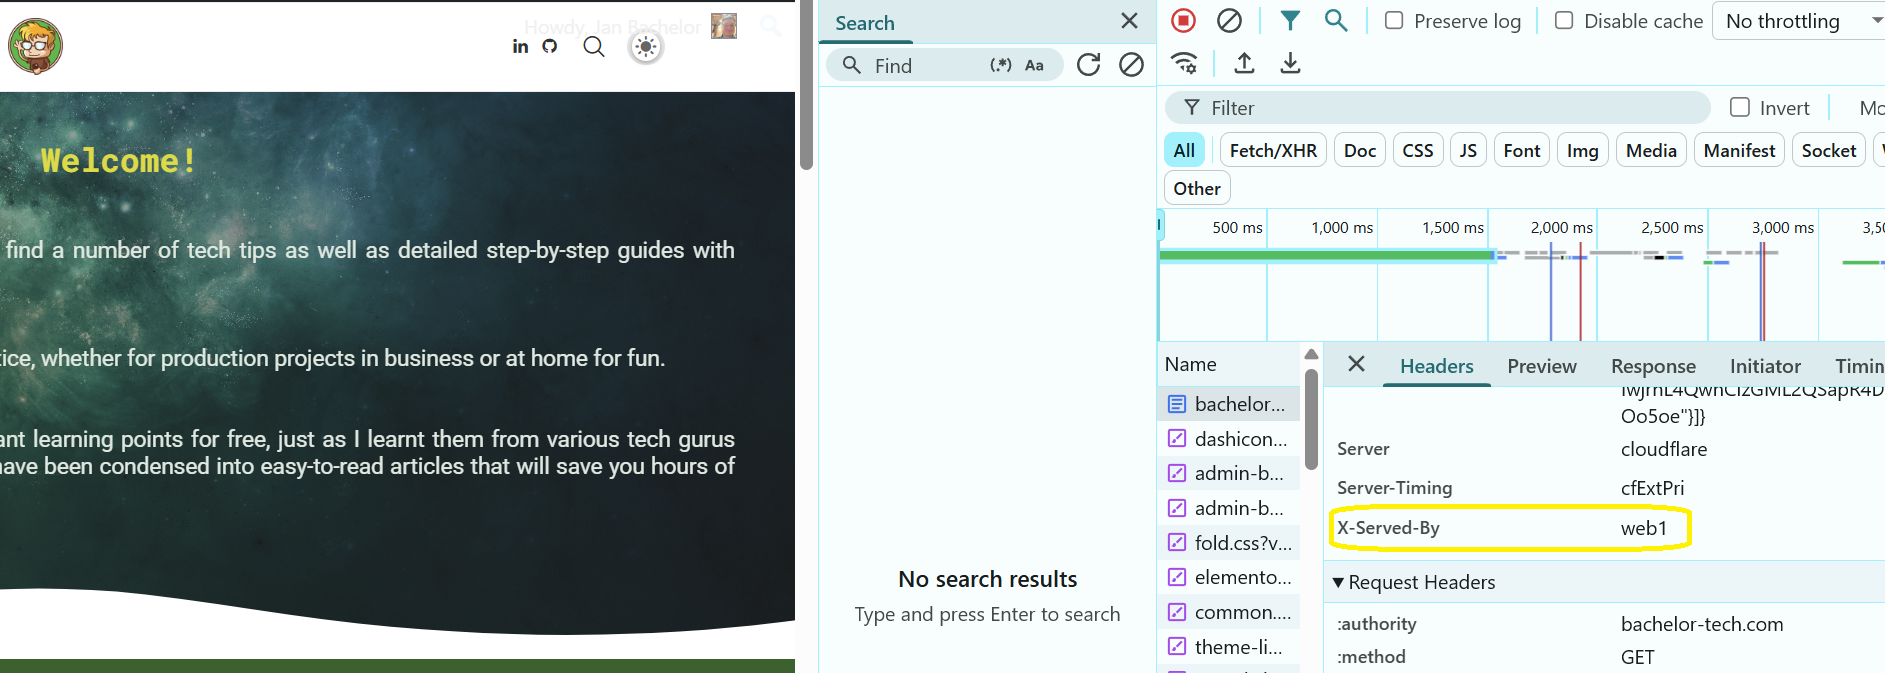
  • Access one of your self-hosted websites and identify the header.
    • Activate the developer tools (F12 on Windows/Linux or Option + ⌘ + J on a Mac)
    • Go to Network → find the first item in the list → Headers
    • Scroll down in the headers to find the ‘X-Served-By’ header.
Screenshot from a browser (Chrome) with opened Developer tools showing the injected header that reveals which web server did we hit when accessing our website.
Verify which server you hit when you access your website
  • Try opening another incognito window to reach the other host. Now try uploading content on one host and see if it displays on the other. This could be an attachment, for example. Does it appear on the other host?
    • If you cannot reach the other host this way after you have uploaded content to one, you can simply remove the host from the back-end pool to force the other one to be used.

When can this be useful?

  • A visitor reports that content loads differently from their end and you want to confirm which web server they are hitting.
  • Sync issues – you upload a file and it vanishes upon page refresh – you can check which VM you were on during upload and after refreshing the page – if they differ, this could point to Syncthing not working or not distributing the content fast enough.

Once completed, then I can but congratualte you! You have a working async replication of data between web server nodes that works both on the same site as well as in between sites. Just in case you had some doubts about whether Syncthing is the tool for you, feel free to check out the next Step to see some alternatives, their pros and cons.

6. Monitor Syncthing jobs with UptimeKuma
8. Alternatives to Syncthing & Wrap Up
Go back to course overview: How to configure High Availability for a Web Server using Syncthing and HAProxy (on OPNSense)

Leave a Comment Cancel Reply

Save my name, email, and website in this browser for the next time I comment.

This site uses Akismet to reduce spam. Learn how your comment data is processed.

0 FacebookWhatsappEmail

Course Steps

  1. 1. Why would you need Syncthing for web server HA?
  2. 2. Clone your web server (Proxmox)
  3. 3. Configure HAPRoxy with web server instances
  4. 4. Set up Syncthing on web servers
  5. 5. Trobleshoot Common Syncthing Issues
  6. 6. Monitor Syncthing jobs with UptimeKuma
  7. 7. Run a Syncthing test with your website
  8. 8. Alternatives to Syncthing & Wrap Up

Other courses

Turn your Raspberry Pi into a Proxmox Backup...

July 13, 2025

Create an automated Gravity workflow that will allow...

January 19, 2024

Dynamically Populate Gravity Forms from Google Sheets (GSheets...

March 16, 2021

Concur Alternative: Import Employees’ Credit Card Expenses to...

January 19, 2024

Install iRedMail Mail Server As Proxmox VM With...

October 31, 2024

Buy Me a Coffee

Buy Me a Coffee Buy Me a Coffee

Recent Posts

  • How to get LXC containers for Proxmox outside of ready-made templates

  • How to join two Proxmox nodes into a cluster (PVE 8.x)

  • How to Rename a Proxmox Node

All Rights Reserved. The theme was customized from Soledad, see PenciDesign

Bachelor Tech
  • Home
  • Tutorials
  • Tips
  • Portfolio
  • About Jan
  • Contact Jan