Bachelor Tech
  • Home
  • Tutorials
  • Tips
  • Portfolio
  • About Jan
  • Contact Jan

2. Clone your web server (Proxmox)

by Jan Bachelor December 8, 2025

We need to create an additional web server with the same configuration – the best way is to clone it and reconfigure it. Alternatively, you can set it up from scratch.

Clone & configure your VM with Proxmox

  • It is highly recommended to take a backup or a snapshot of your existing web server before proceeding.
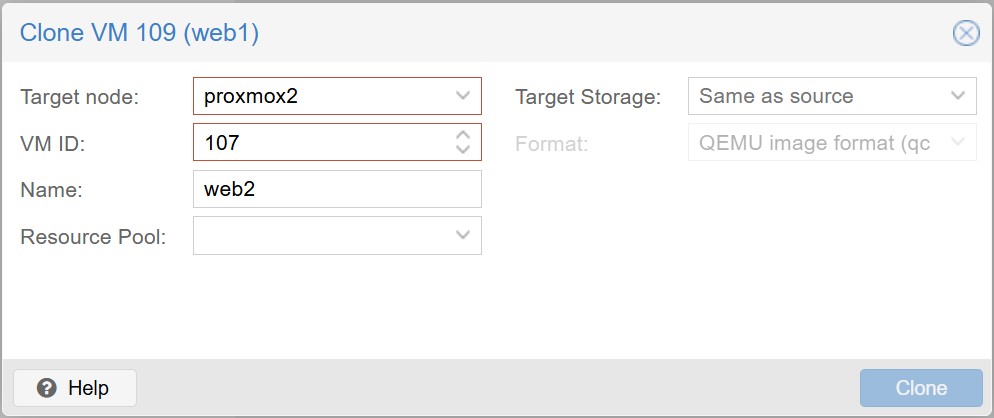
  • Assuming that you have a Type 1 hypervisor deployed of some kind (Proxmox, VMWare, Hyper-V, Harvester, etc.), start by cloning the VM to your other physical server.
Clone a web1 server VM from Proxmox1 to Proxmox2 (as web2)
Proxmox – clone web1 to web2 (ideally that resides on a different physical Proxmox host)
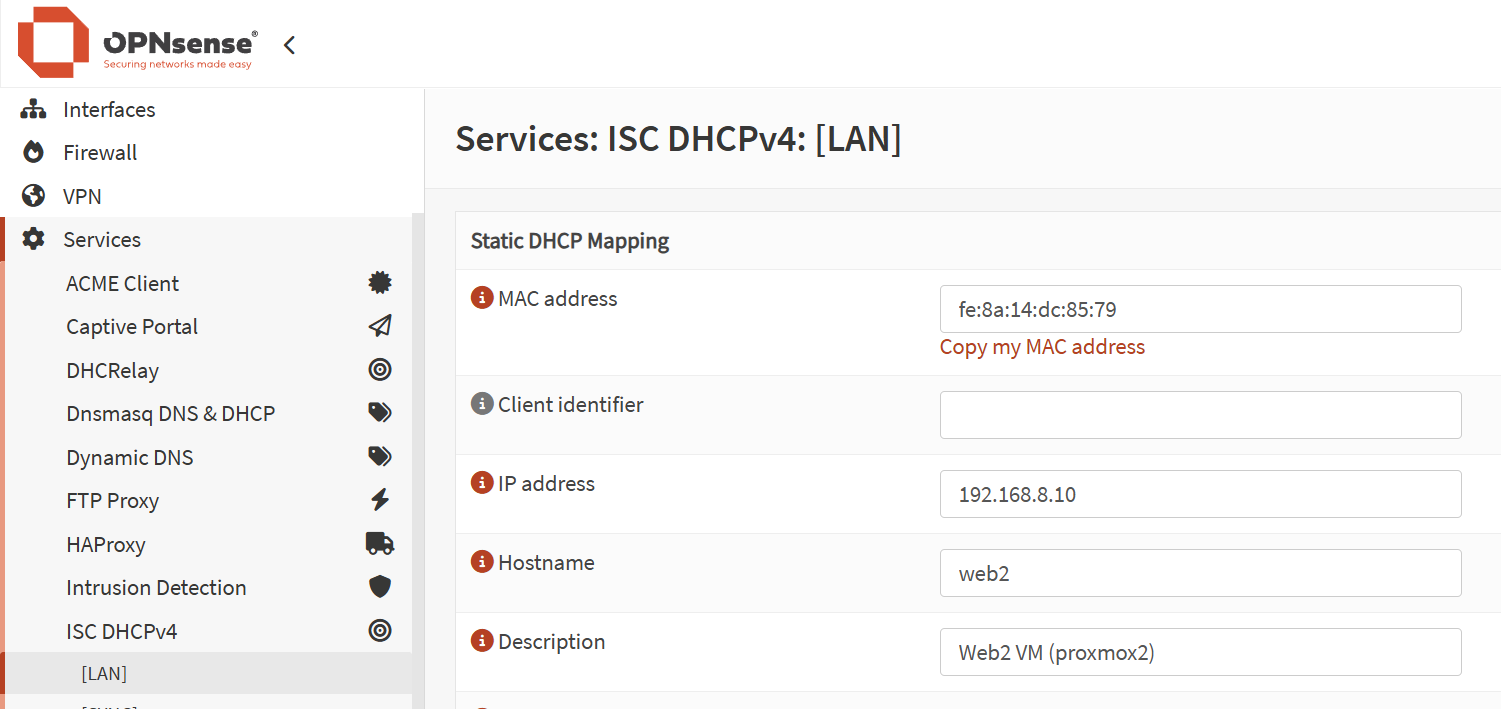
  • Once done, do not switch the VM on. Rather, copy paste its MAC address and head over to your DHCP server to assign it another static IP that you will be referring to from now on.
  • If you use OPNSense, you will find it under ‘Services’ (based on which DHCP server you use, the older one is called ‘ISC DHCPv4’). Alternatively, you may be using Kea for DHCP – the approach is very similar.
Screenshot from OPNSense's environment showing how to assign a static IP to a web server based on its MAC address.
Assign a static IP address for your newly created VM(s)
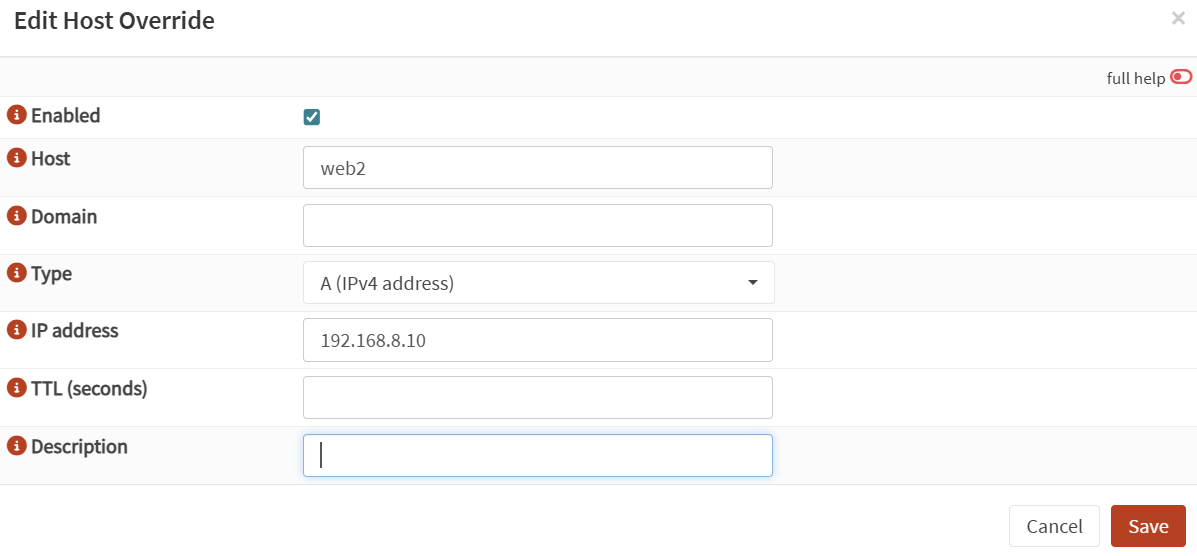
  • It is also recommended to add this VM into your Unbound Override to be reachable more easily from other sites (even if you will be setting them up in the future). In OPNSense, go to ‘Services’ → ‘Unbound DNS’ → Overrides and add your new host there.
Add host into Unbound DNS Override.
It is good practice to set up a host override on Unbound DNS
  • You can now safely switch on the VM. The respective services should run on it, although no traffic is served, as HAProxy does not know about it. Then SSH in and let’s change the hostname:
# Replace 'web2' with the hostname you prefer.
hostnamectl set-hostname web2

# Optional: Modify the /etc/hosts file and add a line for both of your web servers
nano /etc/hosts
127.0.1.1       web2.yourdomain.tld       web2

Now let’s proceed into one more preparation step related to setting up HAProxy on OPNSense to ensure that we have our back-end pool in shape for spreading web traffic in between the web hosts (before we even add Syncthing into the mix).

1. Why would you need Syncthing for web server HA?
3. Configure HAPRoxy with web server instances
Go back to course overview: How to configure High Availability for a Web Server using Syncthing and HAProxy (on OPNSense)

Leave a Comment Cancel Reply

Save my name, email, and website in this browser for the next time I comment.

This site uses Akismet to reduce spam. Learn how your comment data is processed.

0 FacebookWhatsappEmail

Course Steps

  1. 1. Why would you need Syncthing for web server HA?
  2. 2. Clone your web server (Proxmox)
  3. 3. Configure HAPRoxy with web server instances
  4. 4. Set up Syncthing on web servers
  5. 5. Trobleshoot Common Syncthing Issues
  6. 6. Monitor Syncthing jobs with UptimeKuma
  7. 7. Run a Syncthing test with your website
  8. 8. Alternatives to Syncthing & Wrap Up

Other courses

Turn your Raspberry Pi into a Proxmox Backup...

July 13, 2025

Create an automated Gravity workflow that will allow...

January 19, 2024

Dynamically Populate Gravity Forms from Google Sheets (GSheets...

March 16, 2021

Concur Alternative: Import Employees’ Credit Card Expenses to...

January 19, 2024

Install iRedMail Mail Server As Proxmox VM With...

October 31, 2024

Buy Me a Coffee

Buy Me a Coffee Buy Me a Coffee

Recent Posts

  • How to get LXC containers for Proxmox outside of ready-made templates

  • How to join two Proxmox nodes into a cluster (PVE 8.x)

  • How to Rename a Proxmox Node

All Rights Reserved. The theme was customized from Soledad, see PenciDesign

Bachelor Tech
  • Home
  • Tutorials
  • Tips
  • Portfolio
  • About Jan
  • Contact Jan