Congratulations, the hardest part is done! Your infrastructure is in place including detailed monitoring on a granular level. Let’s migrate your existing data from Bitwarden. How can you move them over?
Migrating your Bitwarden data
Each user (you, your spouse, kids, etc.) imports their own private items.
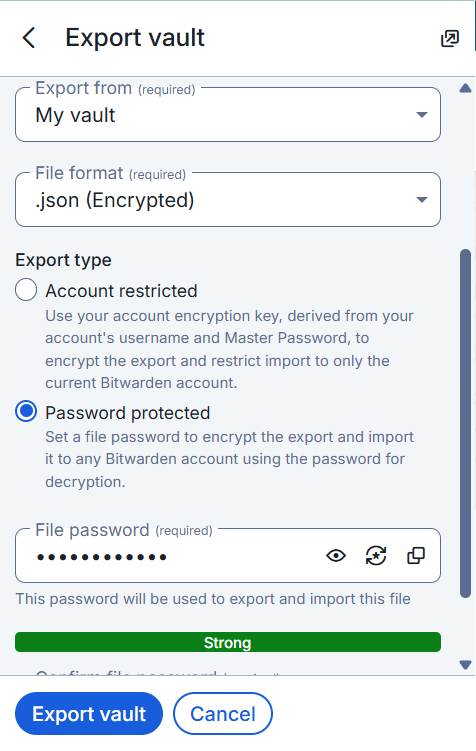
- Export: Log in to your existing Bitwarden Web Vault.
- Go to Tools > Export Vault.
- Select format .json (Encrypted) if you know how to decrypt it, or .json (Plaintext). Warning: Plaintext is readable, handle with care. You can import and encrypted file just fine.
- Import: Log in to your new Vaultwarden instance.
- Create your user account (ensure
SIGNUPS_ALLOWED=truein thedocker-compose.ymlfile at least at the beginning for your own account, the others you can invite).Go to Tools > Import Data.Select Bitwarden (json).Paste the content or upload the file. If you are using the recommended encrypted .json file, you will be prompted for a password.
- Create your user account (ensure

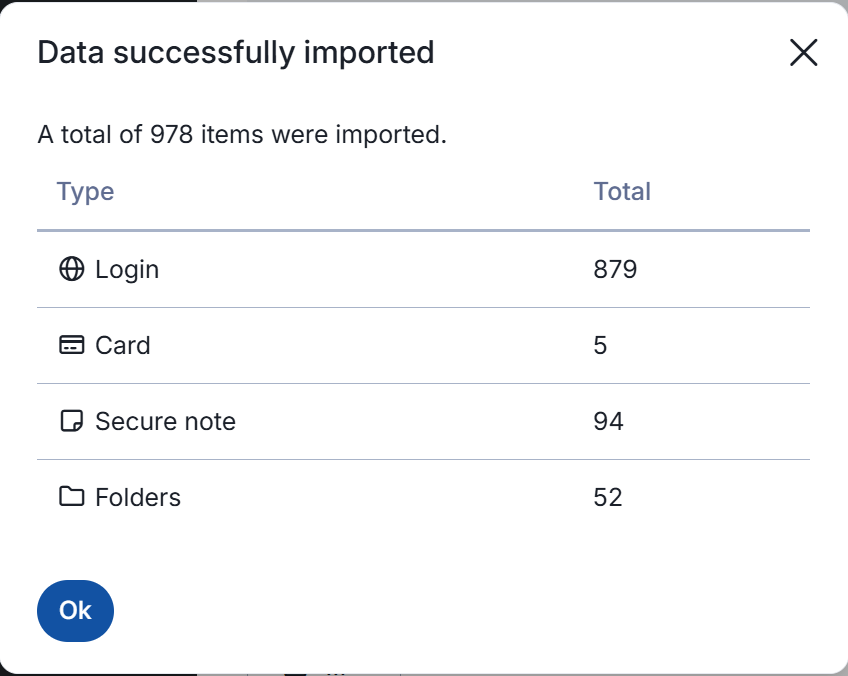
- Give it some time without refreshing the page for the credentials to import.
- You will then be greeted with a confirmation that the import has finished.
💡Moving an Organization (or a Family org) is done in the same way as the personal vault, you just need to export them and import them separately. Collections are re-created automatically during the import, you do not need to create them before the import.
Handling special items in Vaultwarden
- SSH Keys are stored as standard “Items” in the database (similar to Logins or Cards). They will be included in the JSON export and should appear in Vaultwarden automatically.
- Attachments – standard JSON exports do not contain file attachments (images, PDFs, keys attached as files). You must move these manually. While a
.zipexport that includes attachments is available inBitwarden, importing this into a self-hosted Organization often fails or isn’t fully supported by the importer yet. Manual is the safest bet for integrity. - Sends (temporary links) – these cannot be exported. If you have active Sends, you will need to manually recreate them in the new instance.
Log into your Vaultwarden using Bitwarden browser plugin
- If, like many other users, you use the browser plugin for Bitwarden, you can also use it for Vaultwarden.
- Simply log out your Bitwarden account and, as shown below, click on the ‘Accessing’ option and choose ‘self-hosted’.
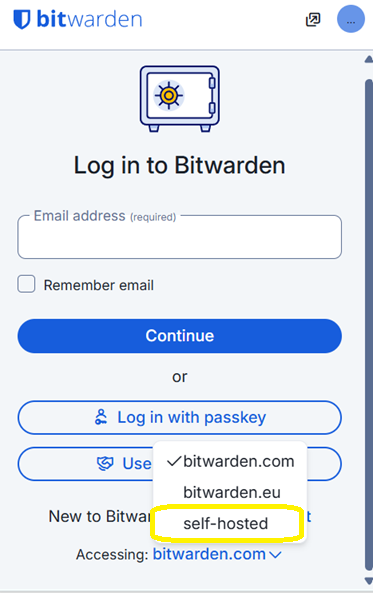
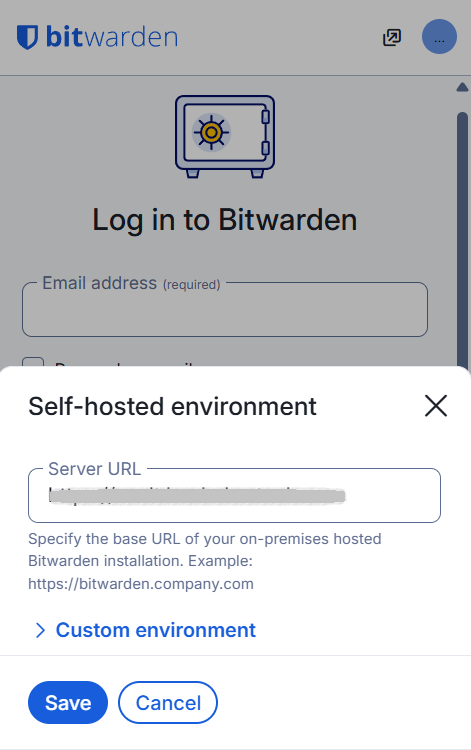
- Enter the URL of your instance.
💡Once your initial accounts are set up and no more sign ups are required, remember to open each
docker-compose.ymlfile on each web server and ensure thatSIGNUPS_ALLOWED=trueare set to true. This is especially sensitive if your Vaultwarden instance is public-facing, as otherwise, anyone could create accounts and use your service, including bots.
Set up user/org policies
Before inviting users, it is vital to set some ‘ground’ rules for authentication and other security policies.
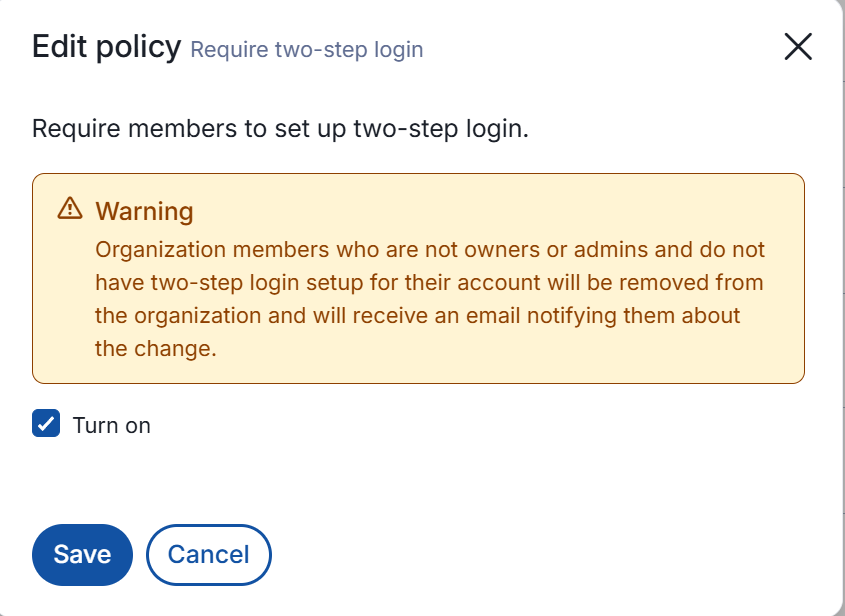
- Go to Settings → Policies → Require two-step login. Turn it on.
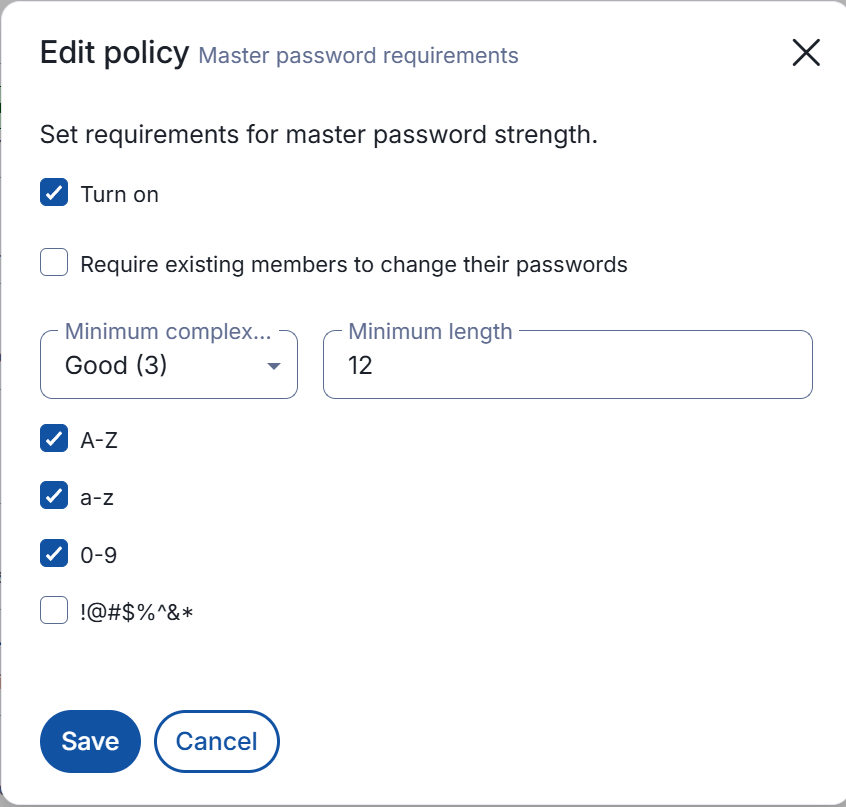
- Similarly, set up Master password requirements. Their length matters way more than complexity. Minimum recommended is 12 characters (marked as ‘Good (3)’ in Vaultwarden).
- Based on your preferences, you can enforce additional policies.
Invite other Vaultwarden members
Since this is a new server, your family members technically need “new” accounts.
- Have family members sign up on your new Vaultwarden URL.
- Go to your Organization > Members > Invite Member.
- Type their email (must match what they signed up with). Verify that they received an email based on the SMTP settings you placed in your
docker-compose.ymlfile previously. - Once they accept the invite, go back to Members and ‘Confirm’ them in the Members tab.
- Assign them to the correct Collections (e.g. children manage only their own collection).
Feel free to play with additional settings in Vaultwarden web UI. Are there are additional considerations to take into account? How about backup and restoration? Or how can you go about updating your Vaultwarden instance? We will review these in our last Step.