Bachelor Tech
  • Home
  • Tutorials
  • Tips
  • Portfolio
  • About Jan
  • Contact Jan

3. Create an SST user on your template container

by Jan Bachelor October 21, 2025

Relevant documentation: mariadb-backup SST method

Later on, once your Galera cluster is operational, your nodes will exchange data using these two types of syncs:

  • IST is used when a node has only been offline for a short time. It just asks for the missing transactions from the donor’s cache (gcache).
  • SST is a full copy of the entire dataset, which is what invokes the wsrep_sst_method script (mariabackup or rsync).

Methods of syncing:

  • Previously, rsync was the method used for syncing between nodes. The challenge with this method is that while the update is being sent by the ‘donor’ node, the receiving ‘joiner’ node is not accepting other traffic.
  • With the mariadb-backup method, traffic is still being accepted even while the sync is in progress. This is achieved by using a socat utility, which must be installed on both ‘donor’ and the ‘joiner’ nodes.

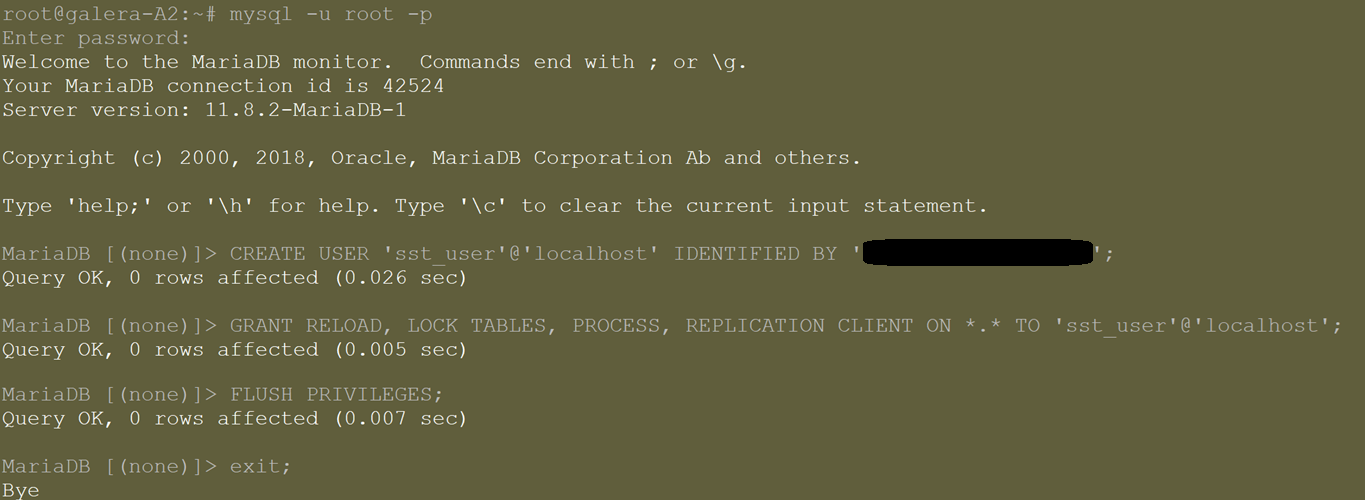
We will need to create a user in MariaDB with a password on all future nodes in our cluster, so let’s do it on the template.

# Log into your MariaDB instance
mariadb -u root -p

CREATE USER 'sst_user'@'localhost' IDENTIFIED BY 'YourSuperSecurePassword';
GRANT RELOAD, LOCK TABLES, PROCESS, REPLICATION CLIENT ON *.* TO 'sst_user'@'localhost';
FLUSH PRIVILEGES;
EXIT;
Create an SST user that will be used for syncing between your nodes once you deploy your cluster
  • A Security Note: The password for the SST user should be very strong, as it has extensive privileges on the database. There are different ways of how you can authenticate (see MariaDB’s documentation). When using the unix method of authentication (this is our case), the password is stored in plain-text in a configuration file. In our case, in step 7, it will be stored in /etc/mysql/mariadb.conf.d/60-galera.cnf. Ensure that you have proper file permissions set to prevent unauthorized access.

2. Create your first container as a template on Proxmox
4. Security Hardening & Logging on Galera template LXC
Go back to course overview: Deploy MariaDB Galera Cluster on Proxmox

Leave a Comment Cancel Reply

Save my name, email, and website in this browser for the next time I comment.

This site uses Akismet to reduce spam. Learn how your comment data is processed.

0 FacebookWhatsappEmail

Course Steps

  1. 1. Galera Cluster - what is it and why is it good for your home set up
  2. 2. Create your first container as a template on Proxmox
  3. 3. Create an SST user on your template container
  4. 4. Security Hardening & Logging on Galera template LXC
  5. 5. Turn the MariaDB container to a template - full vs linked clones?
  6. 6. Deploy 4x LXC containers on 2x Proxmox nodes
  7. 7. Configure Galera on each CT
  8. 8. Configure HAPRoxy for your Galera cluster
  9. 9. Understanding Quorum - When the Raspberry Pi comes in
  10. 10. Set up Monitoring - UpTime Kuma
  11. 11. Entrust your Galera Cluster with data
  12. 12. Beyond the set up - recovery & self-healing options

Other courses

Create an automated Gravity workflow that will allow...

January 19, 2024

Dynamically Populate Gravity Forms from Google Sheets (GSheets...

March 16, 2021

Concur Alternative: Import Employees’ Credit Card Expenses to...

January 19, 2024

Turn your Raspberry Pi into a Proxmox Backup...

July 13, 2025

Install iRedMail Mail Server As Proxmox VM With...

October 31, 2024

Recent Posts

  • How to get LXC containers for Proxmox outside of ready-made templates

  • How to join two Proxmox nodes into a cluster (PVE 8.x)

  • How to Rename a Proxmox Node

Facebook Twitter Instagram Pinterest Linkedin Youtube

All Rights Reserved. The theme was customized from Soledad, see PenciDesign

Bachelor Tech
  • Home
  • Tutorials
  • Tips
  • Portfolio
  • About Jan
  • Contact Jan