In the previous step, we created a simple patching job for a standalone Debian host. In reality, we would need more than that.
- What if you have a database cluster such as on Maria DB (Galera)?
- What if you have more than one web server in HA configuration – you would not want to run the updates and reboot them at the same time.
- What if the patching goes wrong? Why not to create a snapshot BEFORE the patching is done while removing some older ones to prevent them from clogging up the space?
Therefore, we will need more dedicated templates for each purpose. The following examples may not fit you precisely but will give you a good idea. You can use AI to re-create it for your OS flavor and purpose.
Note: Remember to sync the Ansible Playbooks job (Project) once you update Gitea. Similarly, if you make any changes related to your hosts (such as changing tags), you will need to run the Inventory sync job again to ensure it gets updated in your Hosts section.
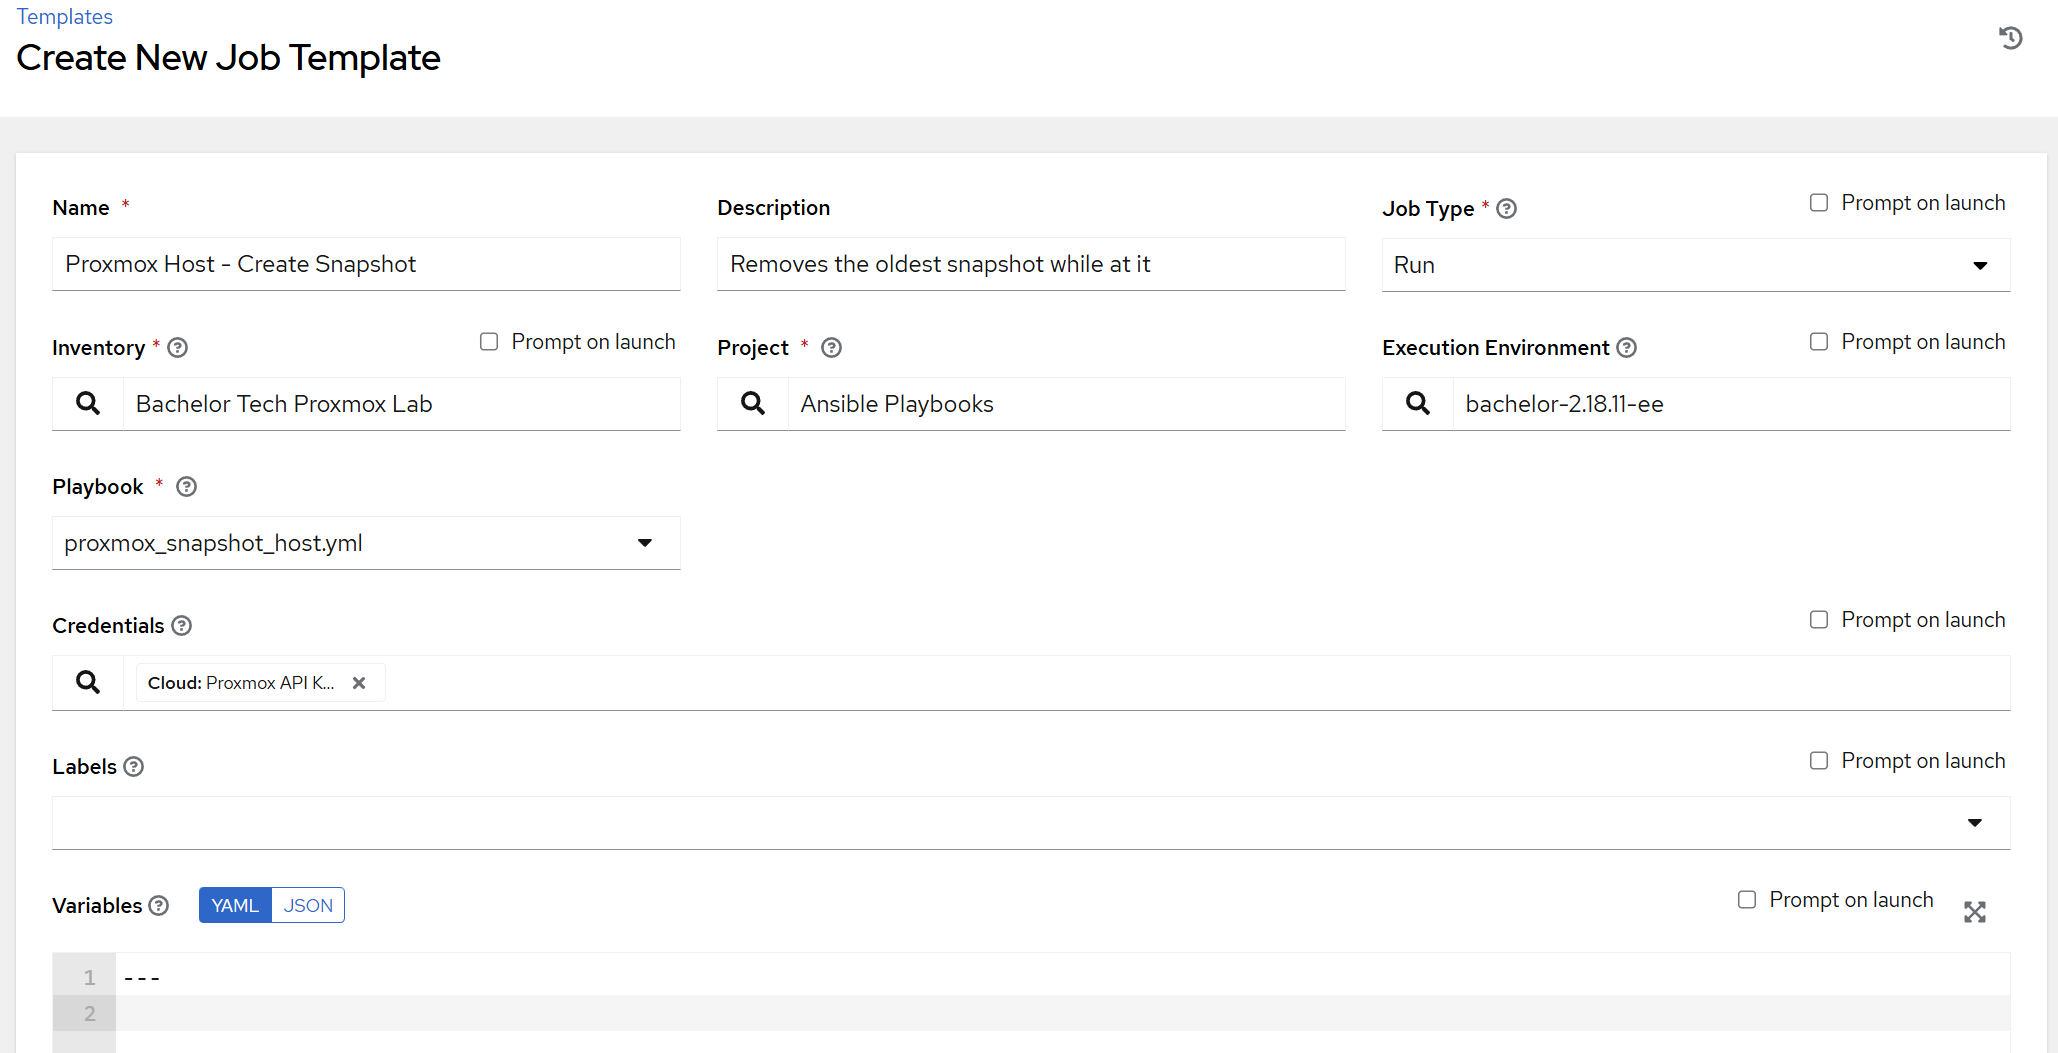
Create an snapshot job for all Proxmox Hosts
Before we do any patching, we should leverage the beautiful feature available to us in Proxmox and snapshot the VM or LXC first. In addition, we should remove the last snapshot available for this host to ensure we do not end up with too many.
- Add this file
proxmox_snapshot_host.ymlinto your Gitea (or other source version control system that you use for this purpose).- Note that the snapshot name needs to be unique for each snapshot, hence why I added the date + time variable into it. Tweak the
tz=to your own time zone based on the TZ Identifier.
- Note that the snapshot name needs to be unique for each snapshot, hence why I added the date + time variable into it. Tweak the
proxmox_snapshot_host.yml
---
- name: Create a Proxmox Snapshot
  hosts: all_proxmox_guests
  become: false
  connection: local
  serial: 1
  gather_facts: false

  vars:
    proxmox_api_host: "proxmox.bachelor-tech.com"
    proxmox_api_port: 443 # If you skipped chapter 3, then use port 8006
    proxmox_api_user: "ansible@pam"
    proxmox_api_token_id: "awx_token"
    proxmox_validate_certs: true
    proxmox_api_secret: "{{ lookup('env', 'PROXMOX_TOKEN_SECRET') }}"

  tasks:
    - name: Create new snapshot (with RAM)
      community.proxmox.proxmox_snap:
        api_host: "{{ proxmox_api_host }}"
        api_port: "{{ proxmox_api_port }}"
        api_user: "{{ proxmox_api_user }}"
        api_token_id: "{{ proxmox_api_token_id }}"
        api_token_secret: "{{ proxmox_api_secret }}"
        validate_certs: "{{ proxmox_validate_certs }}"
        vmid: "{{ proxmox_vmid }}"
        snapname: "AWX_Patch_Backup_{{ lookup('pipe', 'TZ=Europe/Prague date +%Y-%m-%d_%H-%M') }}" # Change your time zone (tz)
        description: "AWX Job Run ID: {{ awx_workflow_job_id | default(awx_job_id, true) | default('Manual Run', true) }}"
        vmstate: true
        state: present
        retention: 3
        timeout: 300
- Add this as a template job under Templates → Add job template. Fill it in. As a credential, find the ‘Proxmox API key’ category type (not a ‘Machine’ type). There is no need for a ‘Privilege Escalation’ here. Since the
community.proxmoxmodule will be used for this job, we will need to use the custom EE we created earlier.
- Feel free to run it on a specific group first to verify that it is working as expected (it took me a while to figure out the
awx_job_idandawx_workflow_job_idvariables but I found them in this article). - Possible errors may include:
- Limited API keys in Proxmox, such as when you have applied only
PVEAuditorand notPVEAdminpermissions to the account you use for Ansible. - Incorrect syntax in YAML – confirm that you copied it over correctly and that any manual modifications honor the spaces (2 spaces for main headings and 4 for subheadings).
- Limited API keys in Proxmox, such as when you have applied only
- Once working, add another template and then we will need to turn it into a workflow.
Patch web servers running Nginx (Debian)
This template is fitted for Debian-based hosts that run nginx as a web server (or as a reverse proxy engine). It is not expected that a DB engine runs on it (separation of concerns).
- With the
serial: 1parameter, only one host at one time will be processed to minimize downtime. - The next host will not be processed until nginx responds with
HTTP/200onlocalhostwithin 5 minutes after the reboot was initiated. - Just confirm the port that your nginx is running on by checking
/etc/nginx/conf.d/default.conf. In my case, it is port 8081, so I changed it accordingly. You can test it by logging into each web server and runningcurl -v <http://localhost:8081> | grep HTTPto confirm that you get a response + that it is HTTP/200 and not something else (like a 300 redirect).
---
- name: Safely patch Nginx Web Servers (Rolling Update)
  # This targets the dynamic group created by your 'nginx' tag
  hosts: nginx
  become: true # Elevate to sudo

  # Run on one host a time
  serial: 1

  tasks:
    - name: Update apt repo and cache
      ansible.builtin.apt:
        update_cache: yes
        force_apt_get: yes
        cache_valid_time: 3600

    - name: Upgrade all apt packages
      ansible.builtin.apt:
        upgrade: dist
        autoremove: yes
        autoclean: yes

    - name: Check if a reboot is required (kernel/libs)
      ansible.builtin.stat:
        path: /var/run/reboot-required
      register: reboot_required_file

    - name: Check if uptime is greater than 90 days
      ansible.builtin.assert:
        that: (ansible_uptime_seconds | int) < 7776000 # (90*24*60*60)
        fail_msg: "Uptime ({{ (ansible_uptime_seconds / 86400) | round(1) }} days) is over 90 days. Forcing reboot."
        quiet: true
      register: uptime_check
      ignore_errors: true

    - name: Reboot the server if (kernel needs it) OR (uptime > 90 days)
      ansible.builtin.reboot:
        msg: "Rebooting server after Ansible patch run"
        connect_timeout: 5
        reboot_timeout: 300
        post_reboot_delay: 30
        test_command: whoami
      when: reboot_required_file.stat.exists or uptime_check.failed

    - name: Wait for Nginx to be up and serving traffic (HTTP 200)
      # This task runs after patching/rebooting.
      # Ansible will not move to the next host until this task succeeds.
      ansible.builtin.uri:
        url: <http://localhost:8081> # Checks Nginx on the host itself - verify your port
        status_code: 200
      register: nginx_status
      # A retry loop
      until: nginx_status.status == 200
      retries: 20 # Retry x amount of times
      delay: 15   # Wait for 15 seconds between retries (5 minutes total)
Patch MySQL databases (Debian)
- If you are running MySQL or MariaDB on Debian, whether in a cluster or standalone, you may appreciate this template – it will process each host one-by-one and waits until the service starts listening again on the default port of 3306 before processing another host of this type. This way, even if you are on a cluster, only one member would be down at a one time.
---
- name: Safely patch Galera Cluster (one node at a time)
  hosts: databases
  become: true # Elevate to sudo

  # Run one host a time
  serial: 1

  tasks:
    - name: Update apt repo and cache
      ansible.builtin.apt:
        update_cache: yes
        force_apt_get: yes
        cache_valid_time: 3600

    - name: Upgrade all apt packages
      ansible.builtin.apt:
        upgrade: dist
        autoremove: yes
        autoclean: yes

    - name: Check if a reboot is required (kernel/libs)
      ansible.builtin.stat:
        path: /var/run/reboot-required
      register: reboot_required_file

    - name: Check if uptime is greater than 90 days
      ansible.builtin.assert:
        that: (ansible_uptime_seconds | int) < 7776000
        fail_msg: "Uptime ({{ (ansible_uptime_seconds / 86400) | round(1) }} days) is over 90 days. Forcing reboot."
        quiet: true
      register: uptime_check
      ignore_errors: true

    - name: Reboot the server if (kernel needs it) OR (uptime > 90 days)
      ansible.builtin.reboot:
        msg: "Rebooting server after Ansible patch run"
        connect_timeout: 5
        reboot_timeout: 300
        pre_reboot_delay: 0
        post_reboot_delay: 30
        test_command: whoami
      when: reboot_required_file.stat.exists or uptime_check.failed

    - name: Wait for the MariaDB port (3306) to be open
      ansible.builtin.wait_for:
        host: "{{ ansible_host }}"
        port: 3306
        delay: 30        # Start checking 30s after reboot
        timeout: 600     # Wait up to 10 minutes
        state: started
      when: reboot_required_file.stat.exists or uptime_check.failed
Patch Debian 12 to 13 (major version change)
This template would be executed only manually on hosts that you want to upgrade – in this case, from Debian 12 (Bookworm) to Debian 13 (Trixie). You can easily adapt it to the future releases. Again with the serial: 1 parameter, only one host at one time would be processed to minimize downtime.
---
- name: Perform major a Debian upgrade from 12 to 13
  hosts: all_debian_hosts # Limit this in AWX
  become: true # Elevate to sudo

  # Run on one host at a time
  serial: 1

  tasks:
    - name: Ensure we are on the current release (Bookworm)
      ansible.builtin.assert:
        that: ansible_distribution_release == 'bookworm'
        fail_msg: "This host is not on Debian 12 (bookworm). Aborting."

    - name: Update all /etc/apt/sources.list files from 'bookworm' to 'trixie'
      ansible.builtin.replace:
        path: "{{ item }}"
        regexp: 'bookworm'
        replace: 'trixie'
      with_fileglob:
        - /etc/apt/sources.list
        - /etc/apt/sources.list.d/*.list

    - name: Run apt update
      ansible.builtin.apt:
        update_cache: yes

    - name: Perform the initial minimal upgrade
      ansible.builtin.apt:
        upgrade: yes
      environment:
        # Attempts to automatically answer config file prompts
        # with "keep the old version"
        DEBIAN_FRONTEND: noninteractive

    - name: Perform the full distribution upgrade
      ansible.builtin.apt:
        upgrade: dist
      environment:
        DEBIAN_FRONTEND: noninteractive

    - name: Clean up old packages
      ansible.builtin.apt:
        autoremove: yes

    - name: Reboot to finish the upgrade
      ansible.builtin.reboot:
        msg: "Rebooting after major Debian upgrade"
Combine the snapshot + patching job into a workflow template job
- Let’s say that you have set up the snapshot job and at least one of the other patching jobs.
- In a real world scenario, you would not want to just patch a host that resides on Proxmox, you would want to always at least take a snapshot before doing so in case things go wrong.
- So let’s do so with AWX by creating a workflow!
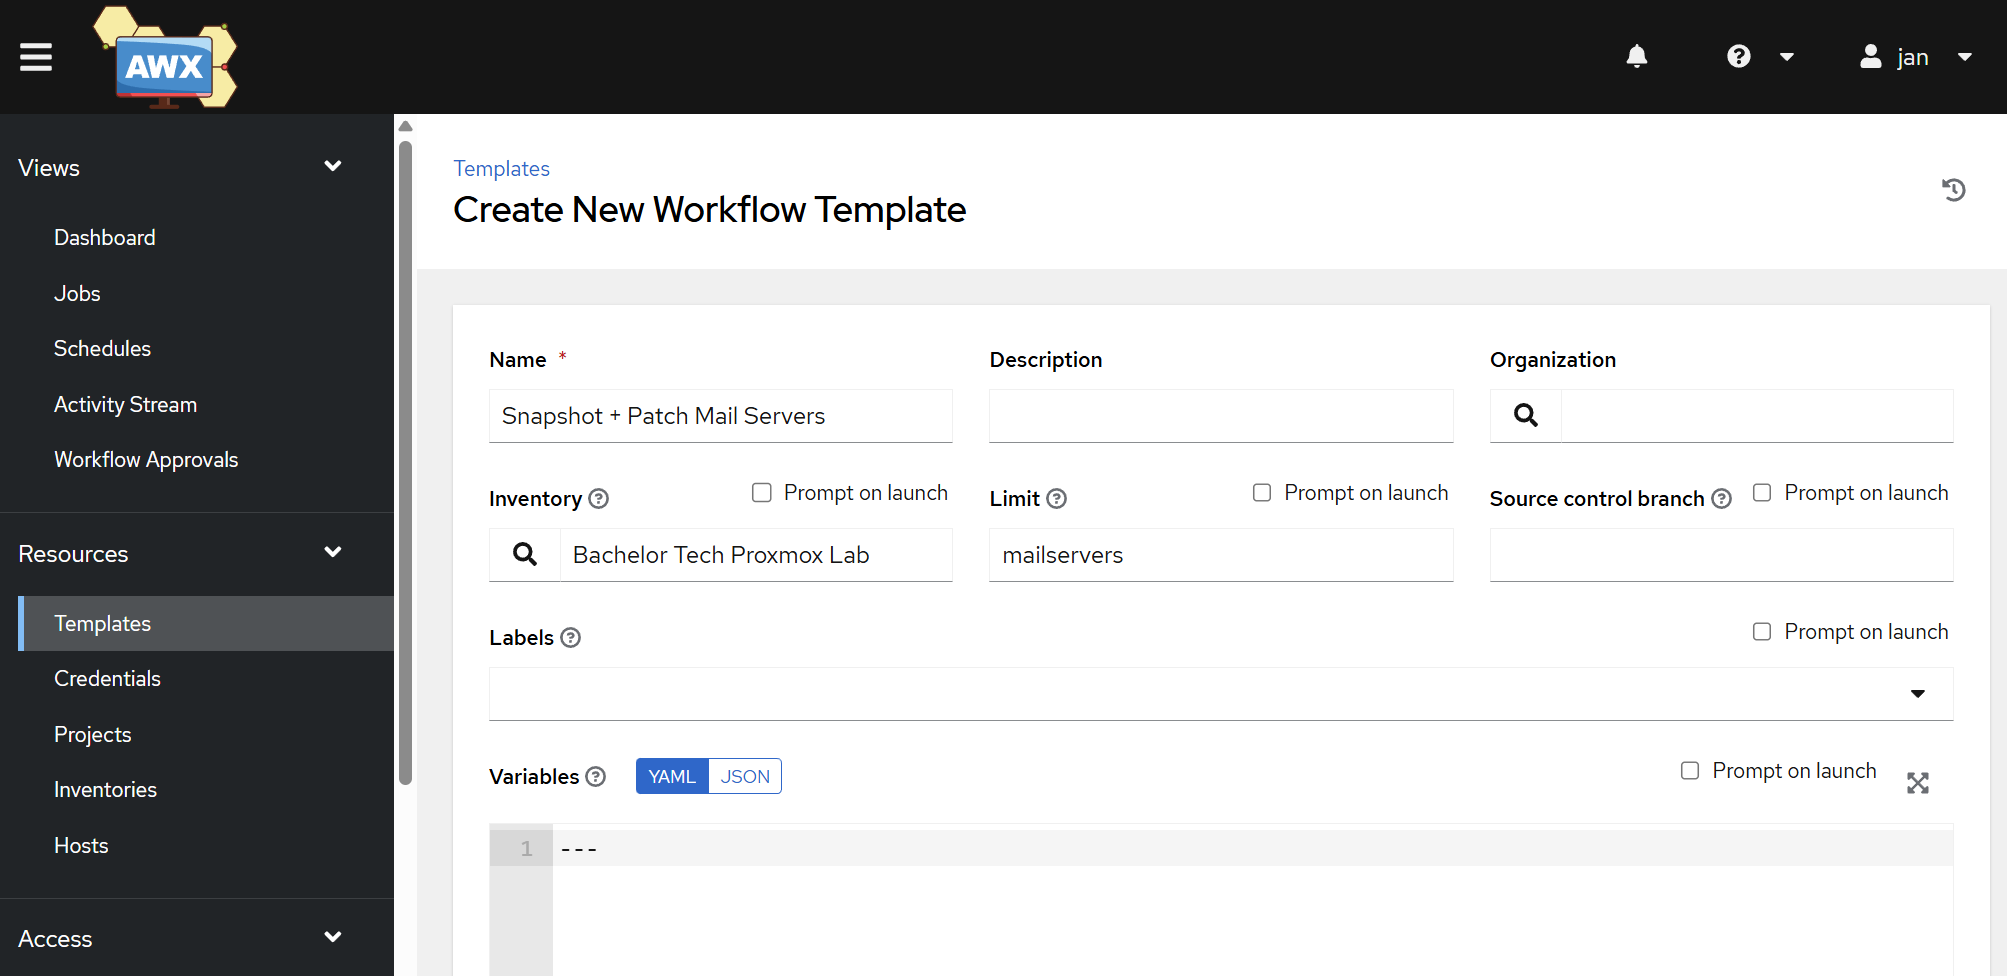
- Go to Resources → Templates → click on the Add button and select ‘Add workflow template’ from the dropdown.
- Name: Indicate clearly that this is a combination of a snapshot + patching for a specific group of hosts, such as
Snapshot + Patch Mail Servers. - Inventory: Choose your existing inventory.
- Limit: Specify the group of hosts you want to limit this workflow to.
- You can leave the other fields empty and click on the Save button.
- Name: Indicate clearly that this is a combination of a snapshot + patching for a specific group of hosts, such as
- You will be taken to the Workflow Visualizer. Click on the Start button.
- Firstly select your snapshotting job and click on the Save button.
- Then point and click on the + sign and select ‘On Success’, then click on the Next button and finally choose the desired patch management job. Confirm your selection by clicking on the Save button again.
- At the end, it should look like this:

Note: With the limit being applied at the workflow level, your patching job does not need to have the ‘Limit’ field filled in, as it will be passed on two each job template from the workflow.
- The condition for that to work is that in your patching job, you tick the box next to it called ‘Prompt on launch’. This is important, as otherwise Limit set in the workflow template will not be applied!