Deploy Termix for web-based SSH access
June 28, 2025
Table of Contents
- 1. Why Yes or No to Termix?
- 2. Deploy a Docker Container on Your Existing Web Server VM
- 3. Nginx Config
- 4. OPNSense - ACME Certificate
- 5. OPNSense - Virtual IP + DNS Override Setup
- 6. OPNSense - HAProxy Setup
- 7. Reach the UI + Basic Setup of Termix
- 8. Monitor the Termix Docker Container with UptimeKuma
- 9. Security Hardening Considerations for Termix
- GitHub source: https://github.com/Termix-SSH/Termix/tree/main
- Licensing: Distributed under the Apache License Version 2.0.
- Website: https://docs.termix.site/
- API documentation: https://docs.termix.site/api-reference
1. Why Yes or No to Termix?
Advantages
- Frequent updates
- Essential security - passwords are stored in the DB as hashes using
bcrypt, 2FA (TOTP), basic RBAC, OIDC (Google, Okta, Authentik), and rate limiting built in. DB file is encrypted with AES-256-GCM. - Info gathered about each host - CPU, memory, disk usage, network stats, uptime and system information
- As of version 1.10.0 (released Jan 1, 2026), Termix also supports Docker container management - start/stop/remove containers, view stats, control using docker exec terminal.
- SSH health checks with automatic reconnection
Disadvantages
- Only supports a SQL database and thus is not suitable for an HA setup
- One-man show (Luke Gustafson from the US) - only one developer is working on it, so while updates are frequent for now, that could slow down or stop if the maintainer moves on.
- During login/registration, the user's password is sent in the body of an HTTP request - TLS needs to be enabled / set up.
2. Deploy a Docker Container on Your Existing Web Server VM
- To set up Docker on a VM, follow the steps in my previous post on how to set up Vaultwarden.
- We will install the docker container in this path:
sudo mkdir /opt/termix
sudo nano /opt/termix/docker-compose.yml- The config is set up to work with nginx proxy:
services:
  termix:
    image: ghcr.io/lukegus/termix:latest
    container_name: termix
    restart: unless-stopped
    ports:
      - "127.0.0.1:8100:8080" # Map to host localhost only
    environment:
      - PORT=8080
    volumes:
- ./termix-data:/app/data-
Then run:
cd /opt/termix && sudo docker compose up -d -
Once the docker container is up, you can verify that it is running:
sudo docker container ps -a3. Nginx Config
- Create a config file:
sudo nano /etc/nginx/conf.d/termix.conf- Customize it to listen on a different port than other services:
server {
    listen 8082; # Different port from other services
    server_name termix.bachelor-tech.com;

    # Import Trusted Proxies (Reuse your existing snippet!)
    include /etc/nginx/snippets/trusted-proxies.conf;

    # Import Blocklist (Optional, but good practice)
    include /etc/nginx/blocklist.conf;

    location / {
        proxy_pass http://127.0.0.1:8100;

        # Standard Proxy Headers
        proxy_set_header Host $host;
        proxy_set_header X-Real-IP $remote_addr;
        proxy_set_header X-Forwarded-For $proxy_add_x_forwarded_for;
        proxy_set_header X-Forwarded-Proto $scheme;

        # CRITICAL: WebSocket Support for SSH Terminal
        proxy_http_version 1.1;
        proxy_set_header Upgrade $http_upgrade;
        proxy_set_header Connection "upgrade";
    }
}- Verify the config and reload:
sudo nginx -t
sudo systemctl reload nginx
4. OPNSense - ACME Certificate
The crucial piece of the puzzle here is that we do not want this website to be publicly reachable, yet we do want to equip it with an SSL certificate and accessible internally via HTTPS.
- In OPNSense, go to Services → ACME Client → Certificates. Add your subdomain it to your existing domain, such as termix.bachelor-tech.com .
- If you have never done this part before and need to set up the rest of the ACME client, please follow my previous tutorial on setting up the ACME client in OPNSense.
5. OPNSense - Virtual IP + DNS Override Setup
- If you are running OPNSense in CARP (master / backups configuration), you will need to define a new virtual IP under Interfaces → Virtual IPs. Check out my previous guide on setting up CARP and Virtual IPs in OPNSense.
- Create a DNS override in OPNSense that points to a virtual IP interface that HAProxy listens to. If you use Unbound, go to Services → Unbound DNS → Overrides. Point the override to that virtual IP address, not to the web server.

6. OPNSense - HAProxy Setup
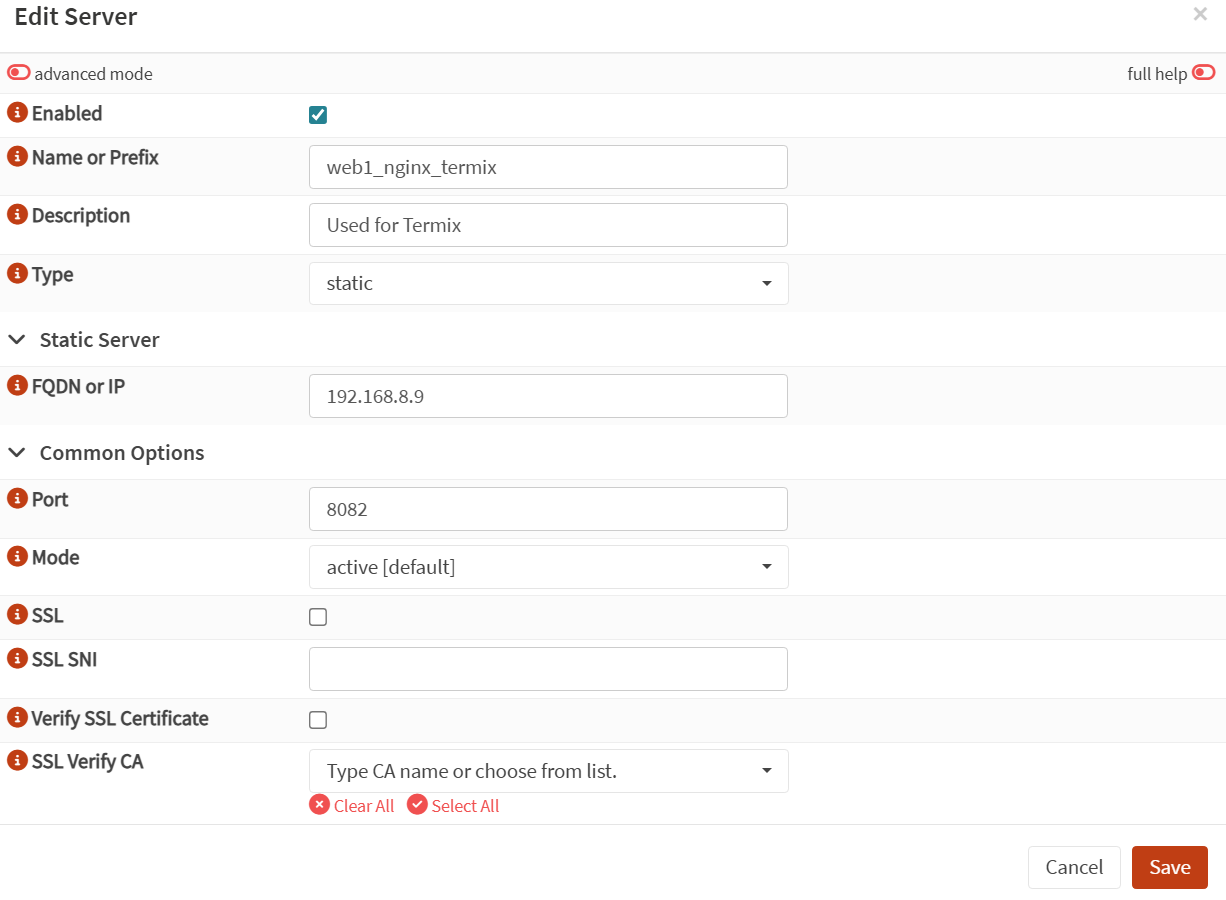
Set up a new 'Real Server'
- On OPNSense, go to Services → HAProxy → then switch to the other menu and go to Real Servers → Real Servers. Add the server even though it may already be there but on another port.
Add a new Back-end
- In the top menu while within HAProxy, go to Virtual Services → Backend Pools. Add a new one.
- Since there is only one server, we can skip the health check.
- Tick the box for 'X-Forwarded-For header', which is important for nginx when forwarding traffic to the container.

Create a Condition + Rule
- Go to Rules & Checks → Conditions and add a new condition.
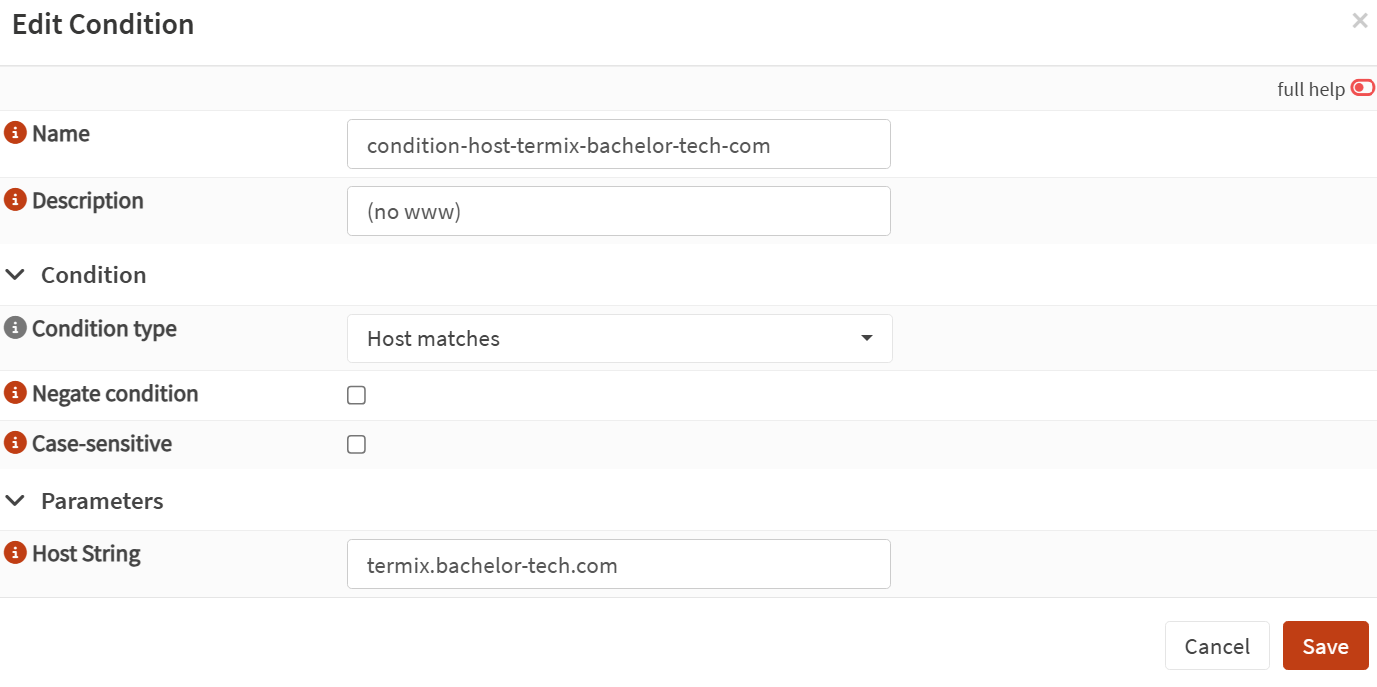
- Then go to the Rules section and add a new rule.

Update the Front-end Service
- Go to Virtual Services → Public Services and either modify your existing set up or create a new one that listens on the virtual IP and the HTTPS port.

(Some parts are skipped, as they are left at default settings.)

- Test the syntax and then apply it.
7. Reach the UI + Basic Setup of Termix
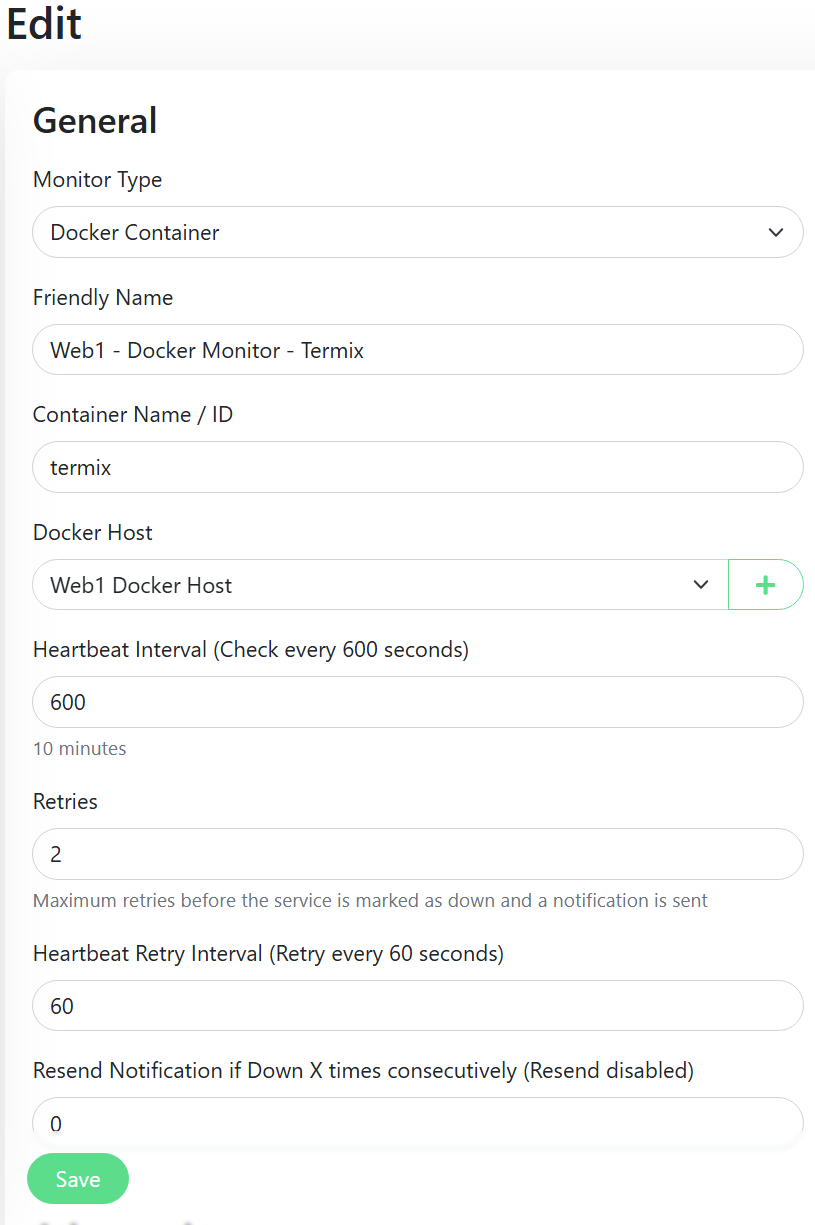
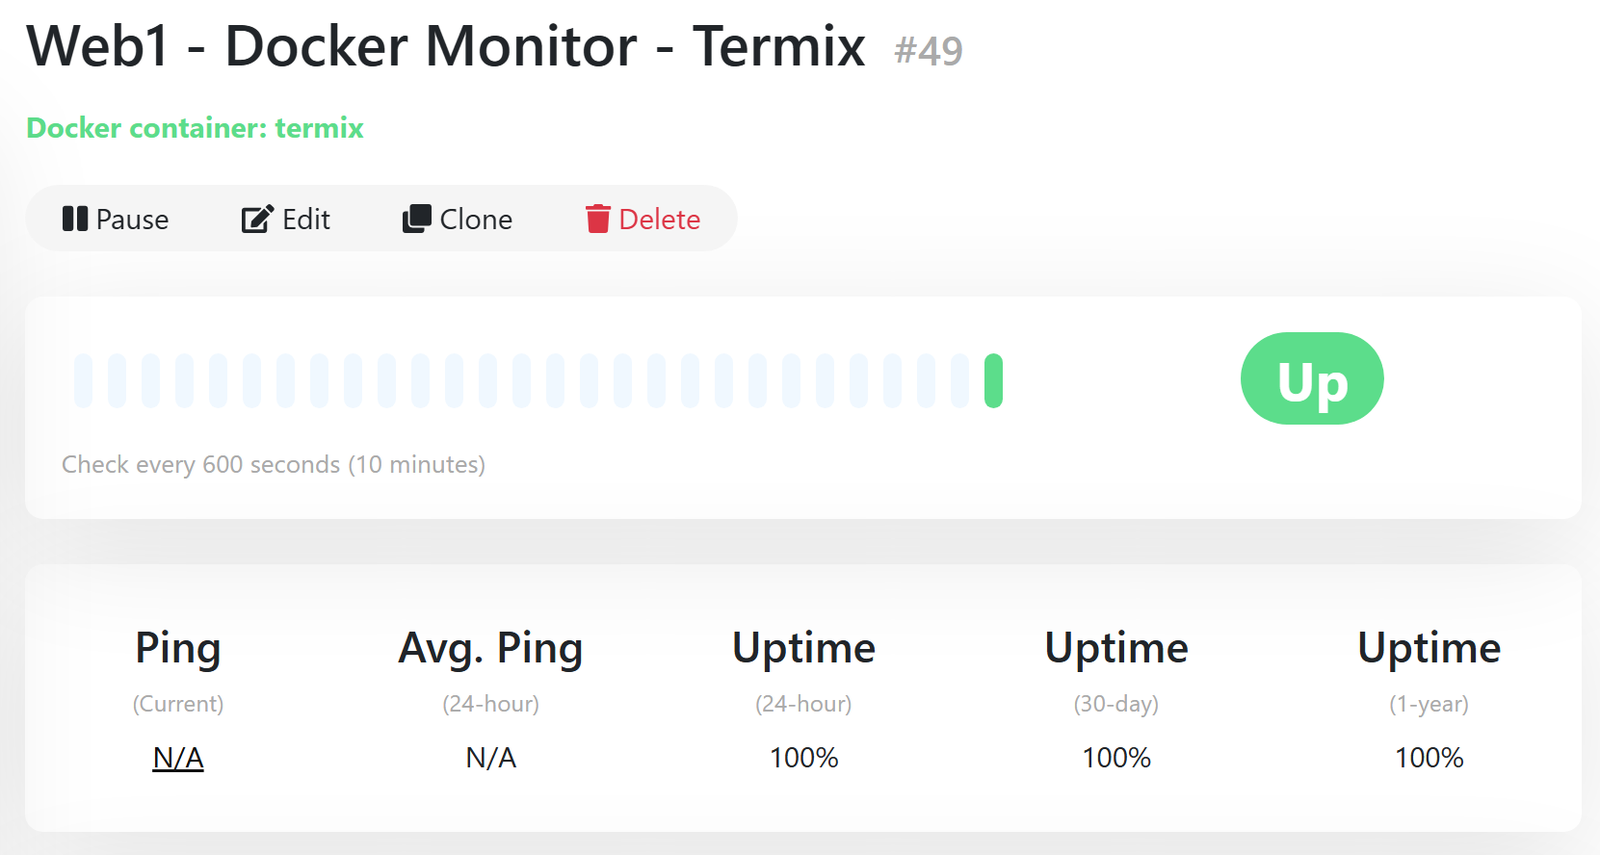
8. Monitor the Termix Docker Container with UptimeKuma
9. Security Hardening Considerations for Termix
- If you seem to have got blocked by fail2ban, check the jail:
sudo fail2ban-client status sshd- Whitelist your LAN + the docker container range
sudo nano /etc/fail2ban/jail.local

# "ignoreself" specifies whether the local resp. own IP addresses should be ignored
# (default is true). Fail2ban will not ban a host which matches such addresses.
ignoreself = true

# "ignoreip" can be a list of IP addresses, CIDR masks or DNS hosts. Fail2ban
# will not ban a host which matches an address in this list. Several addresses
# can be defined using space (and/or comma) separator.
ignoreip = 127.0.0.1/8 ::1 192.168.0.0/16 172.20.0.0/16- Restart the services and unban if needed:
sudo systemctl restart fail2ban

sudo fail2ban-client set sshd unbanip 172.20.0.2Enjoying this tutorial?
This site is a non-profit project. If it saved you some time, you can support it by getting Jan some coffee.
☕ Buy me a coffee
Comments